CHETTINAD EGG CURRY | CHETTINAD MUTTAI MASALA RECIPE

Chettinad Cuisines are one of the noteworthy fare in Tamil Nadu. The Chettinad region comprising Karaikudi and adjoining areas is known for both traditional vegetarian as well as non-vegetarian dishes.

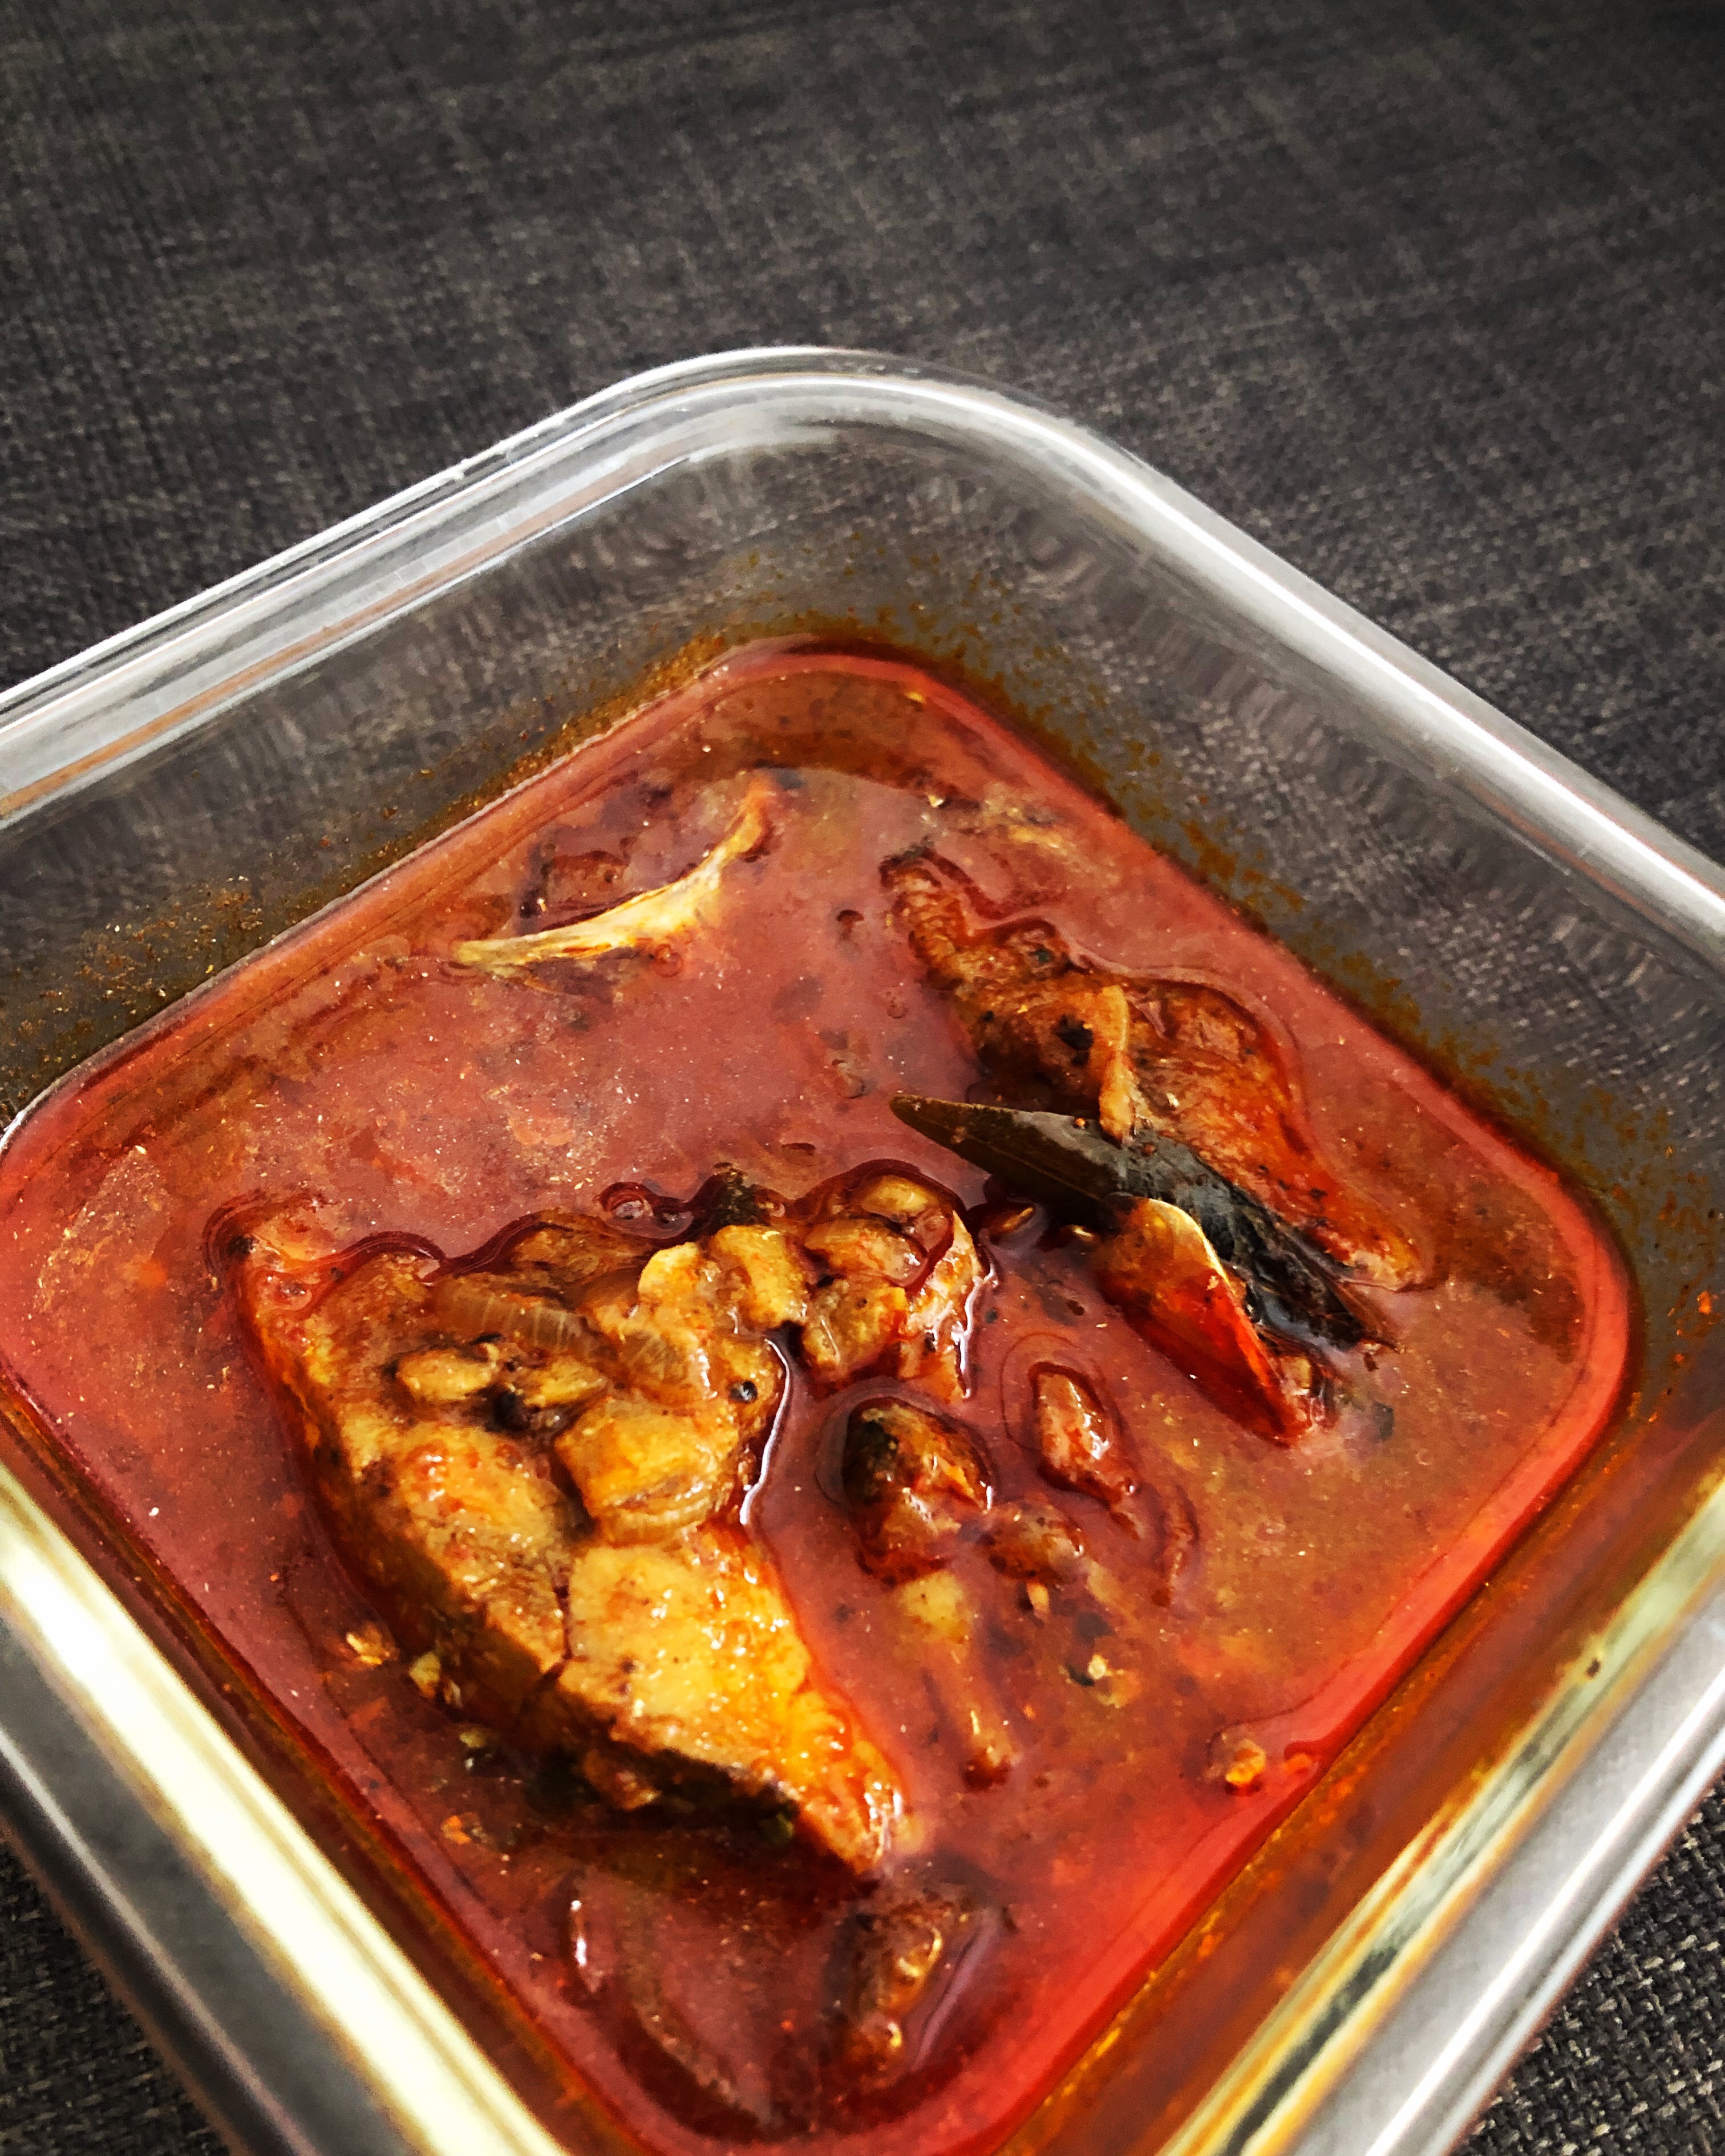
Chettinad curries are distinctly aromatic, spicy and fiery. It has a lot of flavours going on, so finding the perfect blend of spices is the key. The base that adds volume to most of the signature curries is made up of freshly roasted & ground spices, red chillies, ginger, garlic, tamarind and coconut.

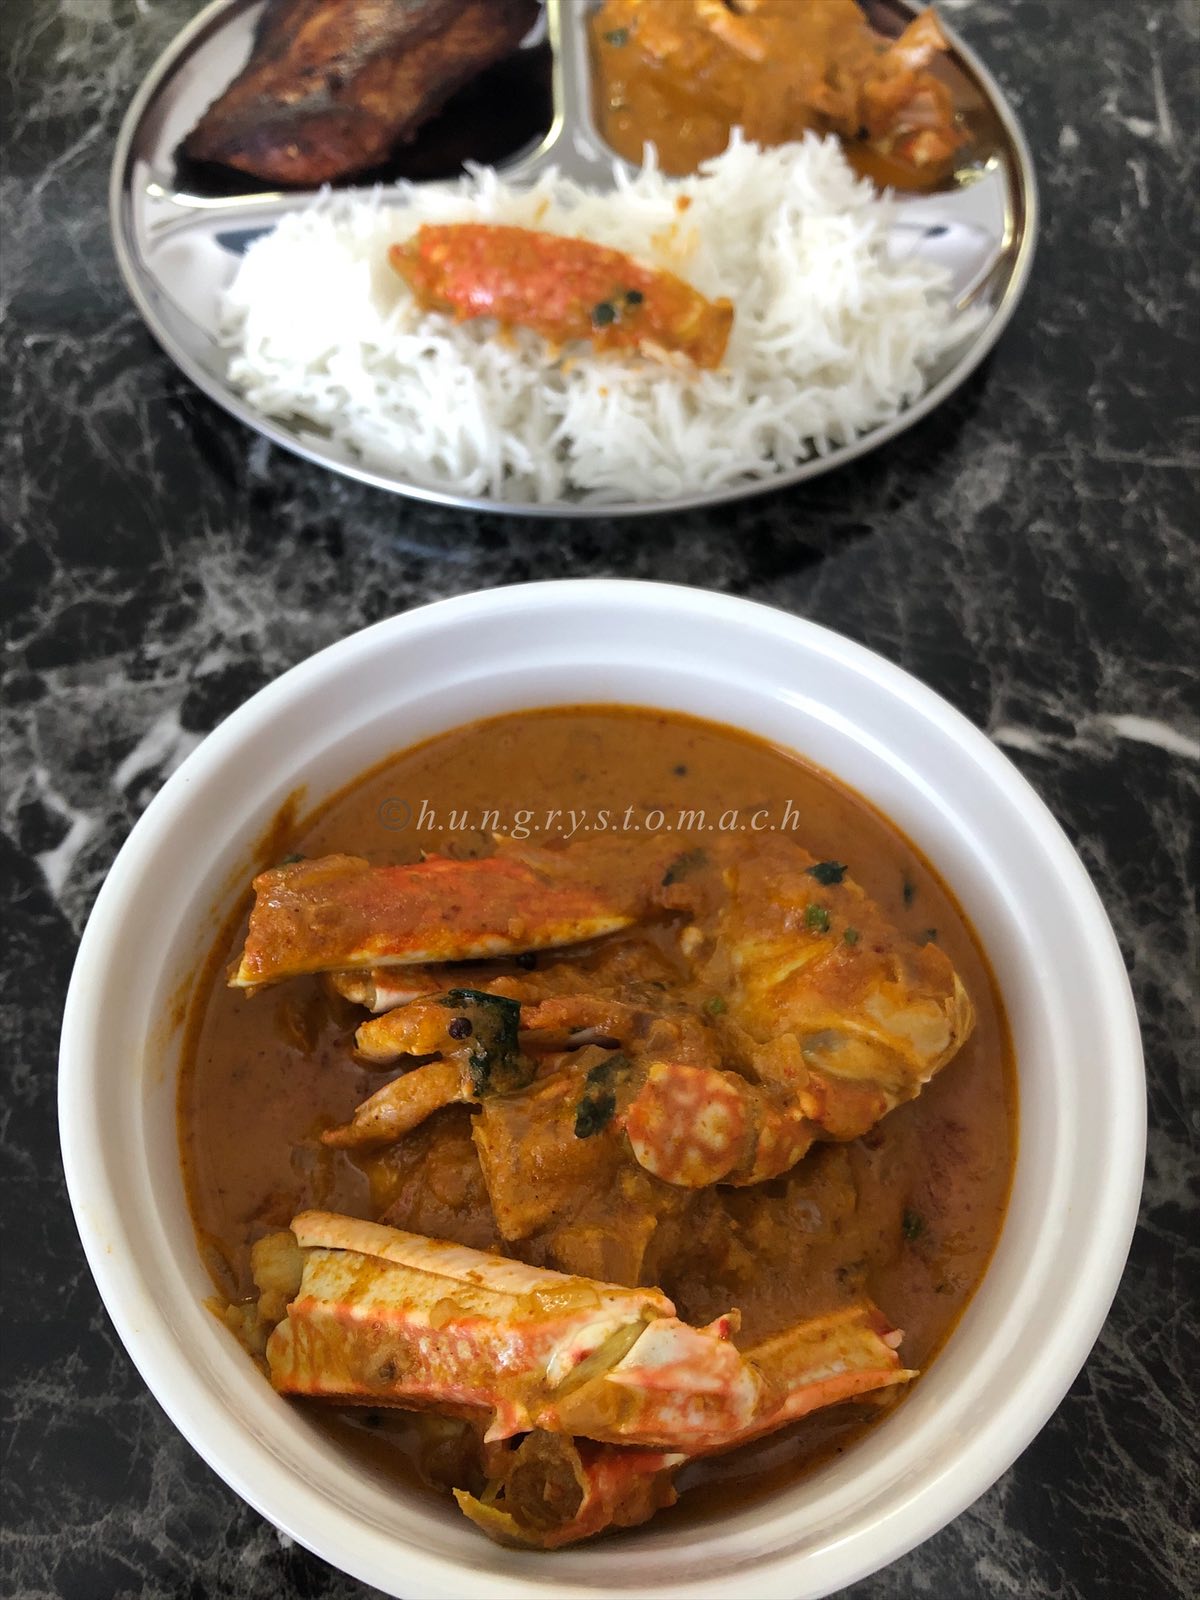
Chettinad chicken is one of the most famous among dish them. This curry is not for the faint-hearted, but it is definitely a celebration of spices that we have to balance well! Today i’m sharing the egg version from this cuisine!
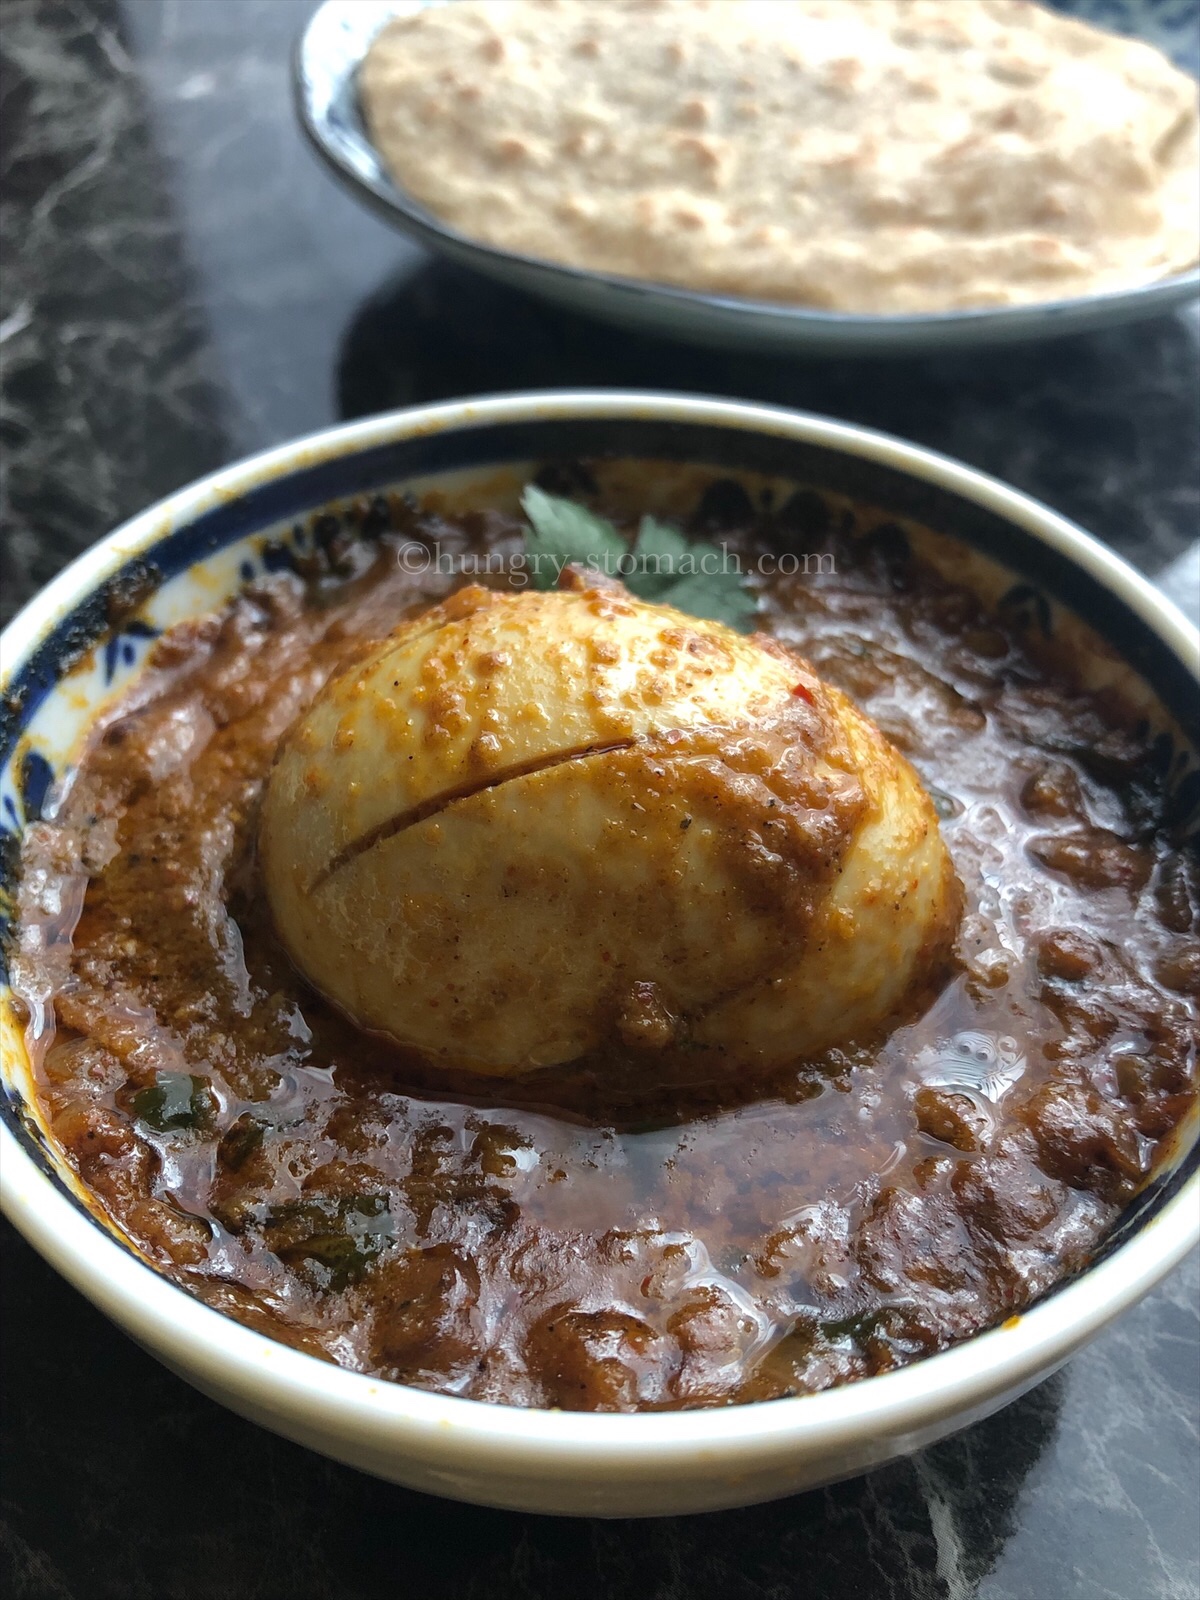
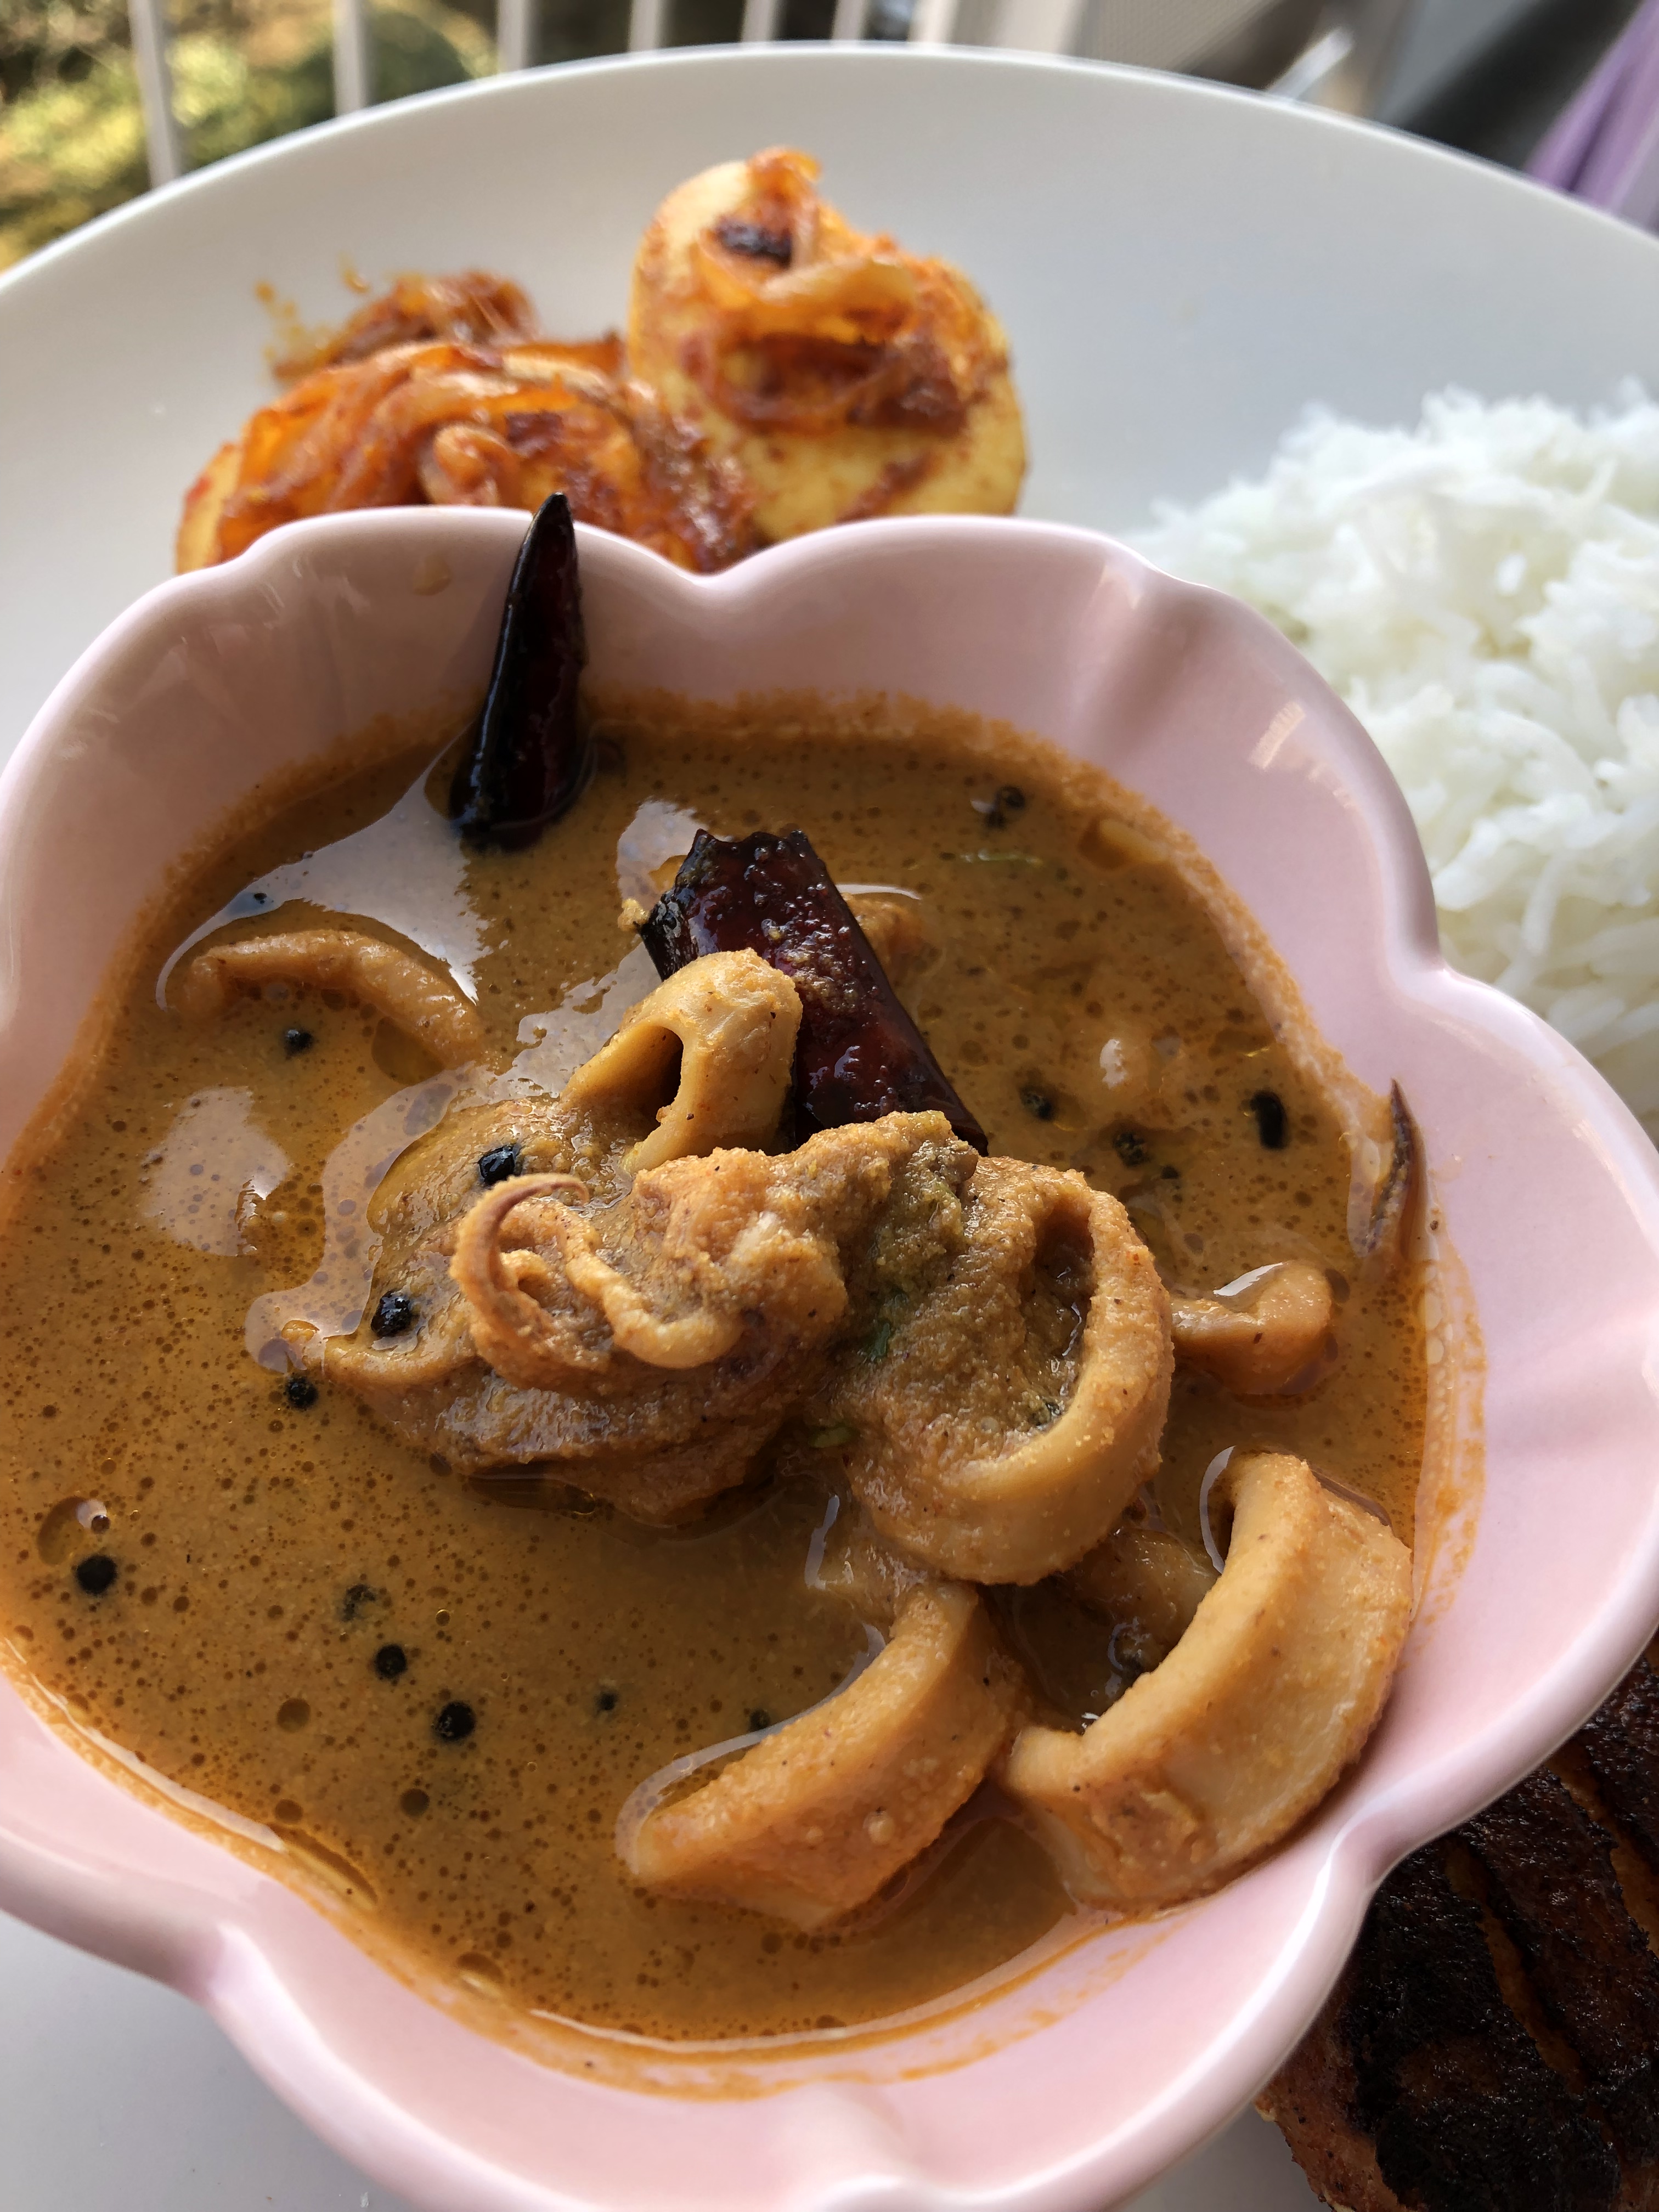
Chettinad Egg Curry

Chettinad Egg curry, is one of the finest and most authentic egg curry recipe that I have made. This spicy curry too is laced with red chillies and coconut.

If you like less spicier curries, use dried Kashmiri red chilies and remove seeds from them. You will get the colour and flavour without the heat of chilies in the curry.
It’s easy to make and tastes simply delicious! This curry goes well with Roti, Rice, Dosa. Do you love spicy curry? Then this is for you.

Ingredients

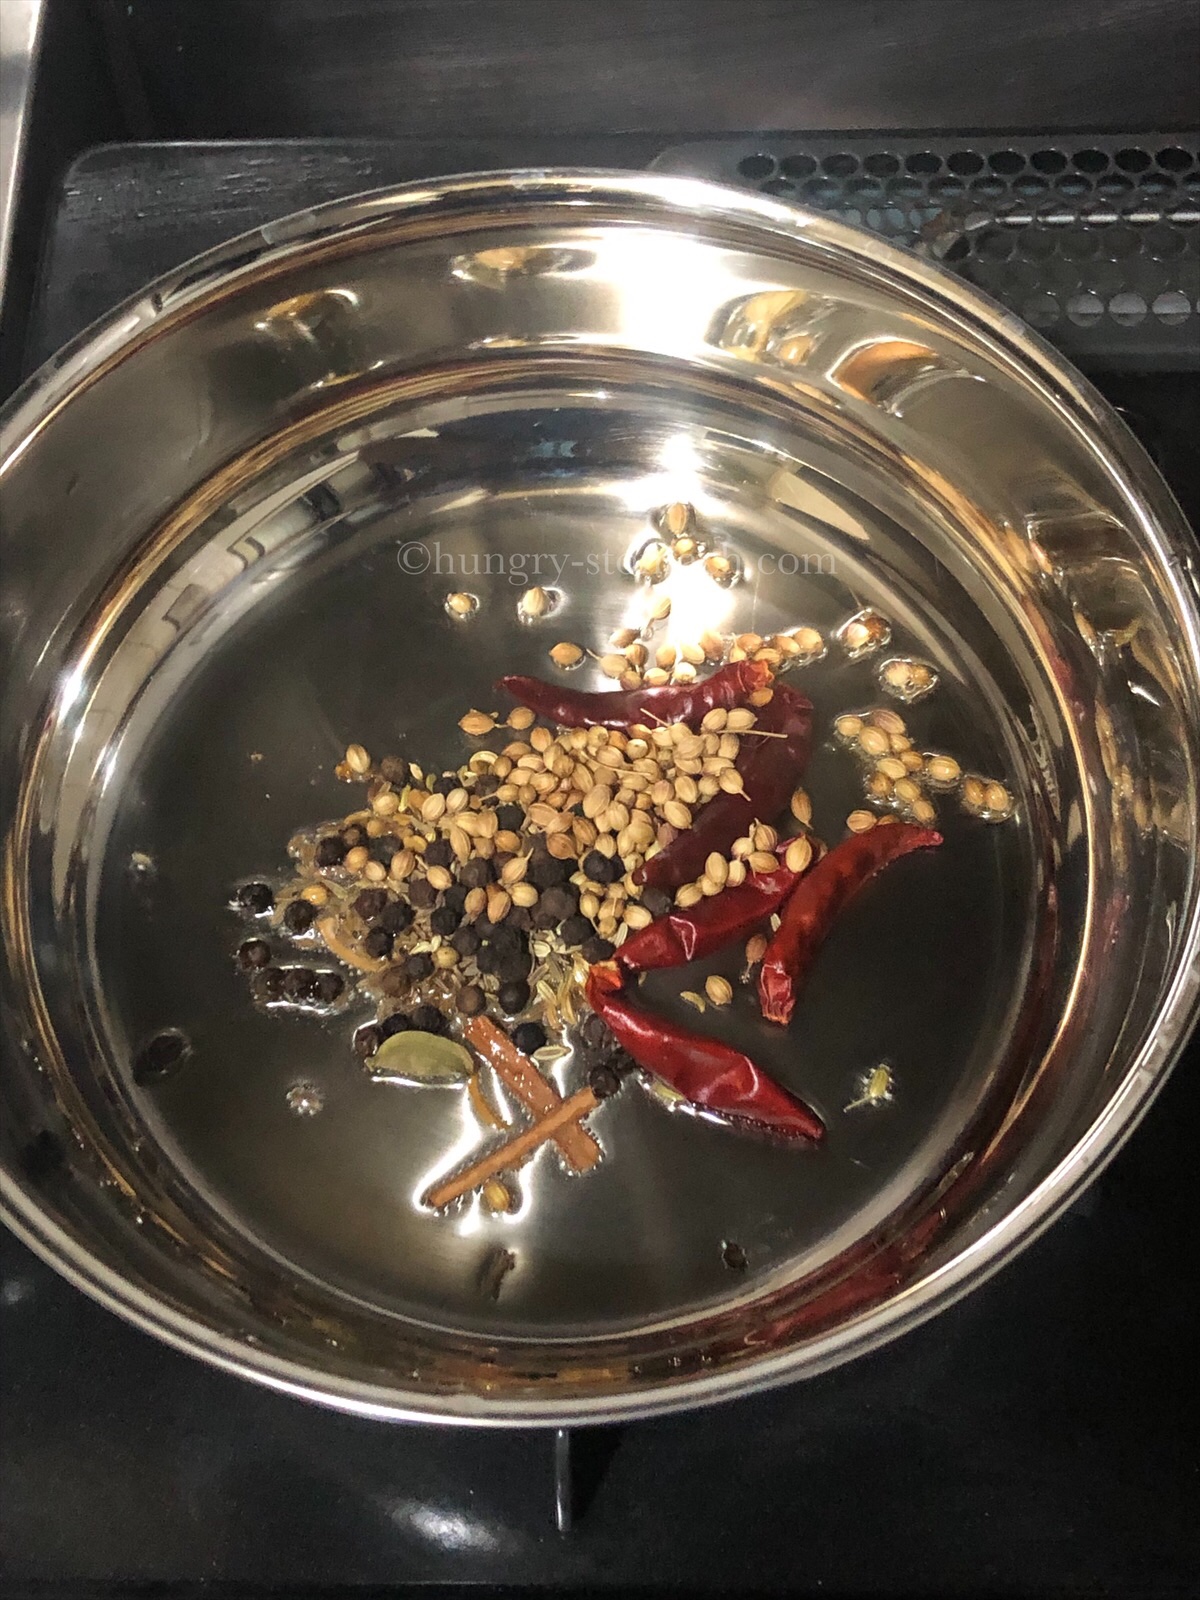
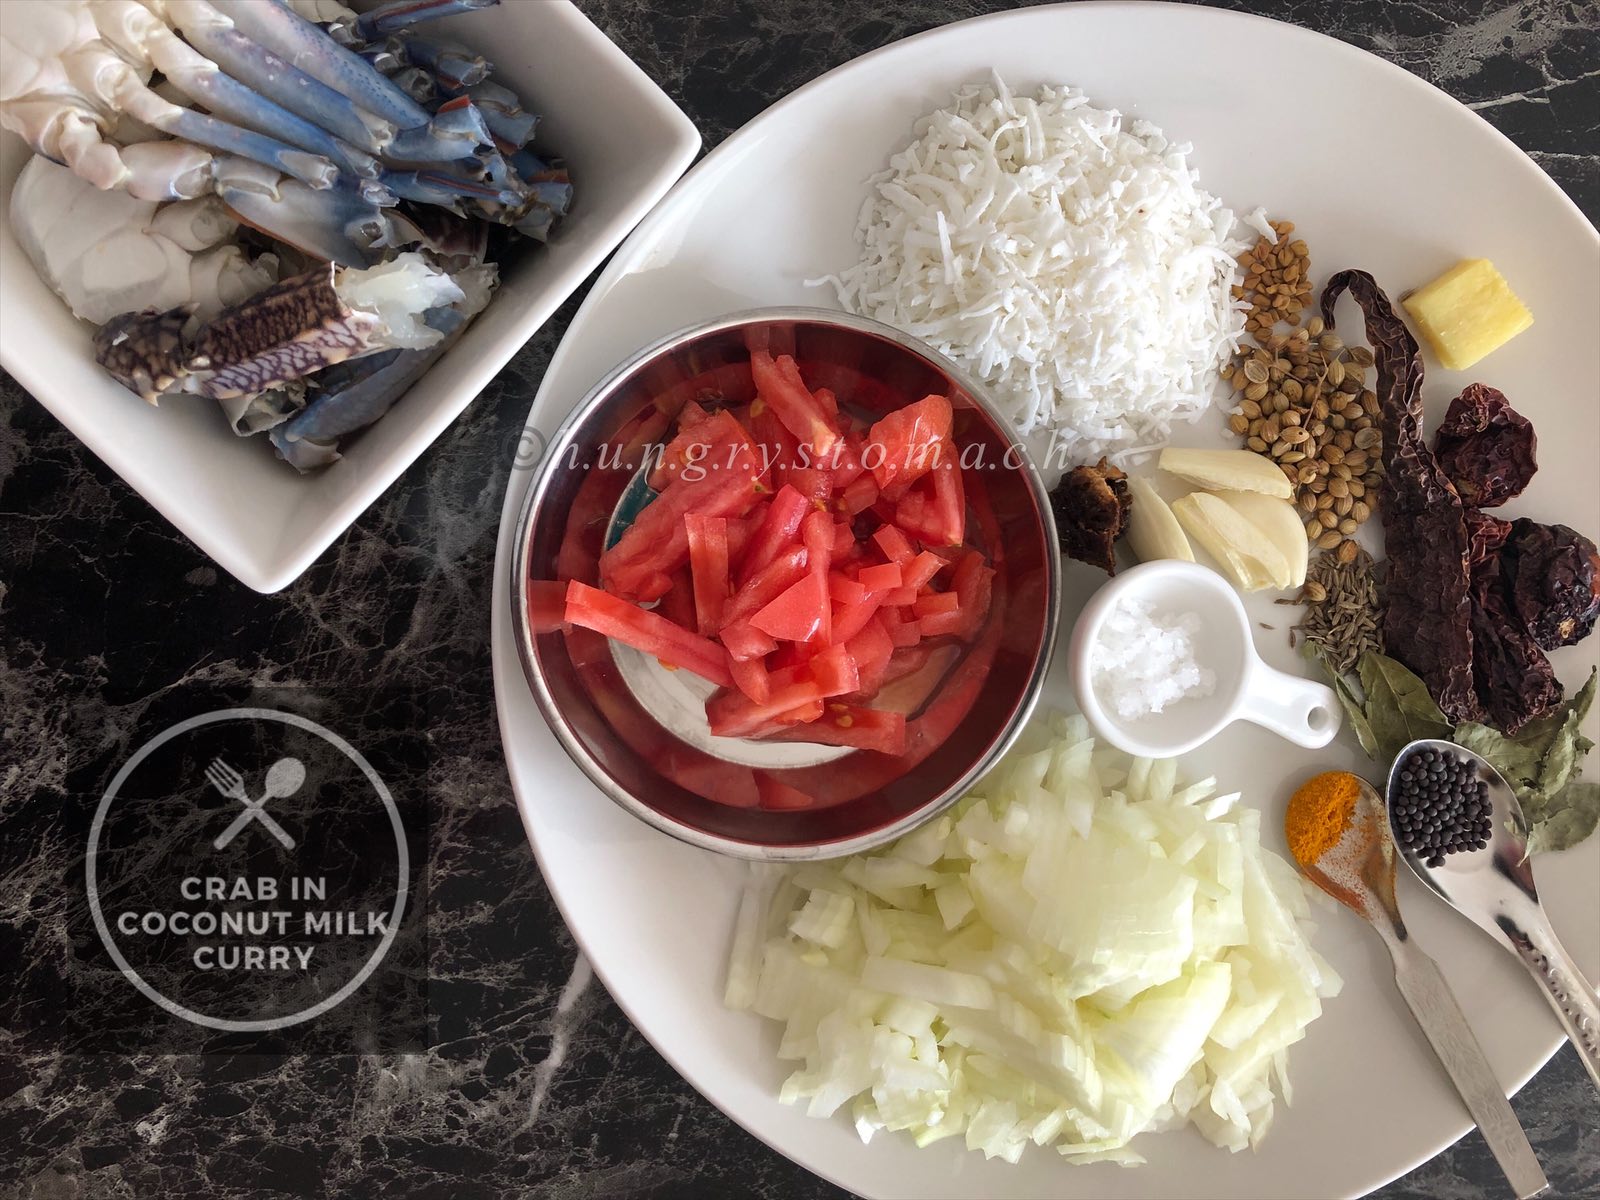
For Chettinad Spice Mix
    5 to 6 dry red chilies
    1 mace
    An inch stick cinnamon
    2 cloves
    1 cardamom pod
    1 tsp Black Pepper
    2 tsp coriander seeds
    1/2 tsp Fennel seeds
    1/2 tsp Cumin seeds
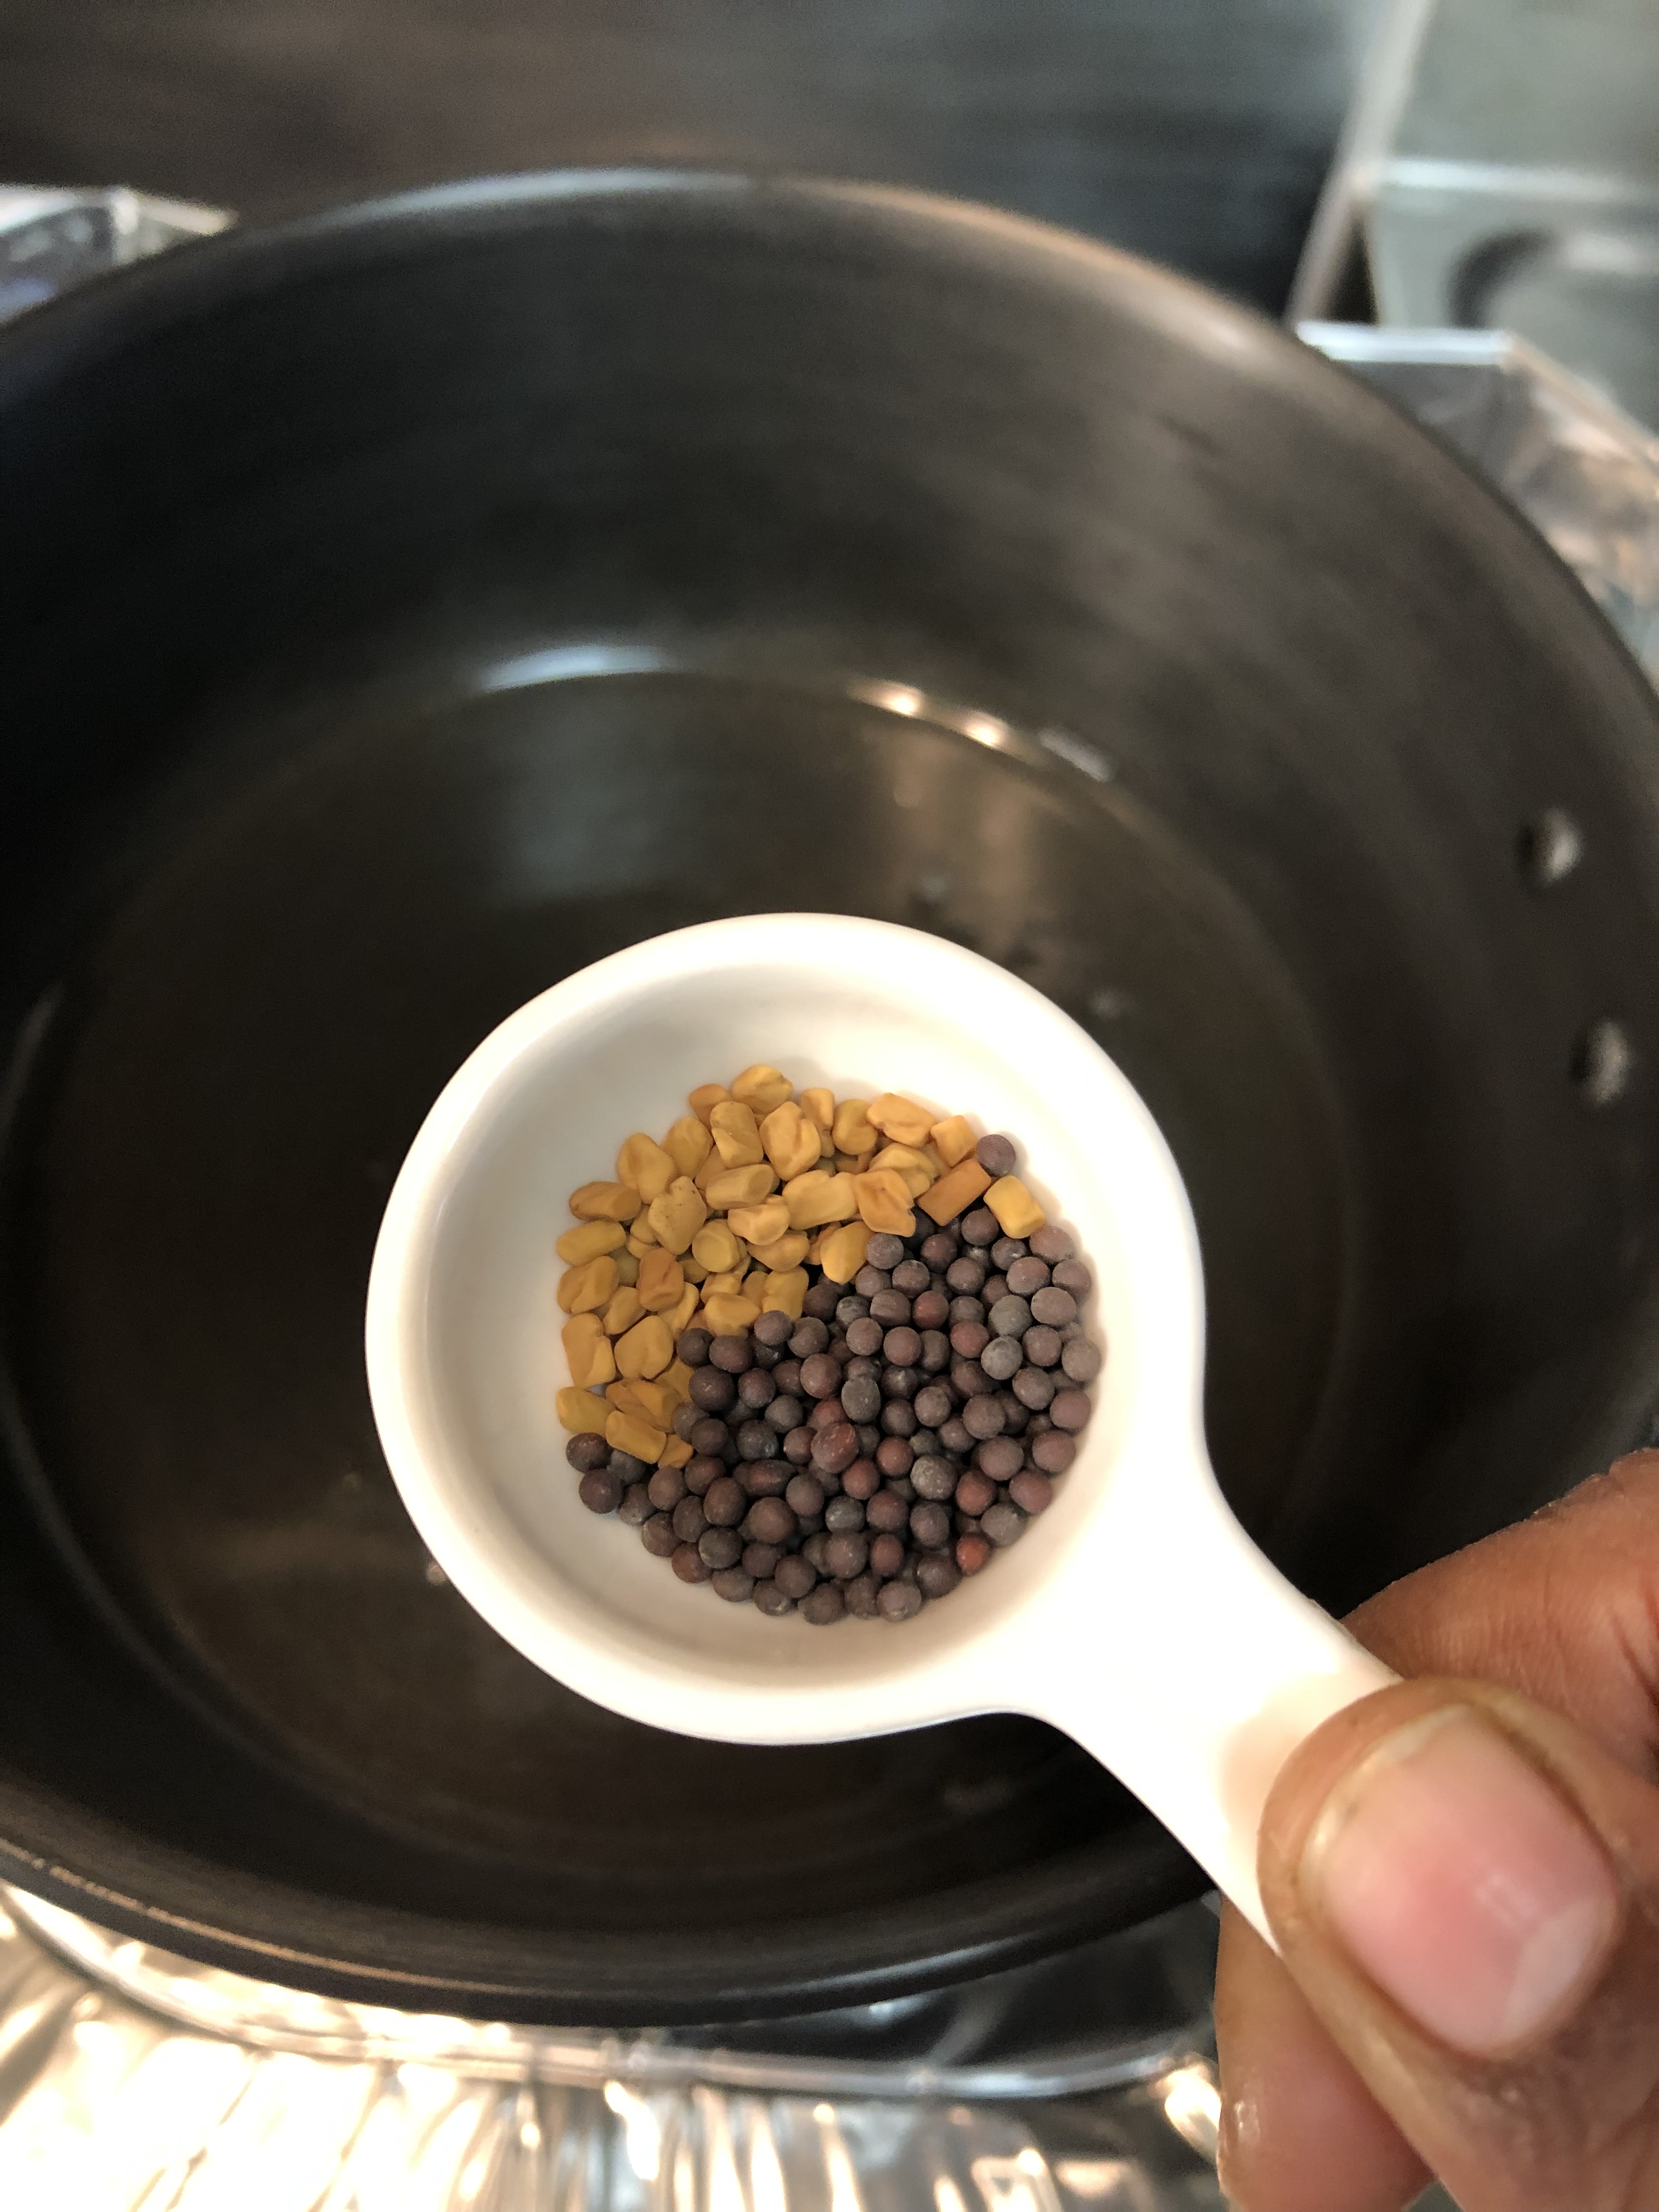
    1/8 tsp Fenugreek Seeds
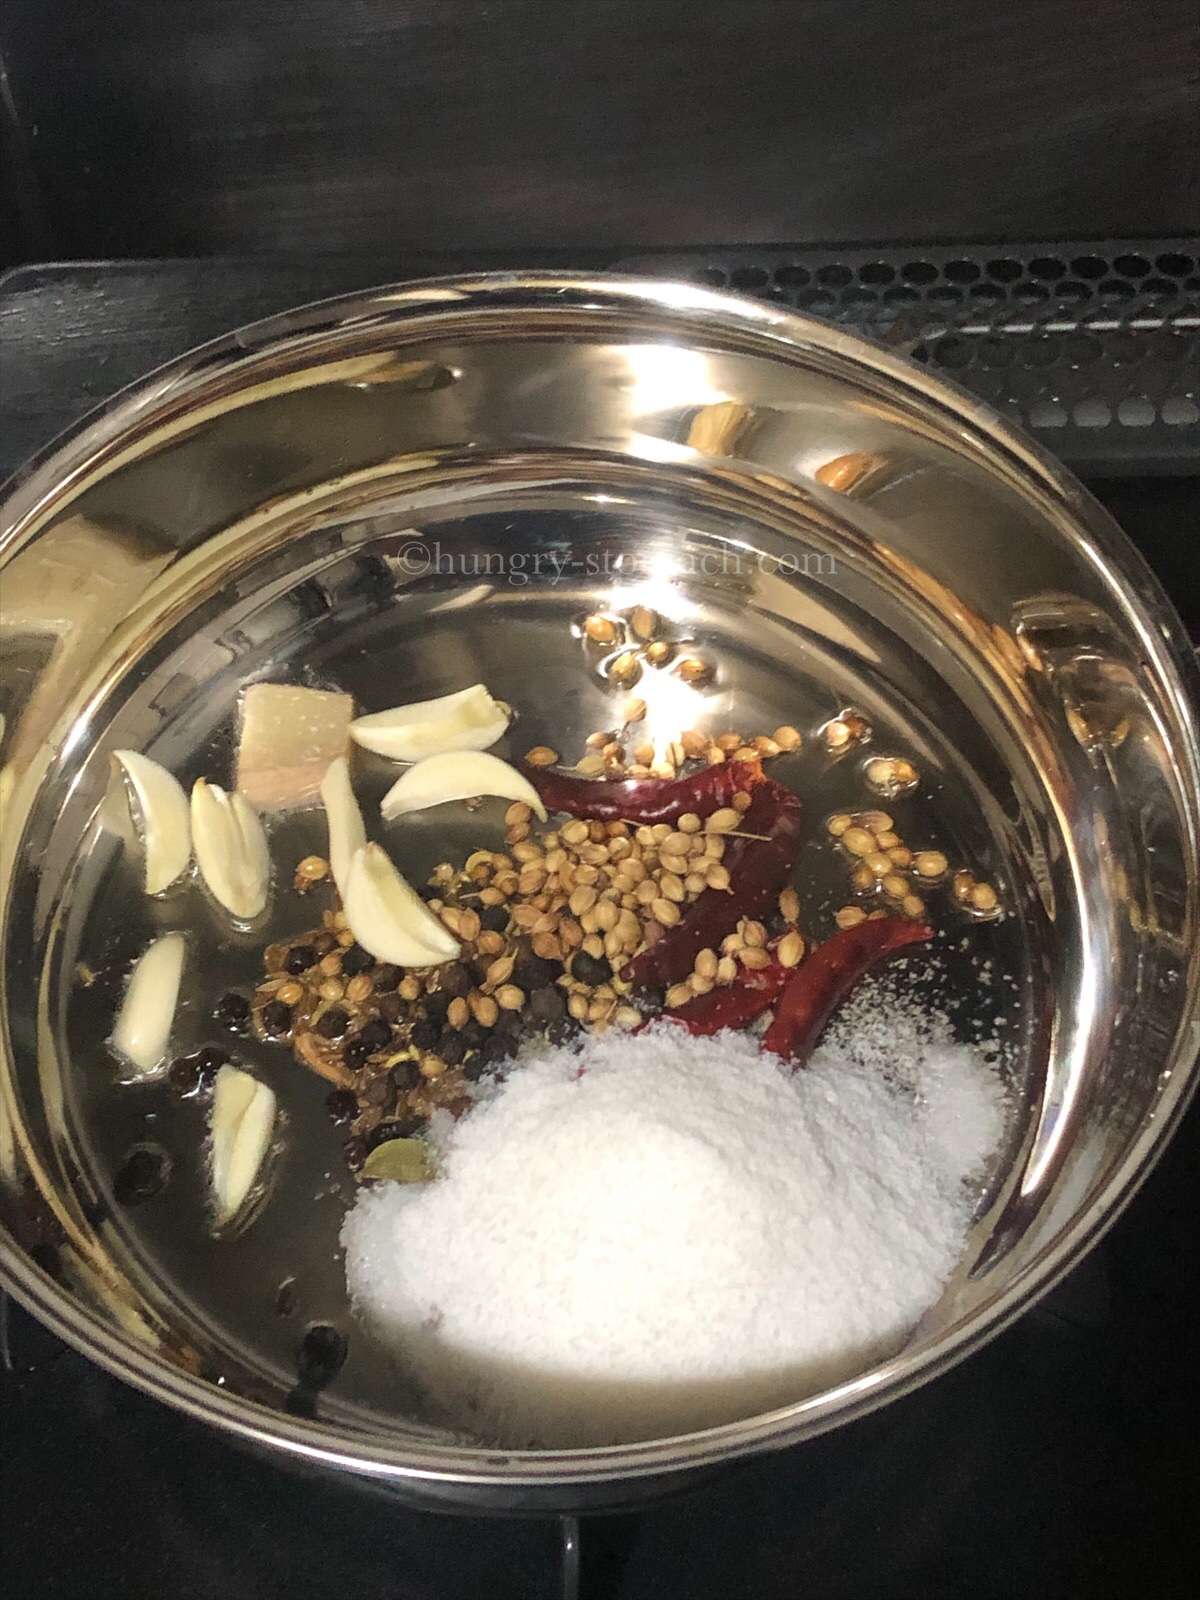
    3 Garlic, cloves
    An inch Ginger
    1/2 cup Coconut
    1 tsp Oil
For Gravy
  • 3 to 4 Eggs, hard boiled
  • 1 Onion, Medium, finely chopped
  • 1 Tomato, small, chopped
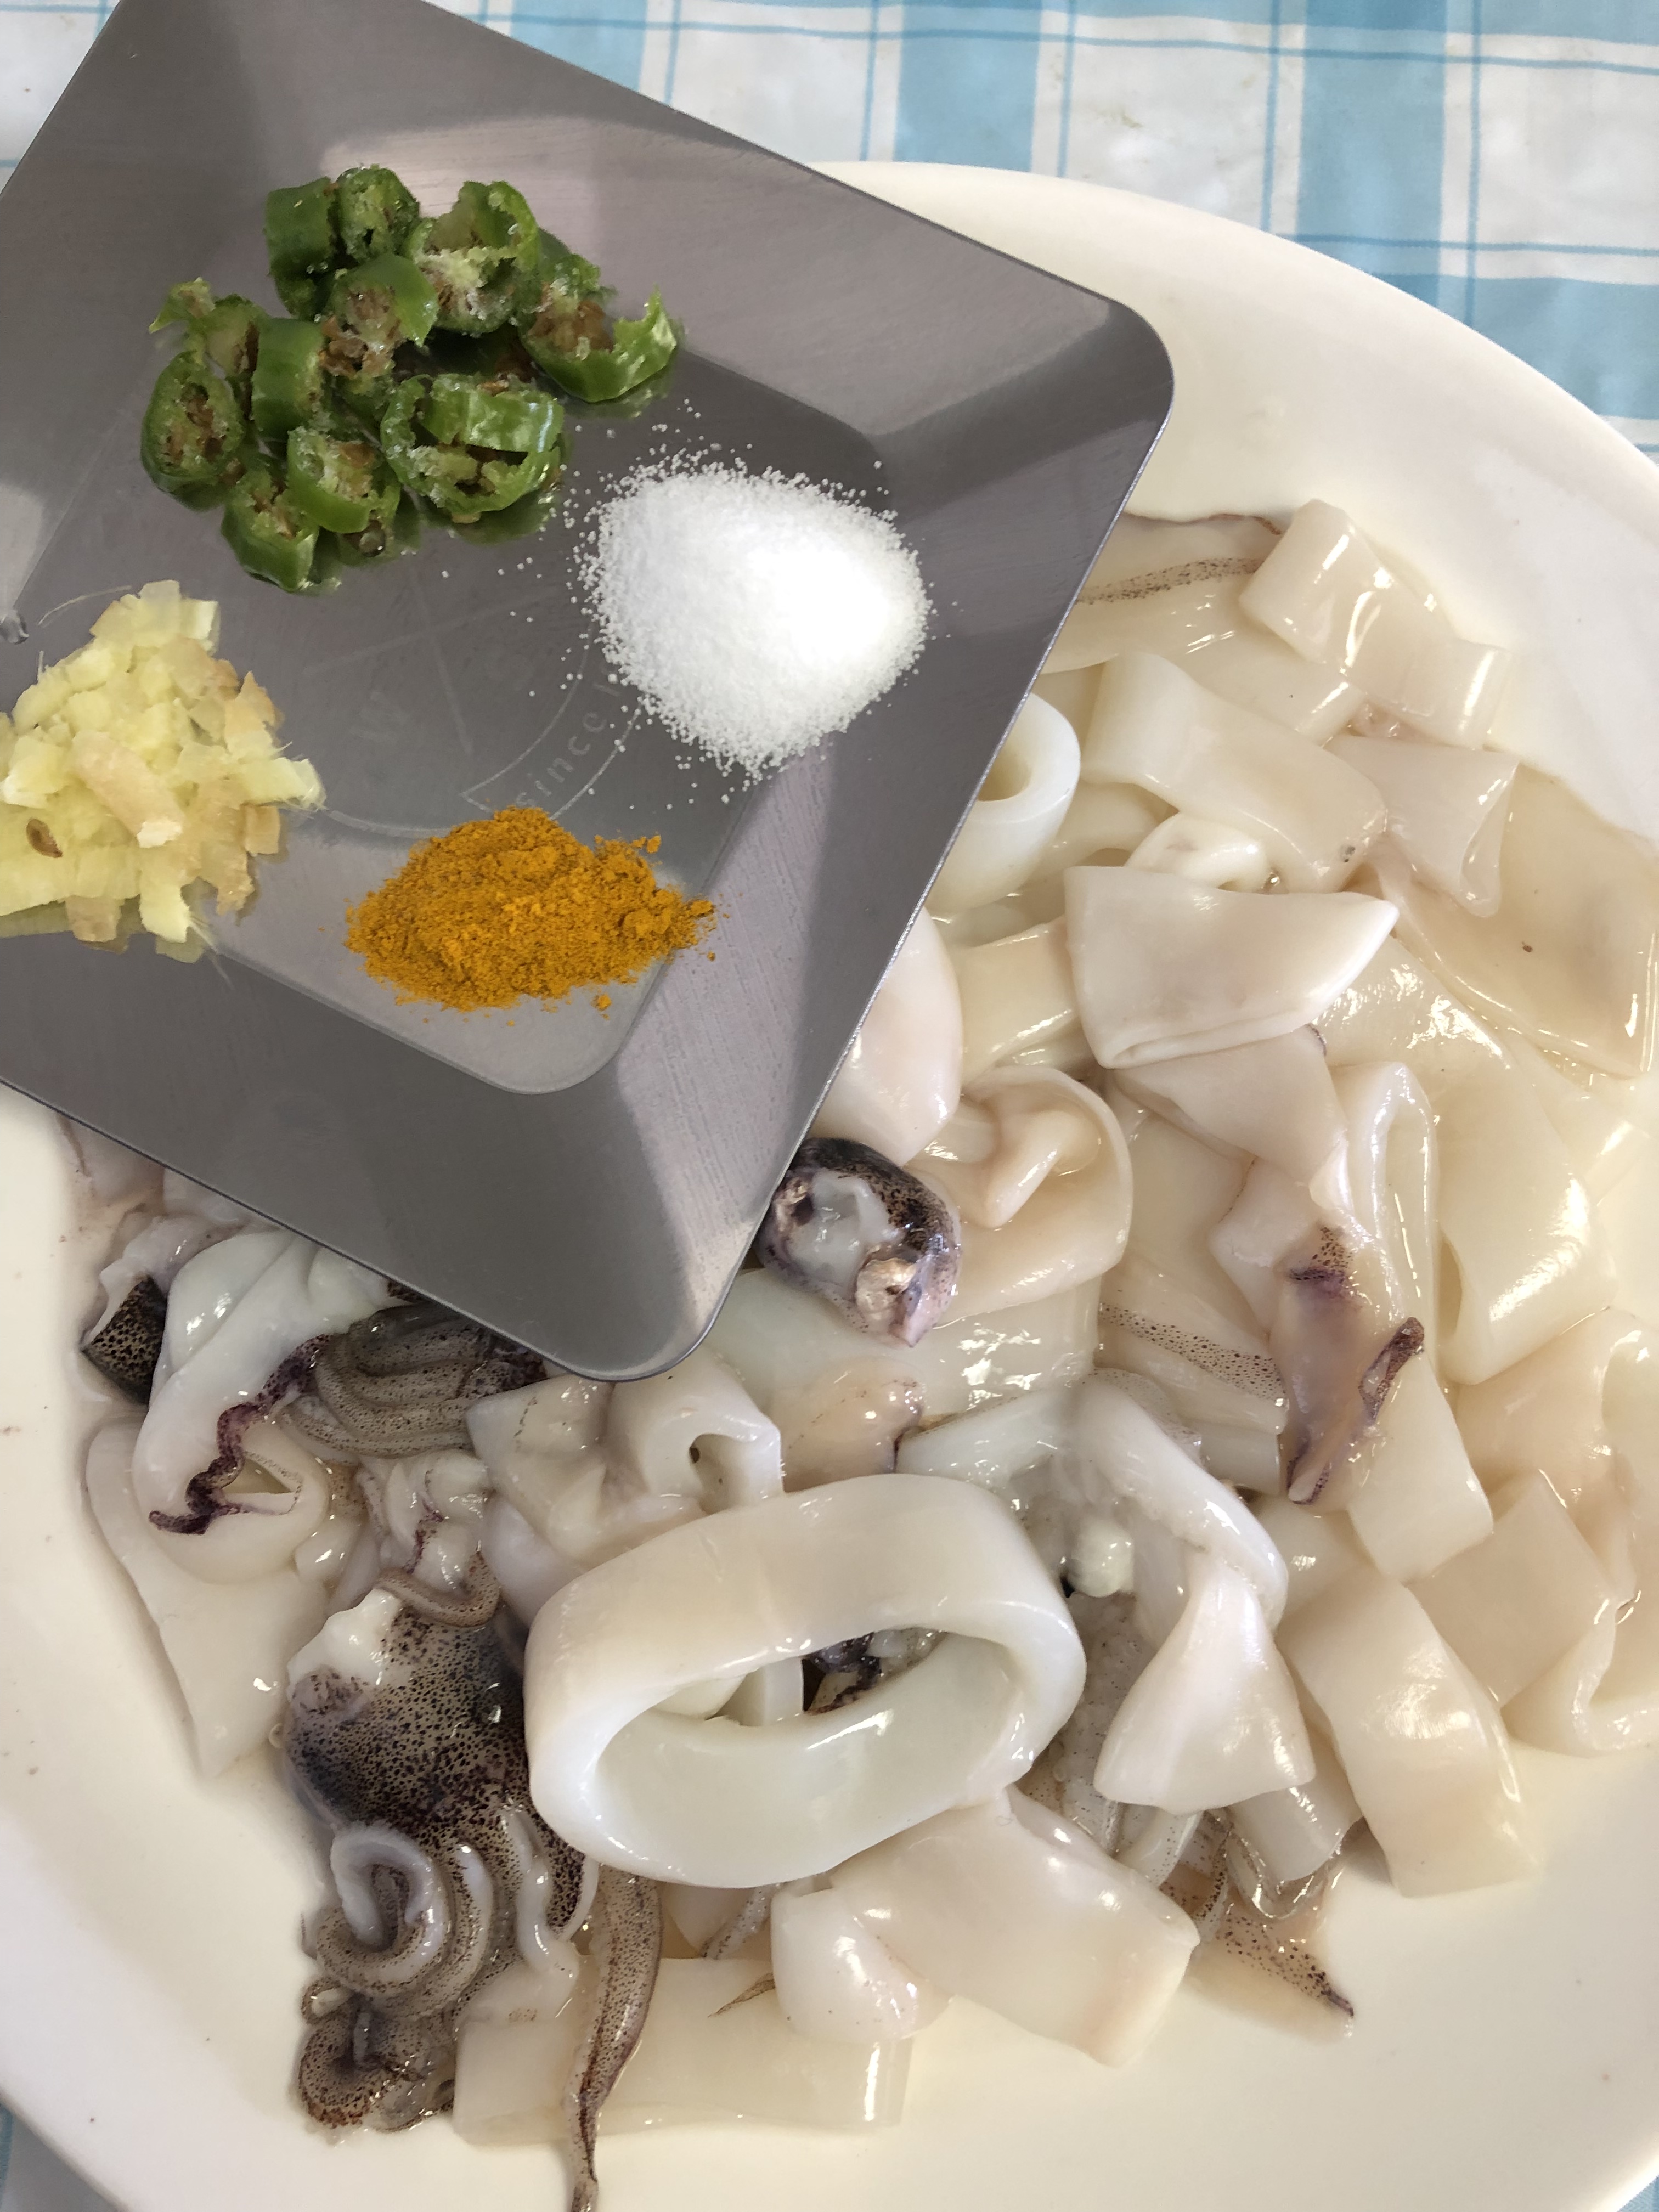
  • 1 Green Chilly
  • 1/2 tsp Mustard Seeds
  • 1/2 tsp Cumin Seeds
  • A sprig, Curry leaves
  • 1/4 tsp Turmeric Powder
  • 1 tsp Redchilli Powder
  • 1/2 tbsp Tamarind Paste
  • 1/8 tsp Asafoetida
  • 1/8 cup, Coriander Leaves, chopped
  • Salt
  • 1 tbsp Oil

Instructions

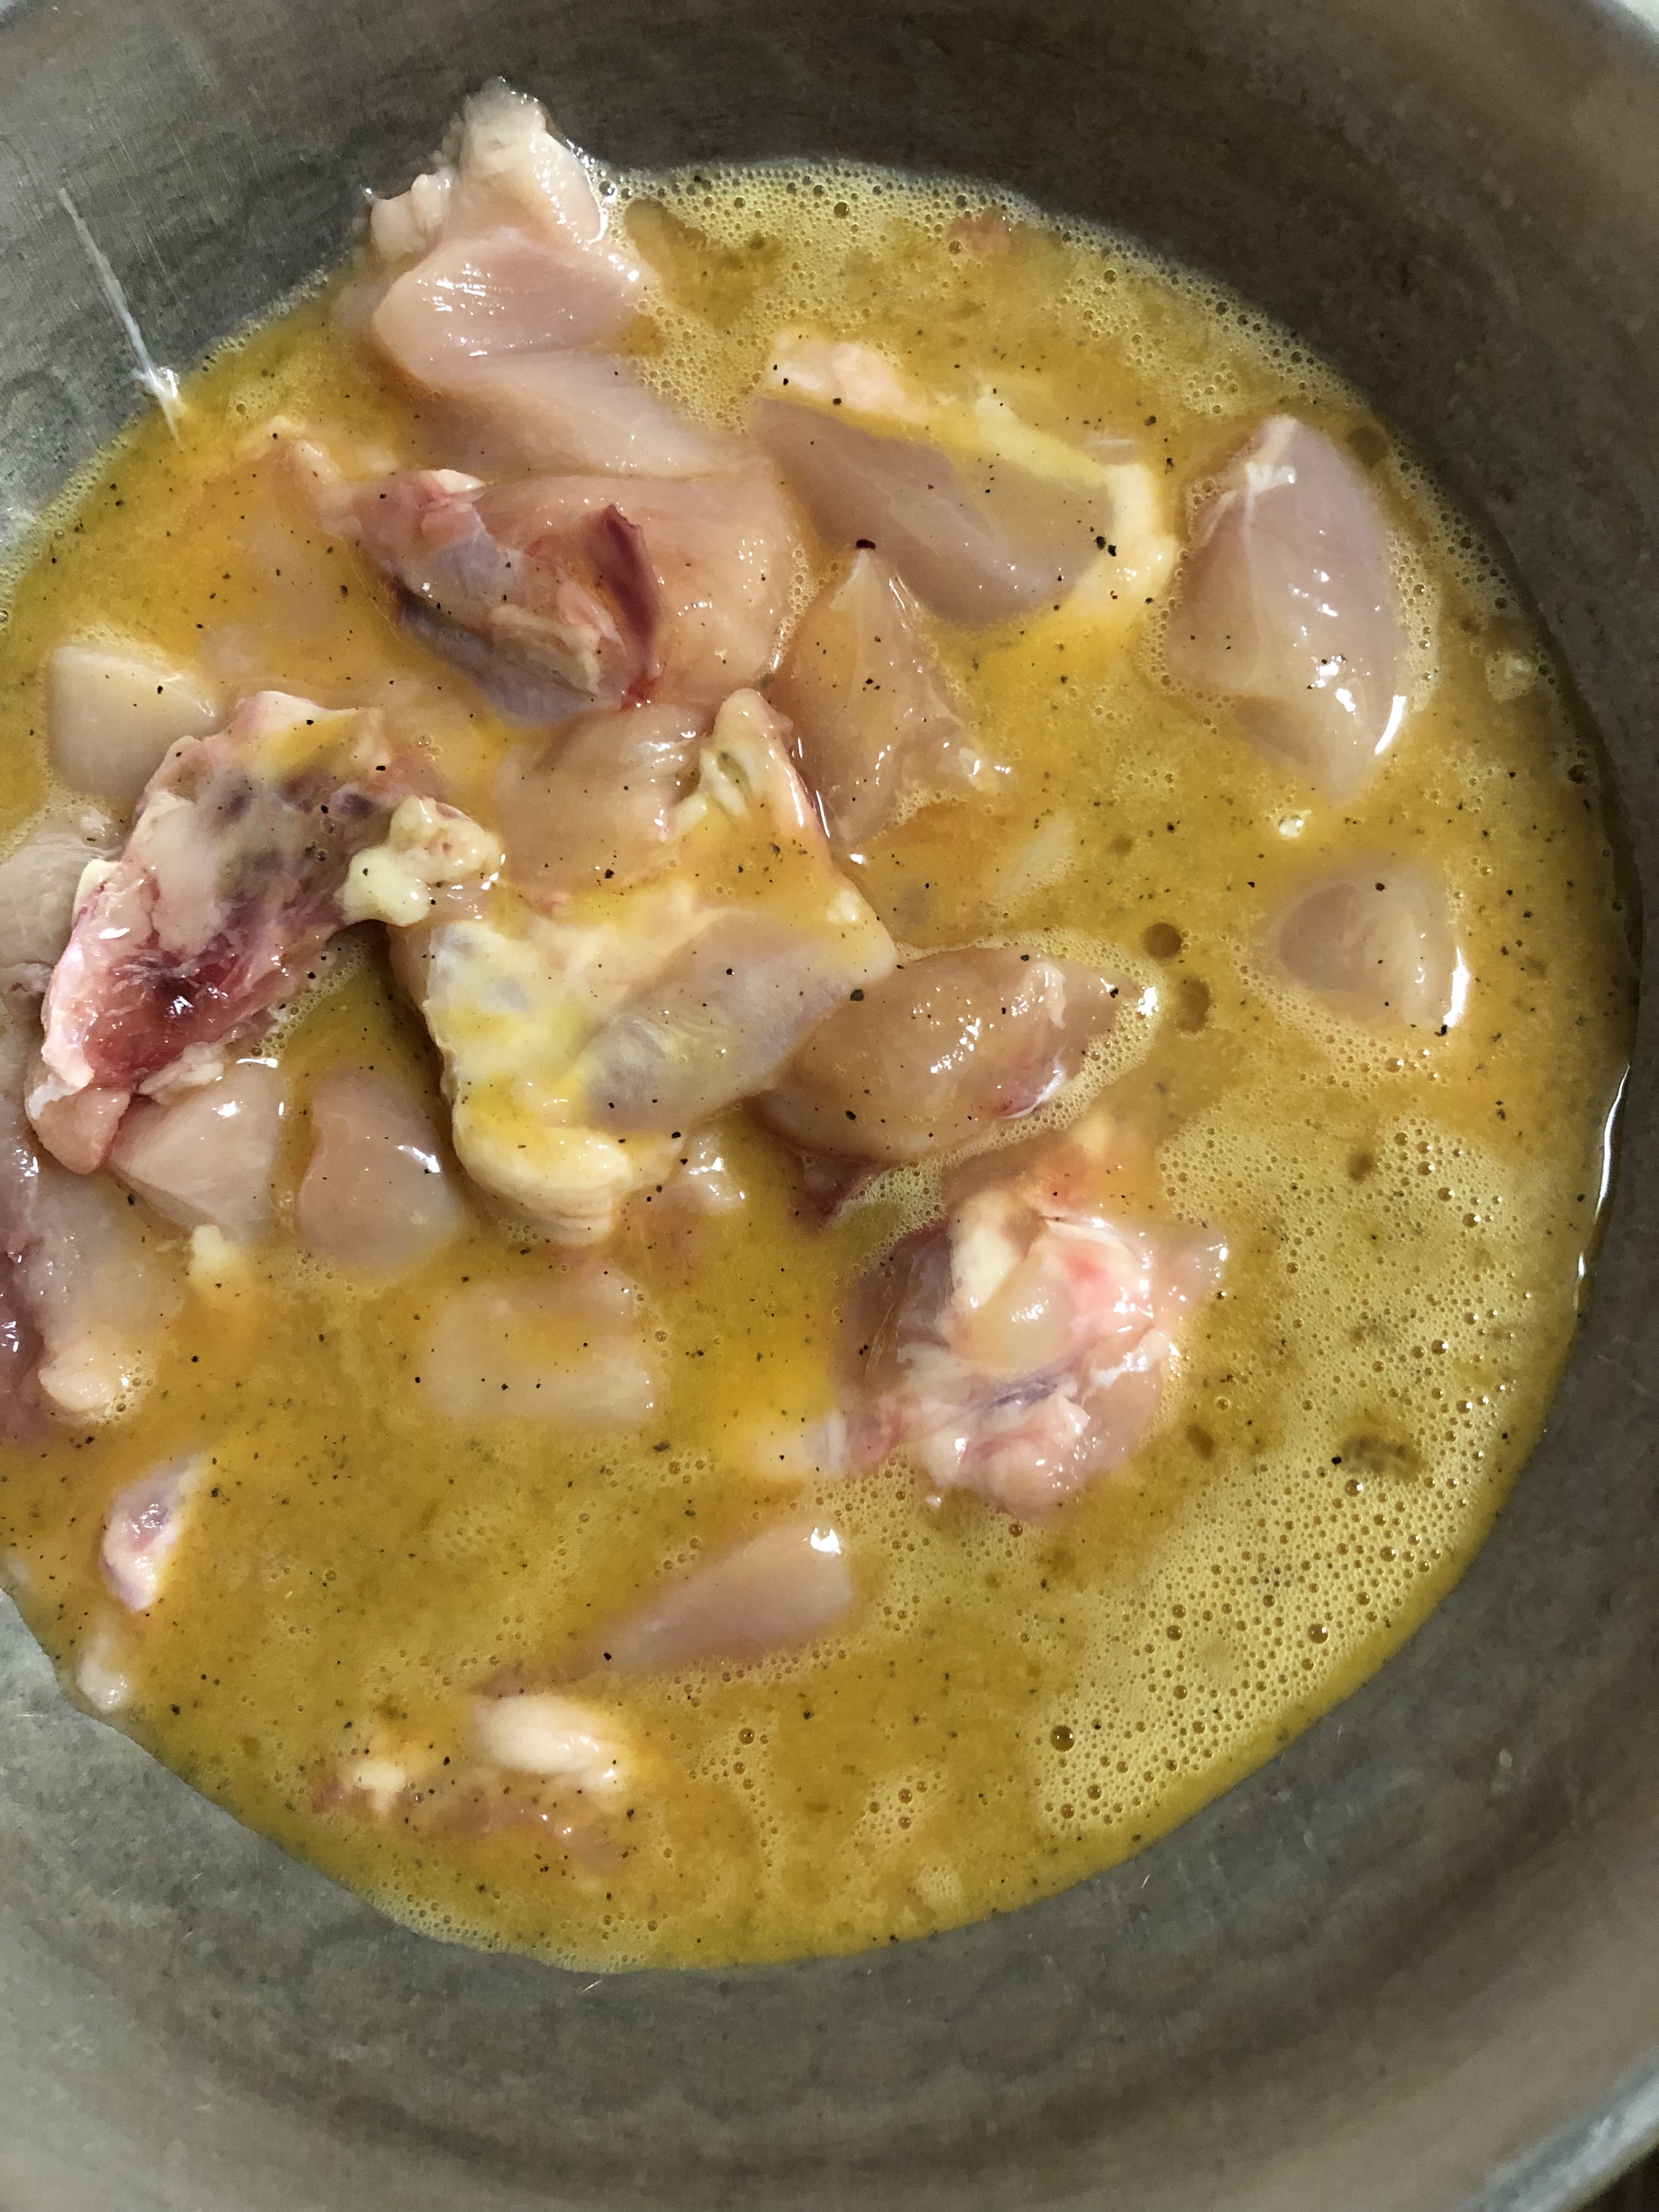
  1. Boil eggs, peel the shell. Make a few slits on the egg white with a fork carefully without penetrating deep into the yolks.
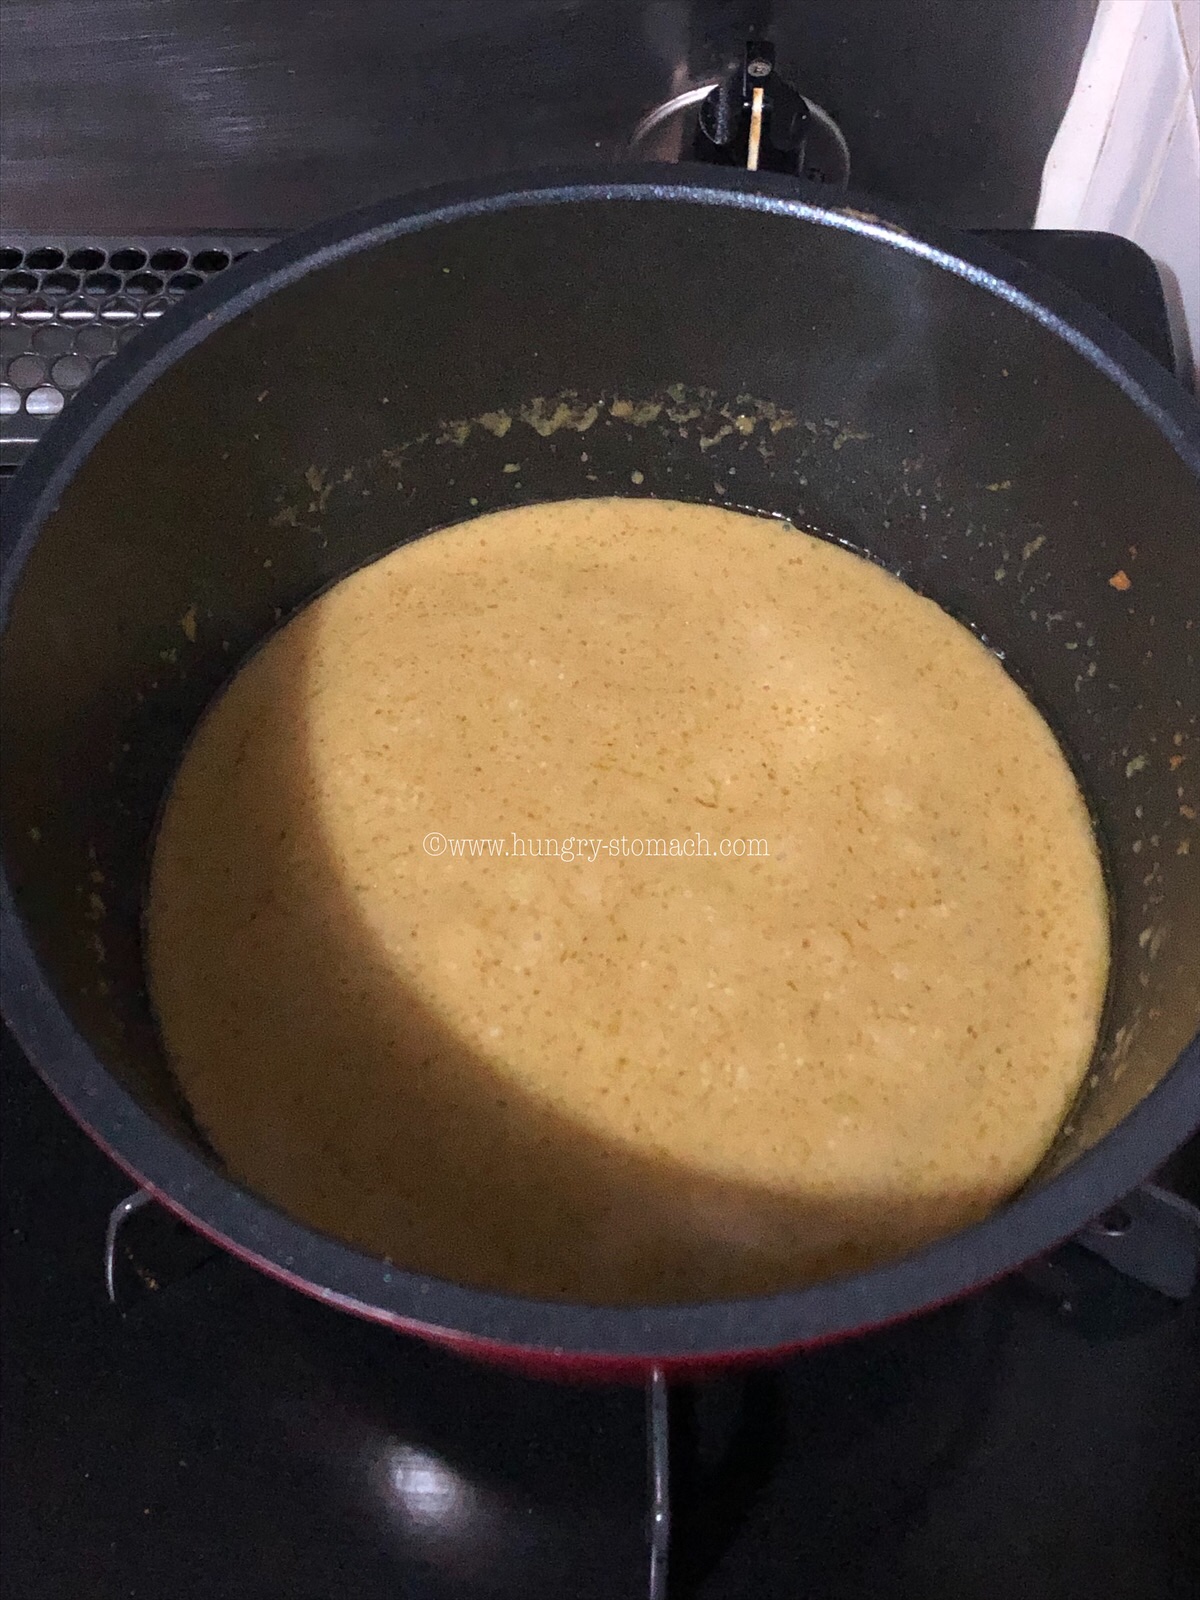
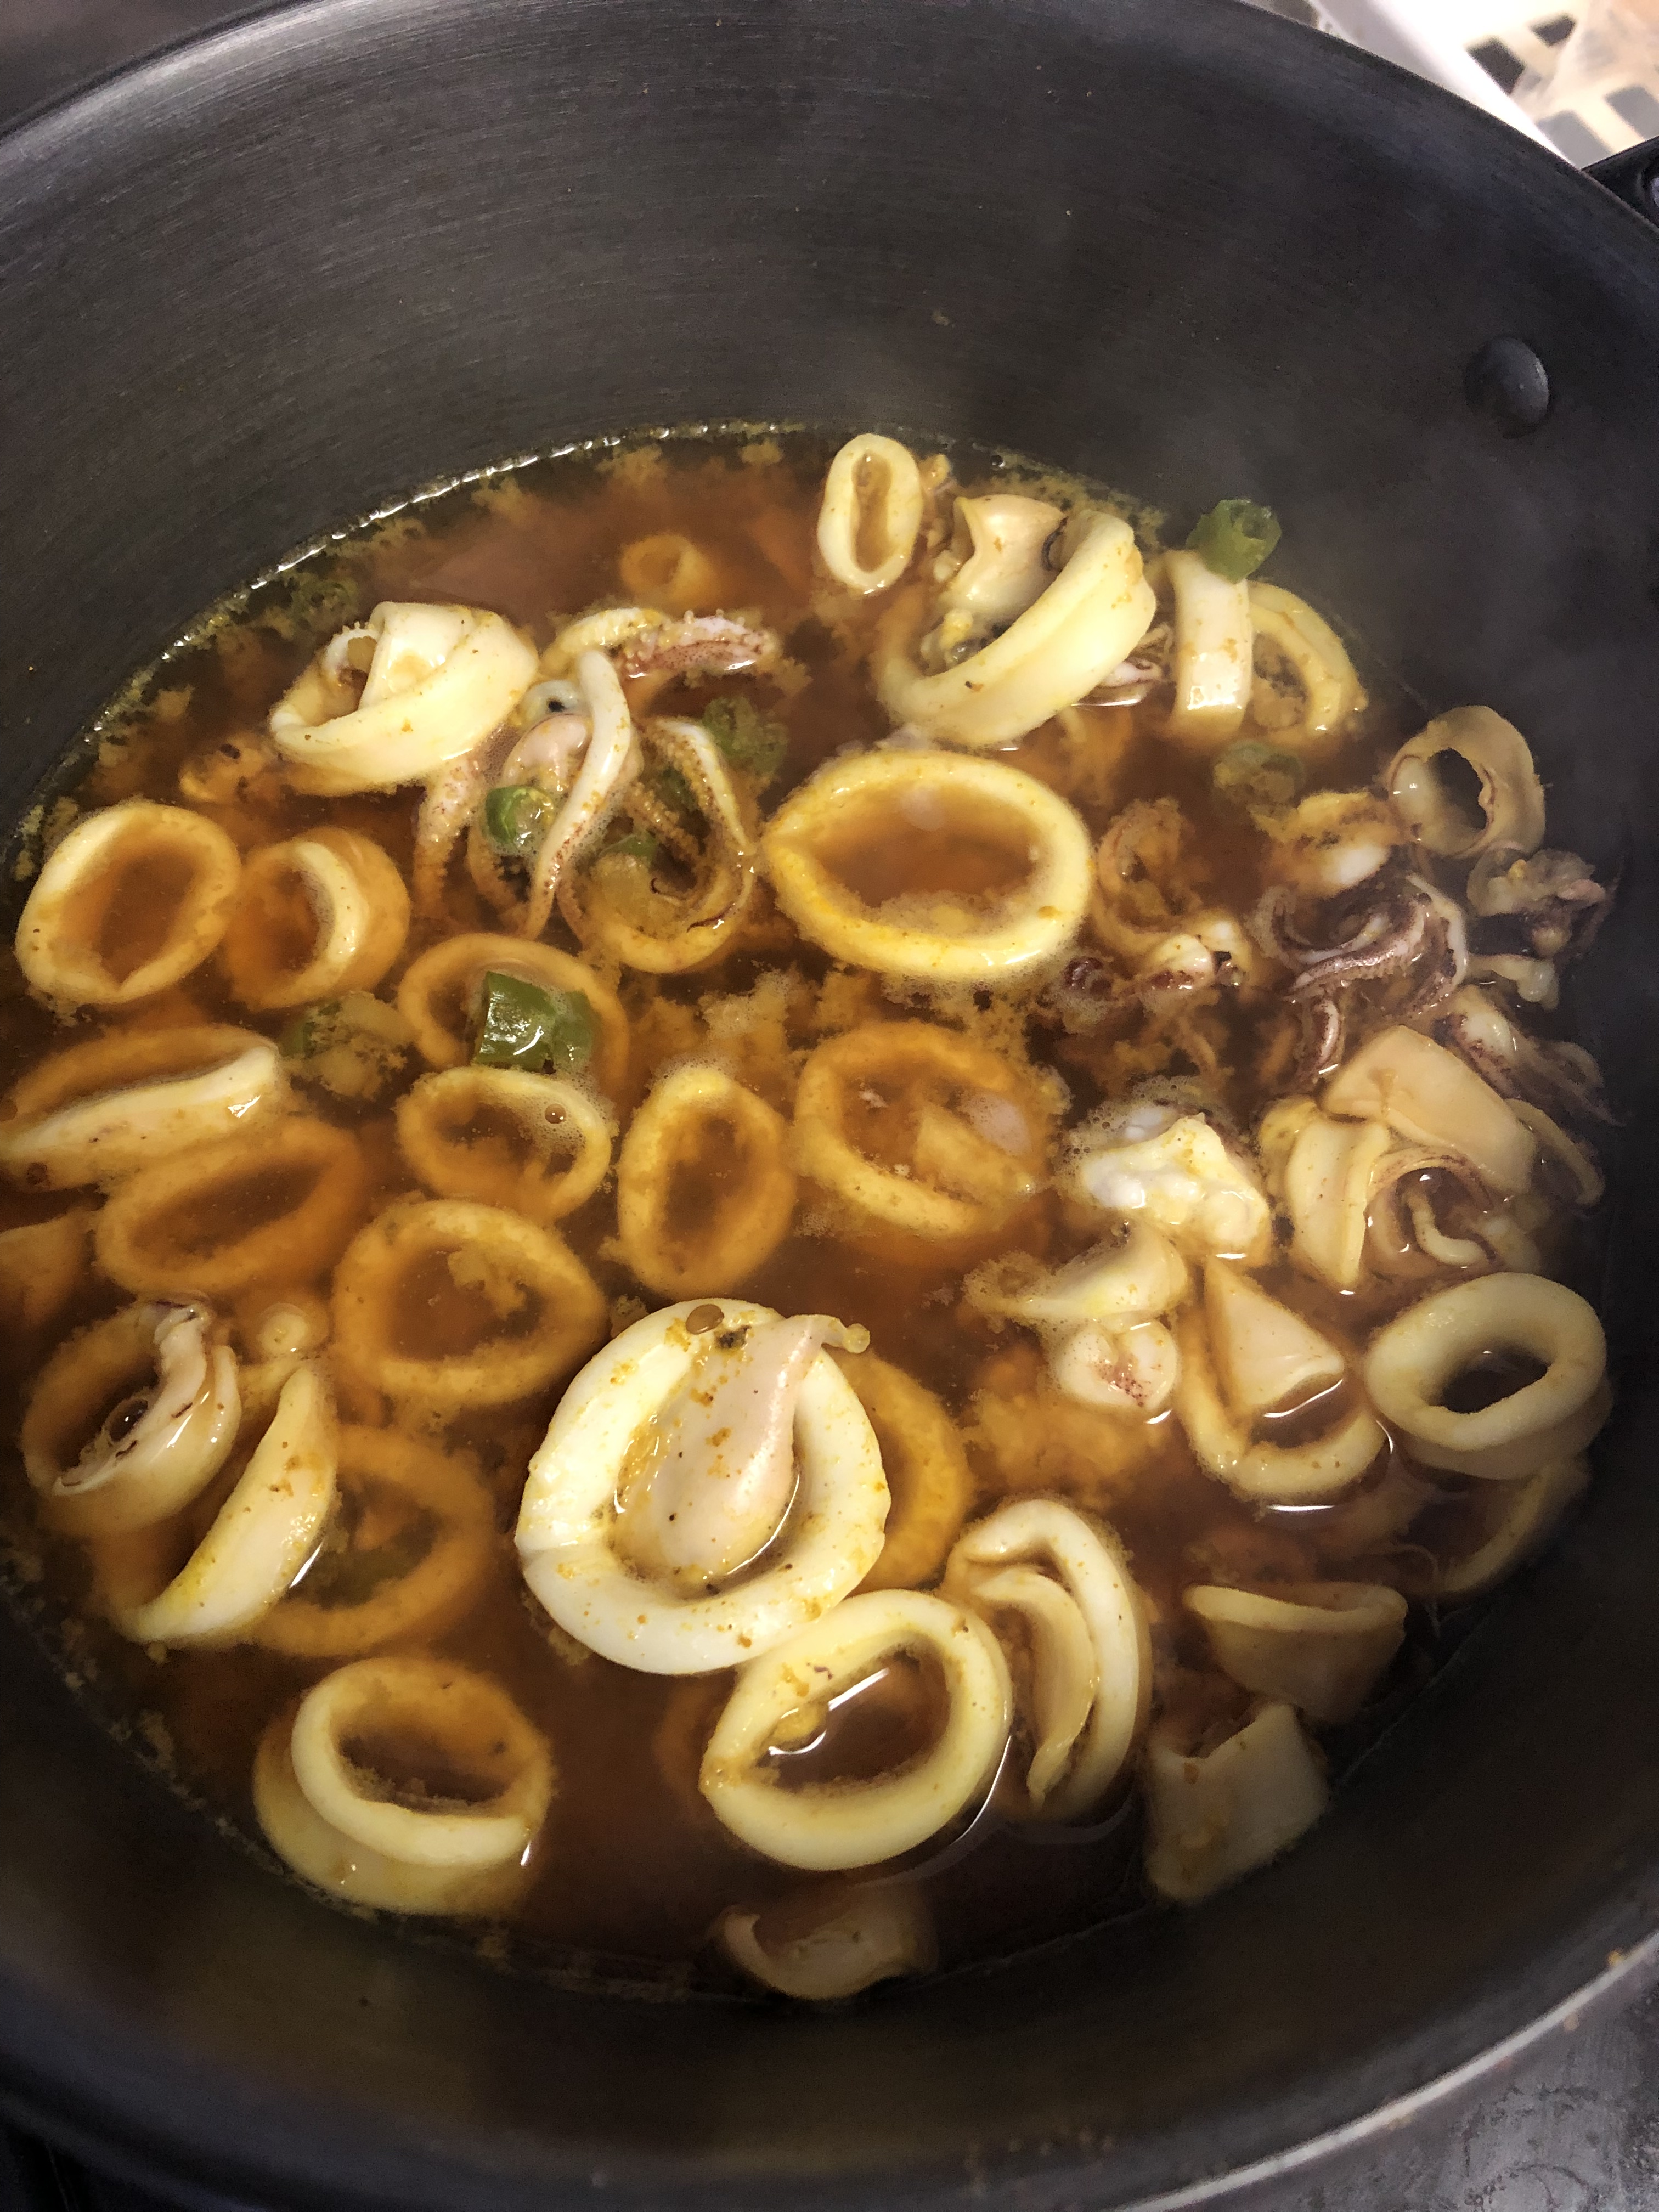
  2. Heat a teaspoon of oil in a thick bottomed pan. Add all the ingredients mentioned under ‘for Chettinad spice mix’. Roast them until spices turn fragrant and coconut starts to turn brown. 
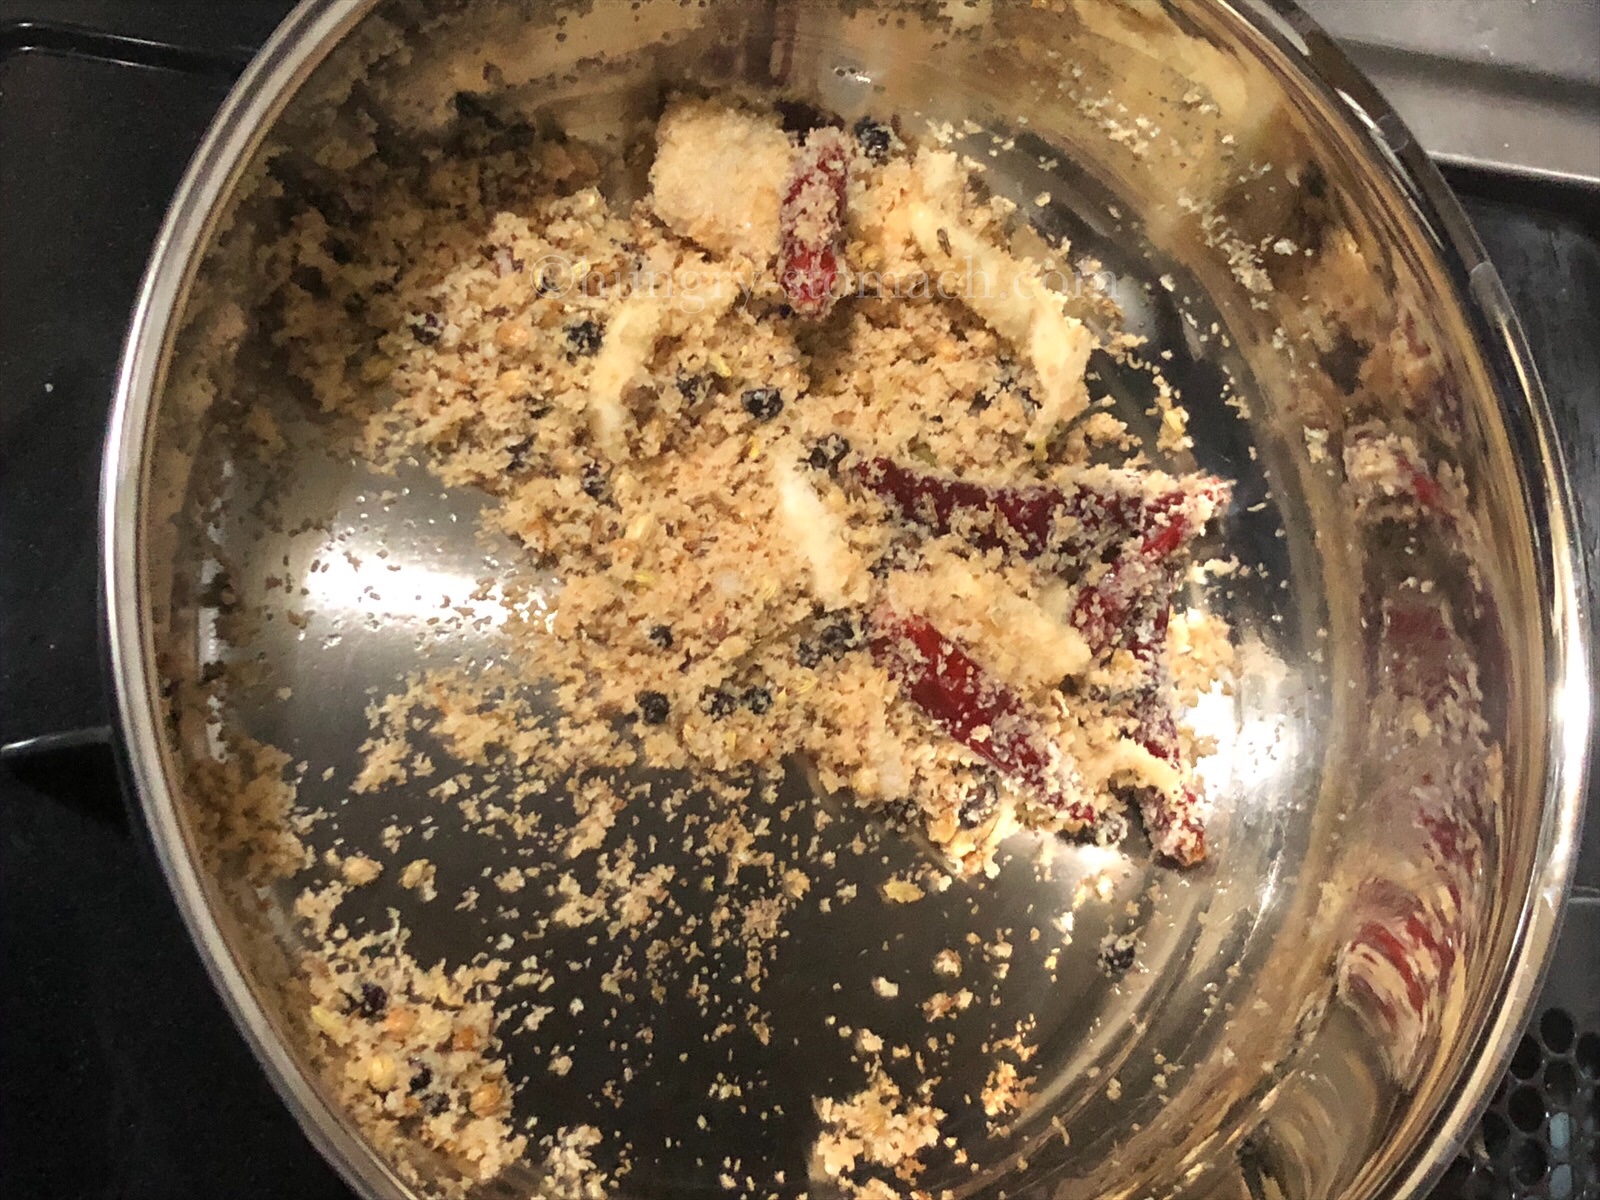
Remove and let it cool. Grind to a paste with little water.
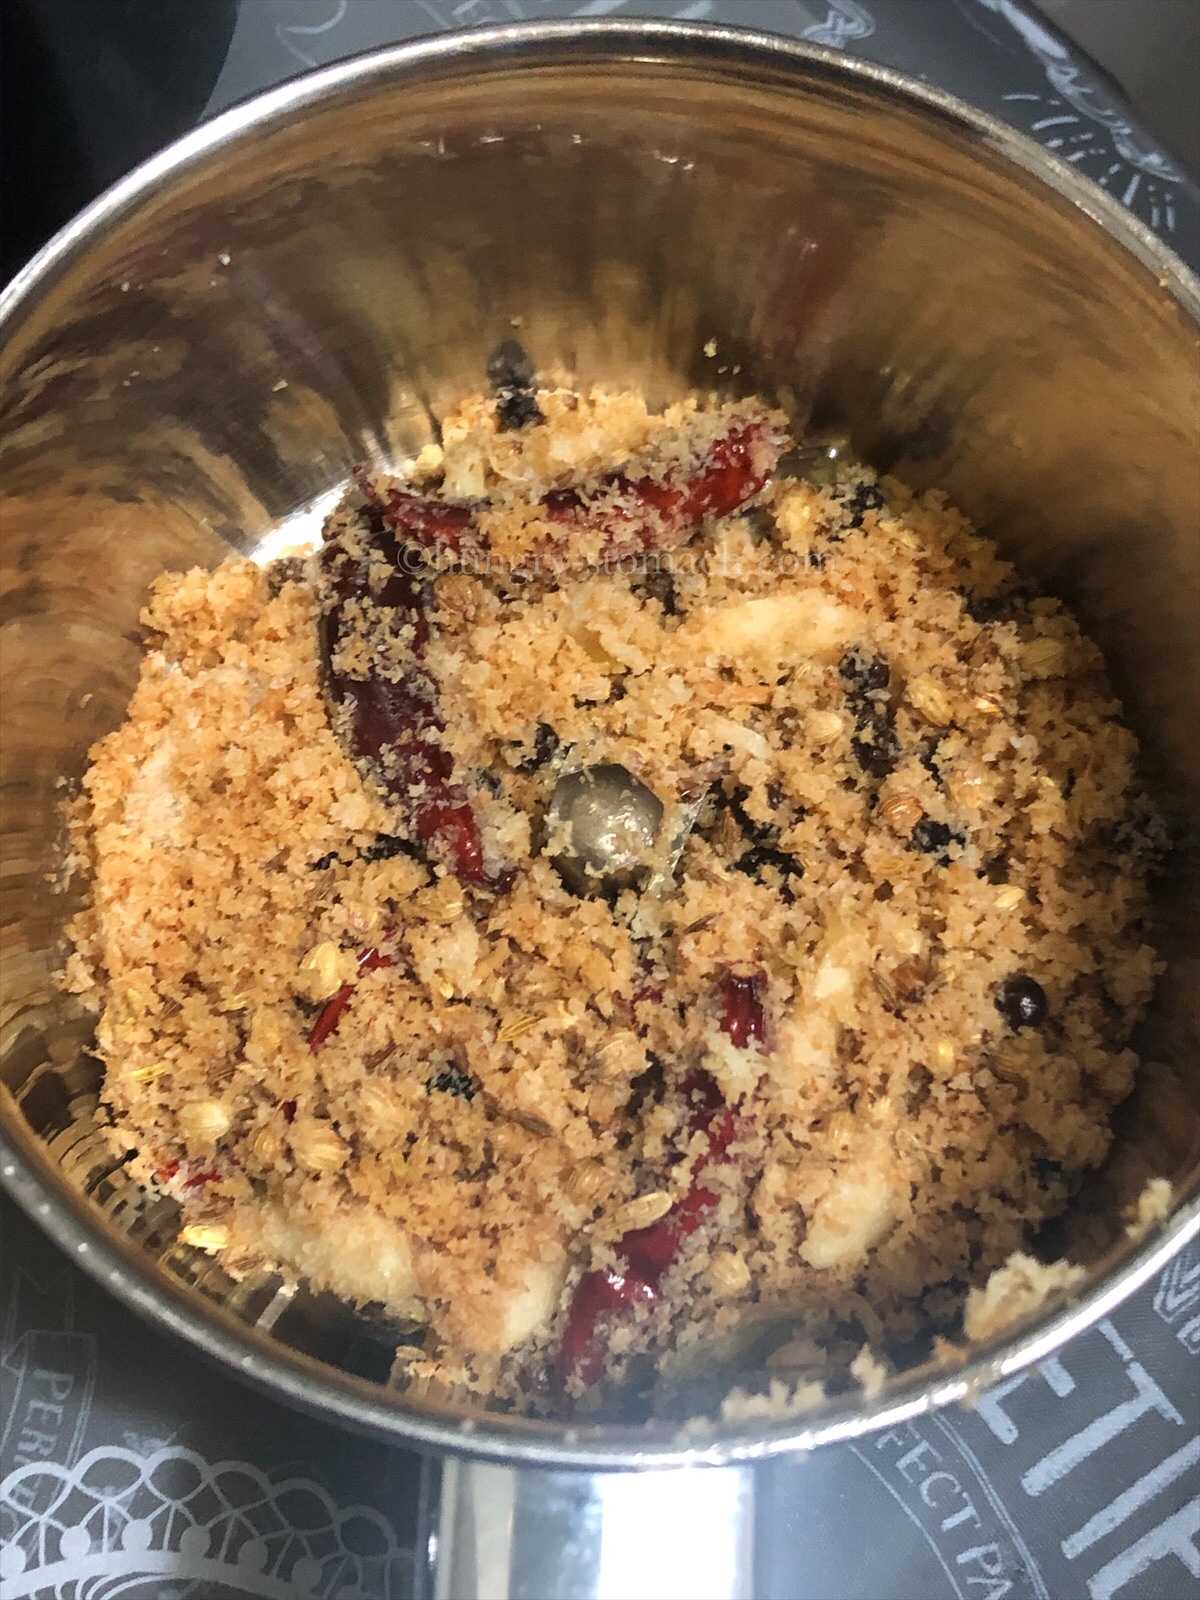
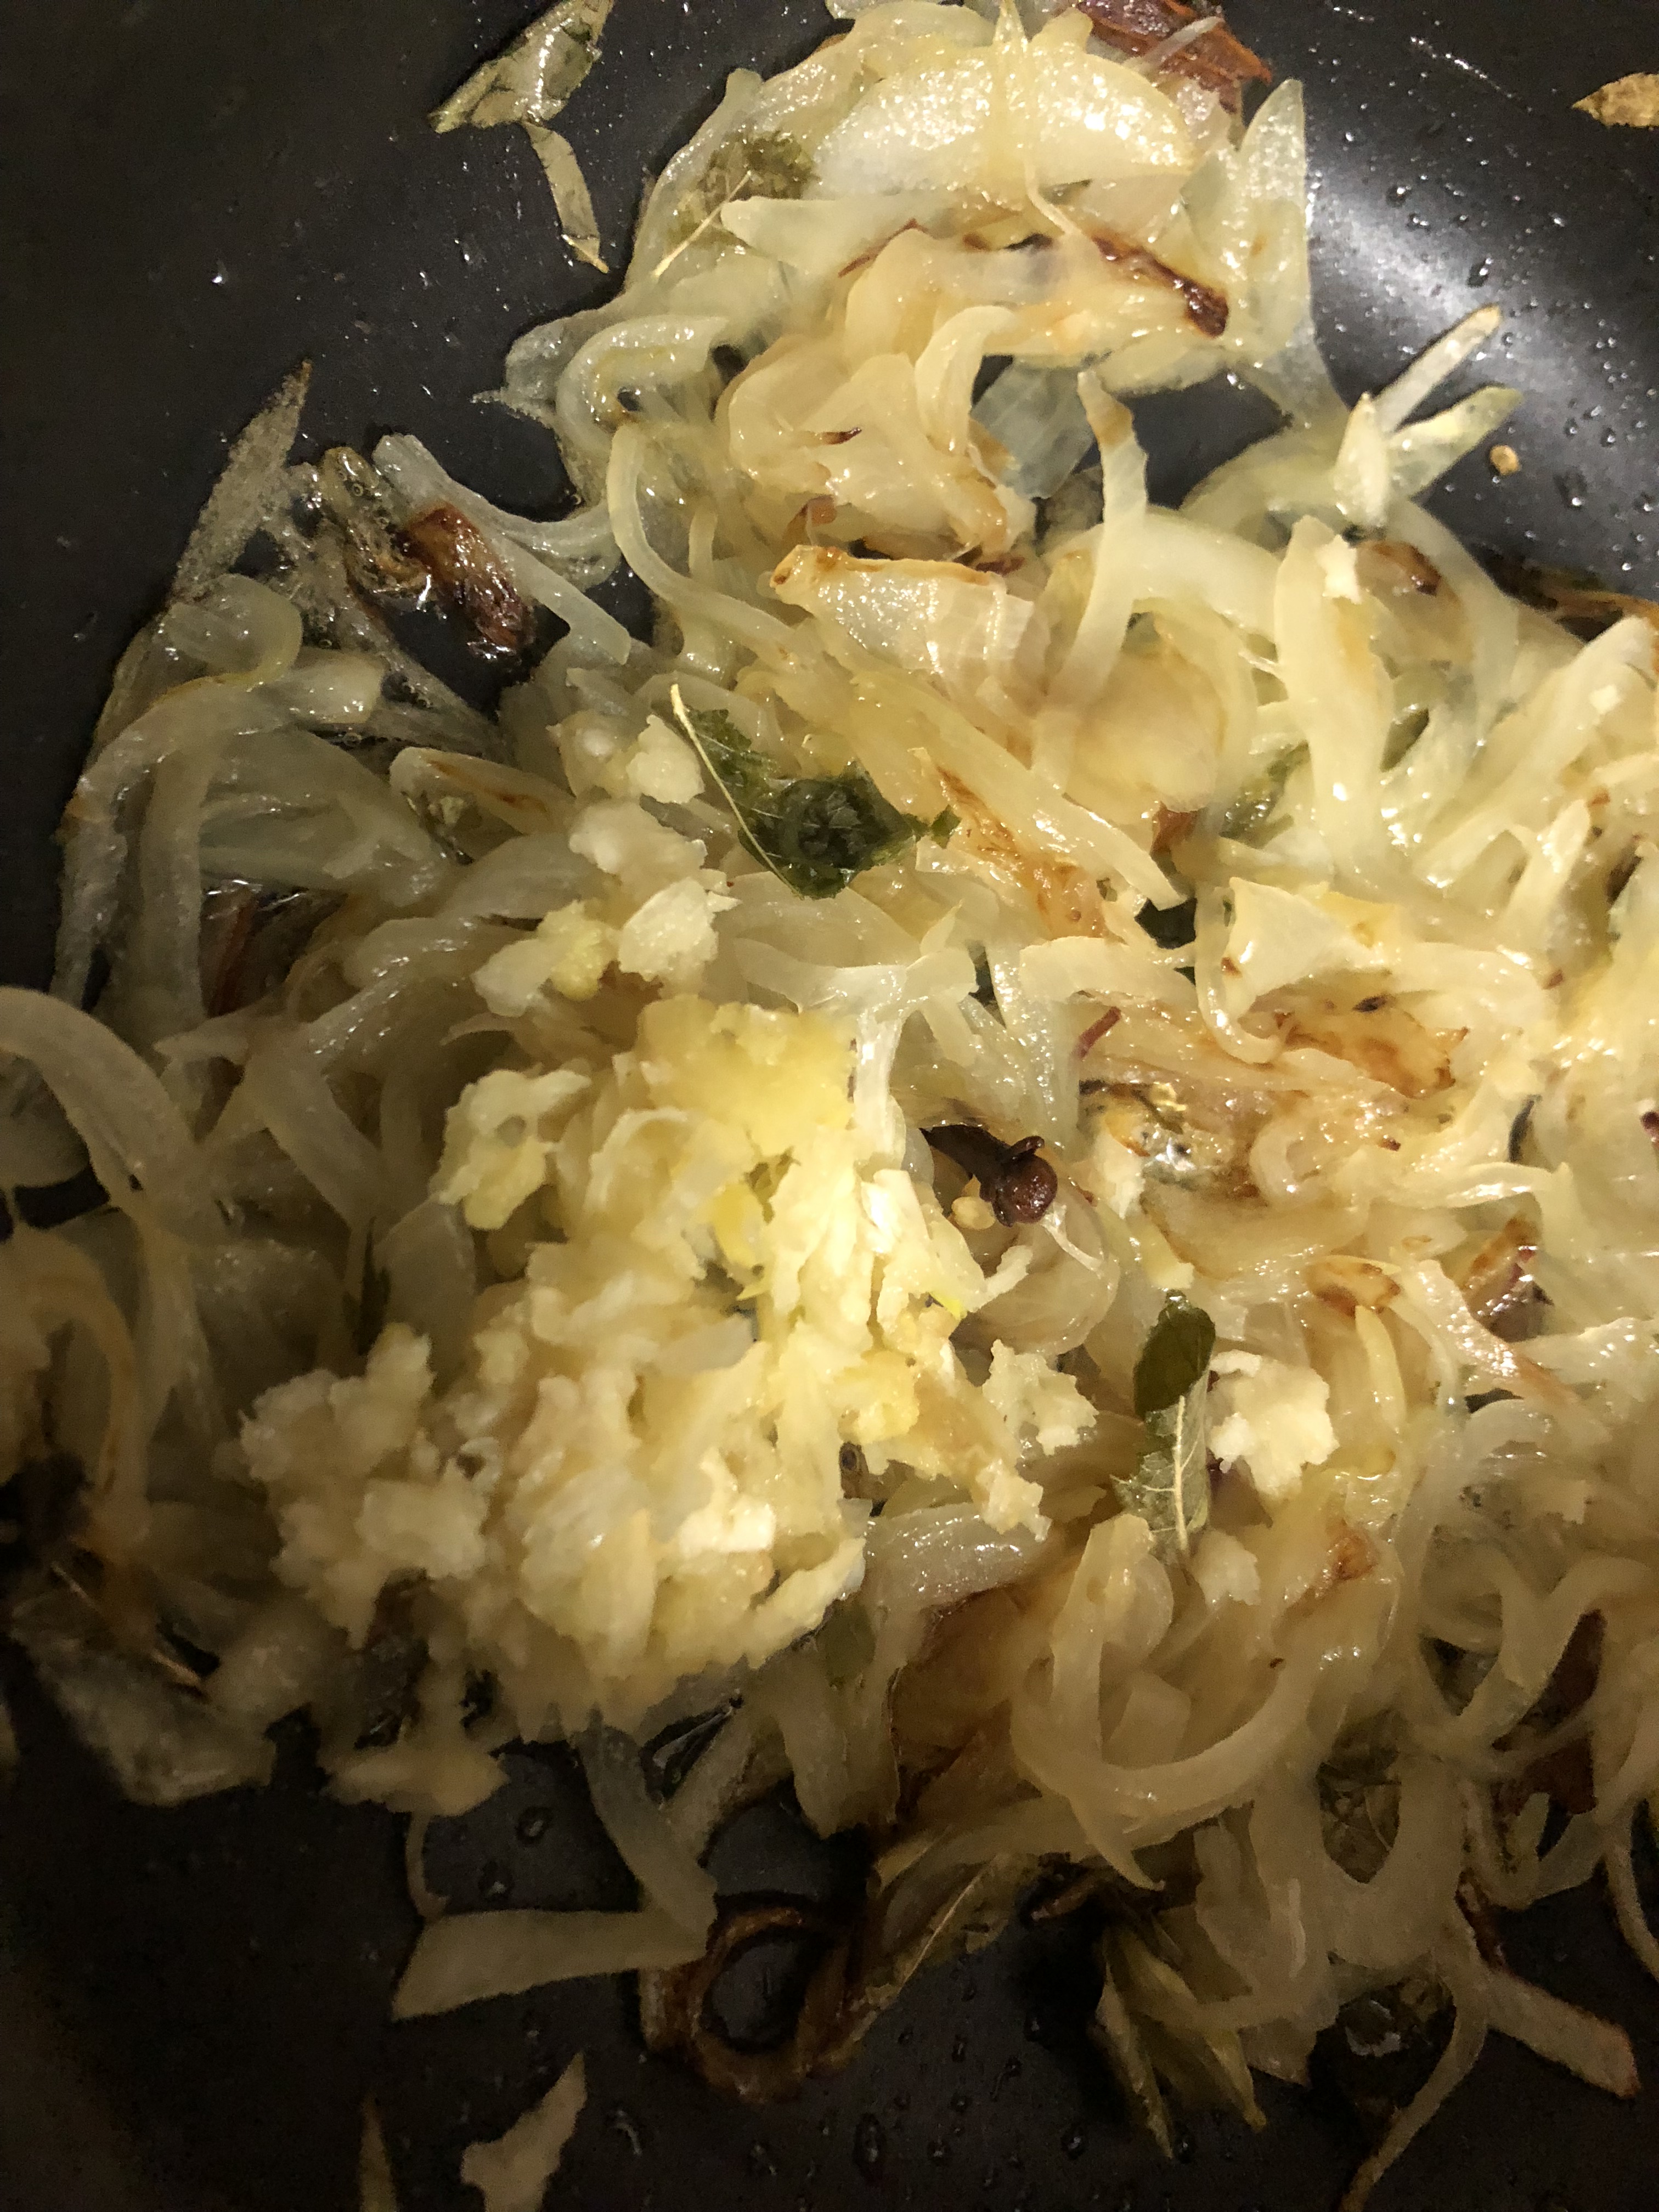
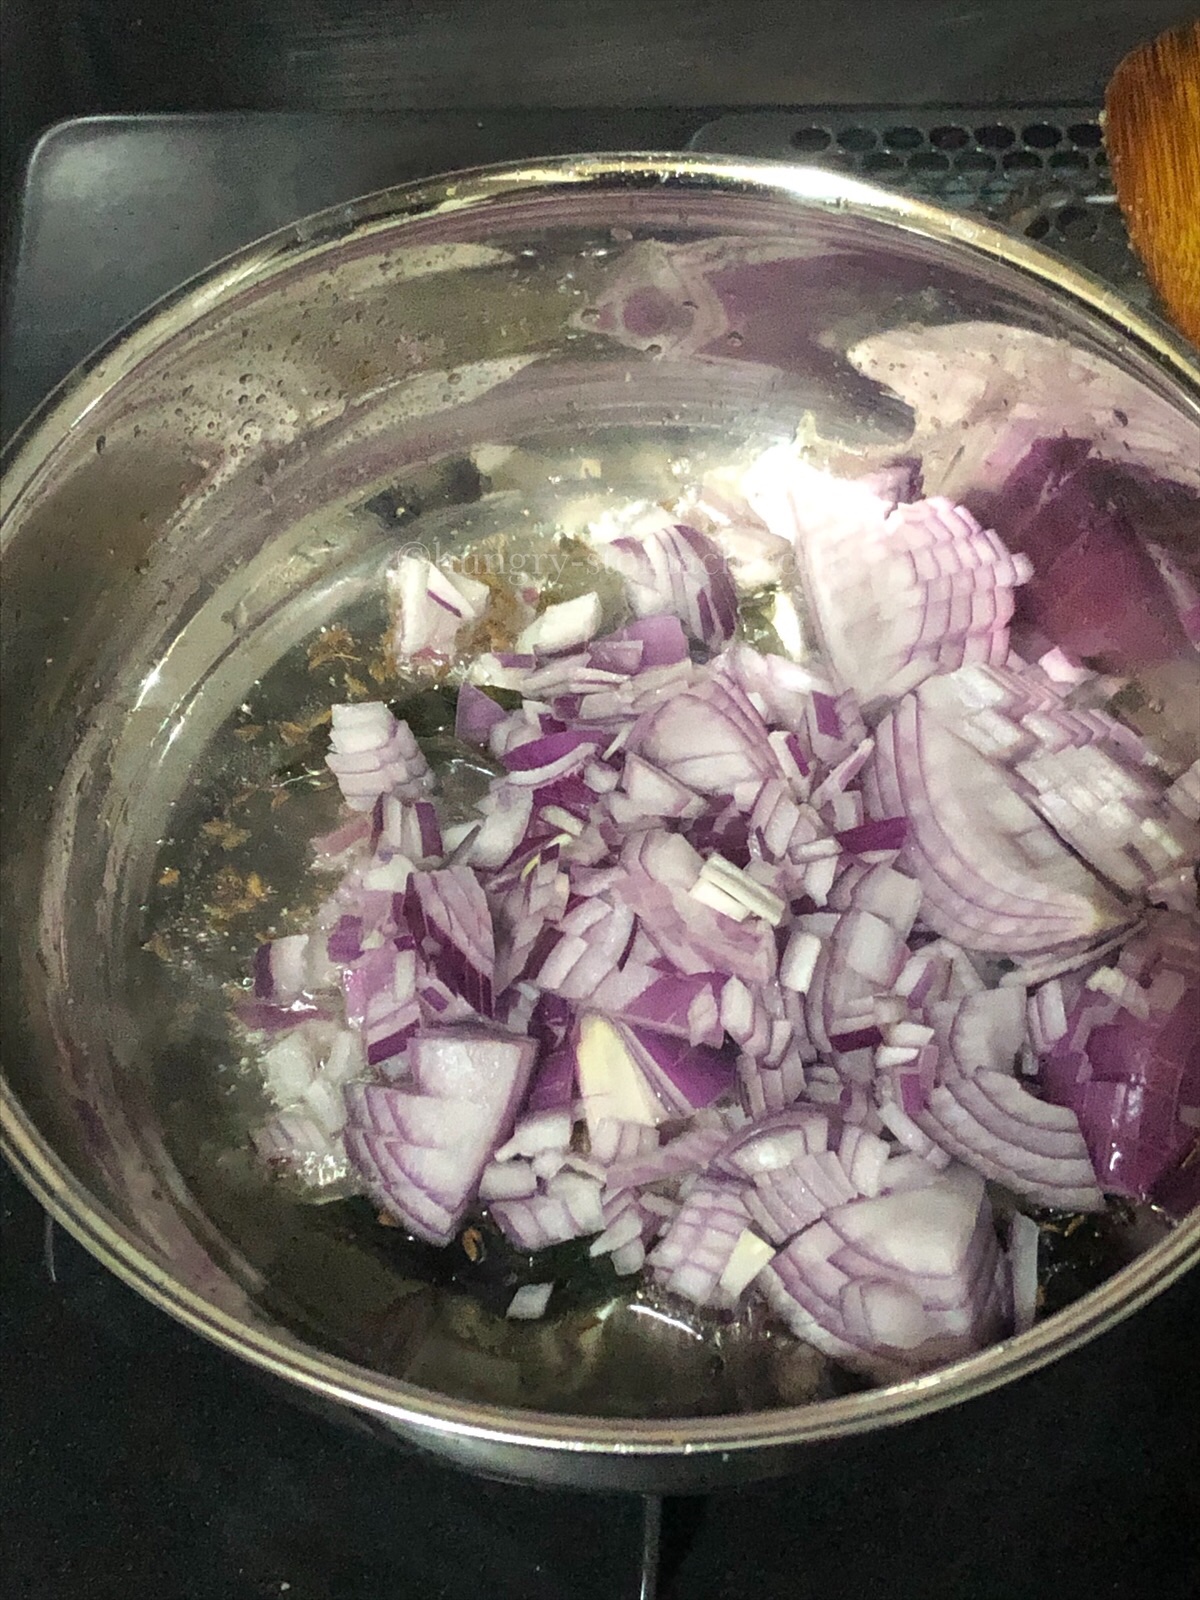
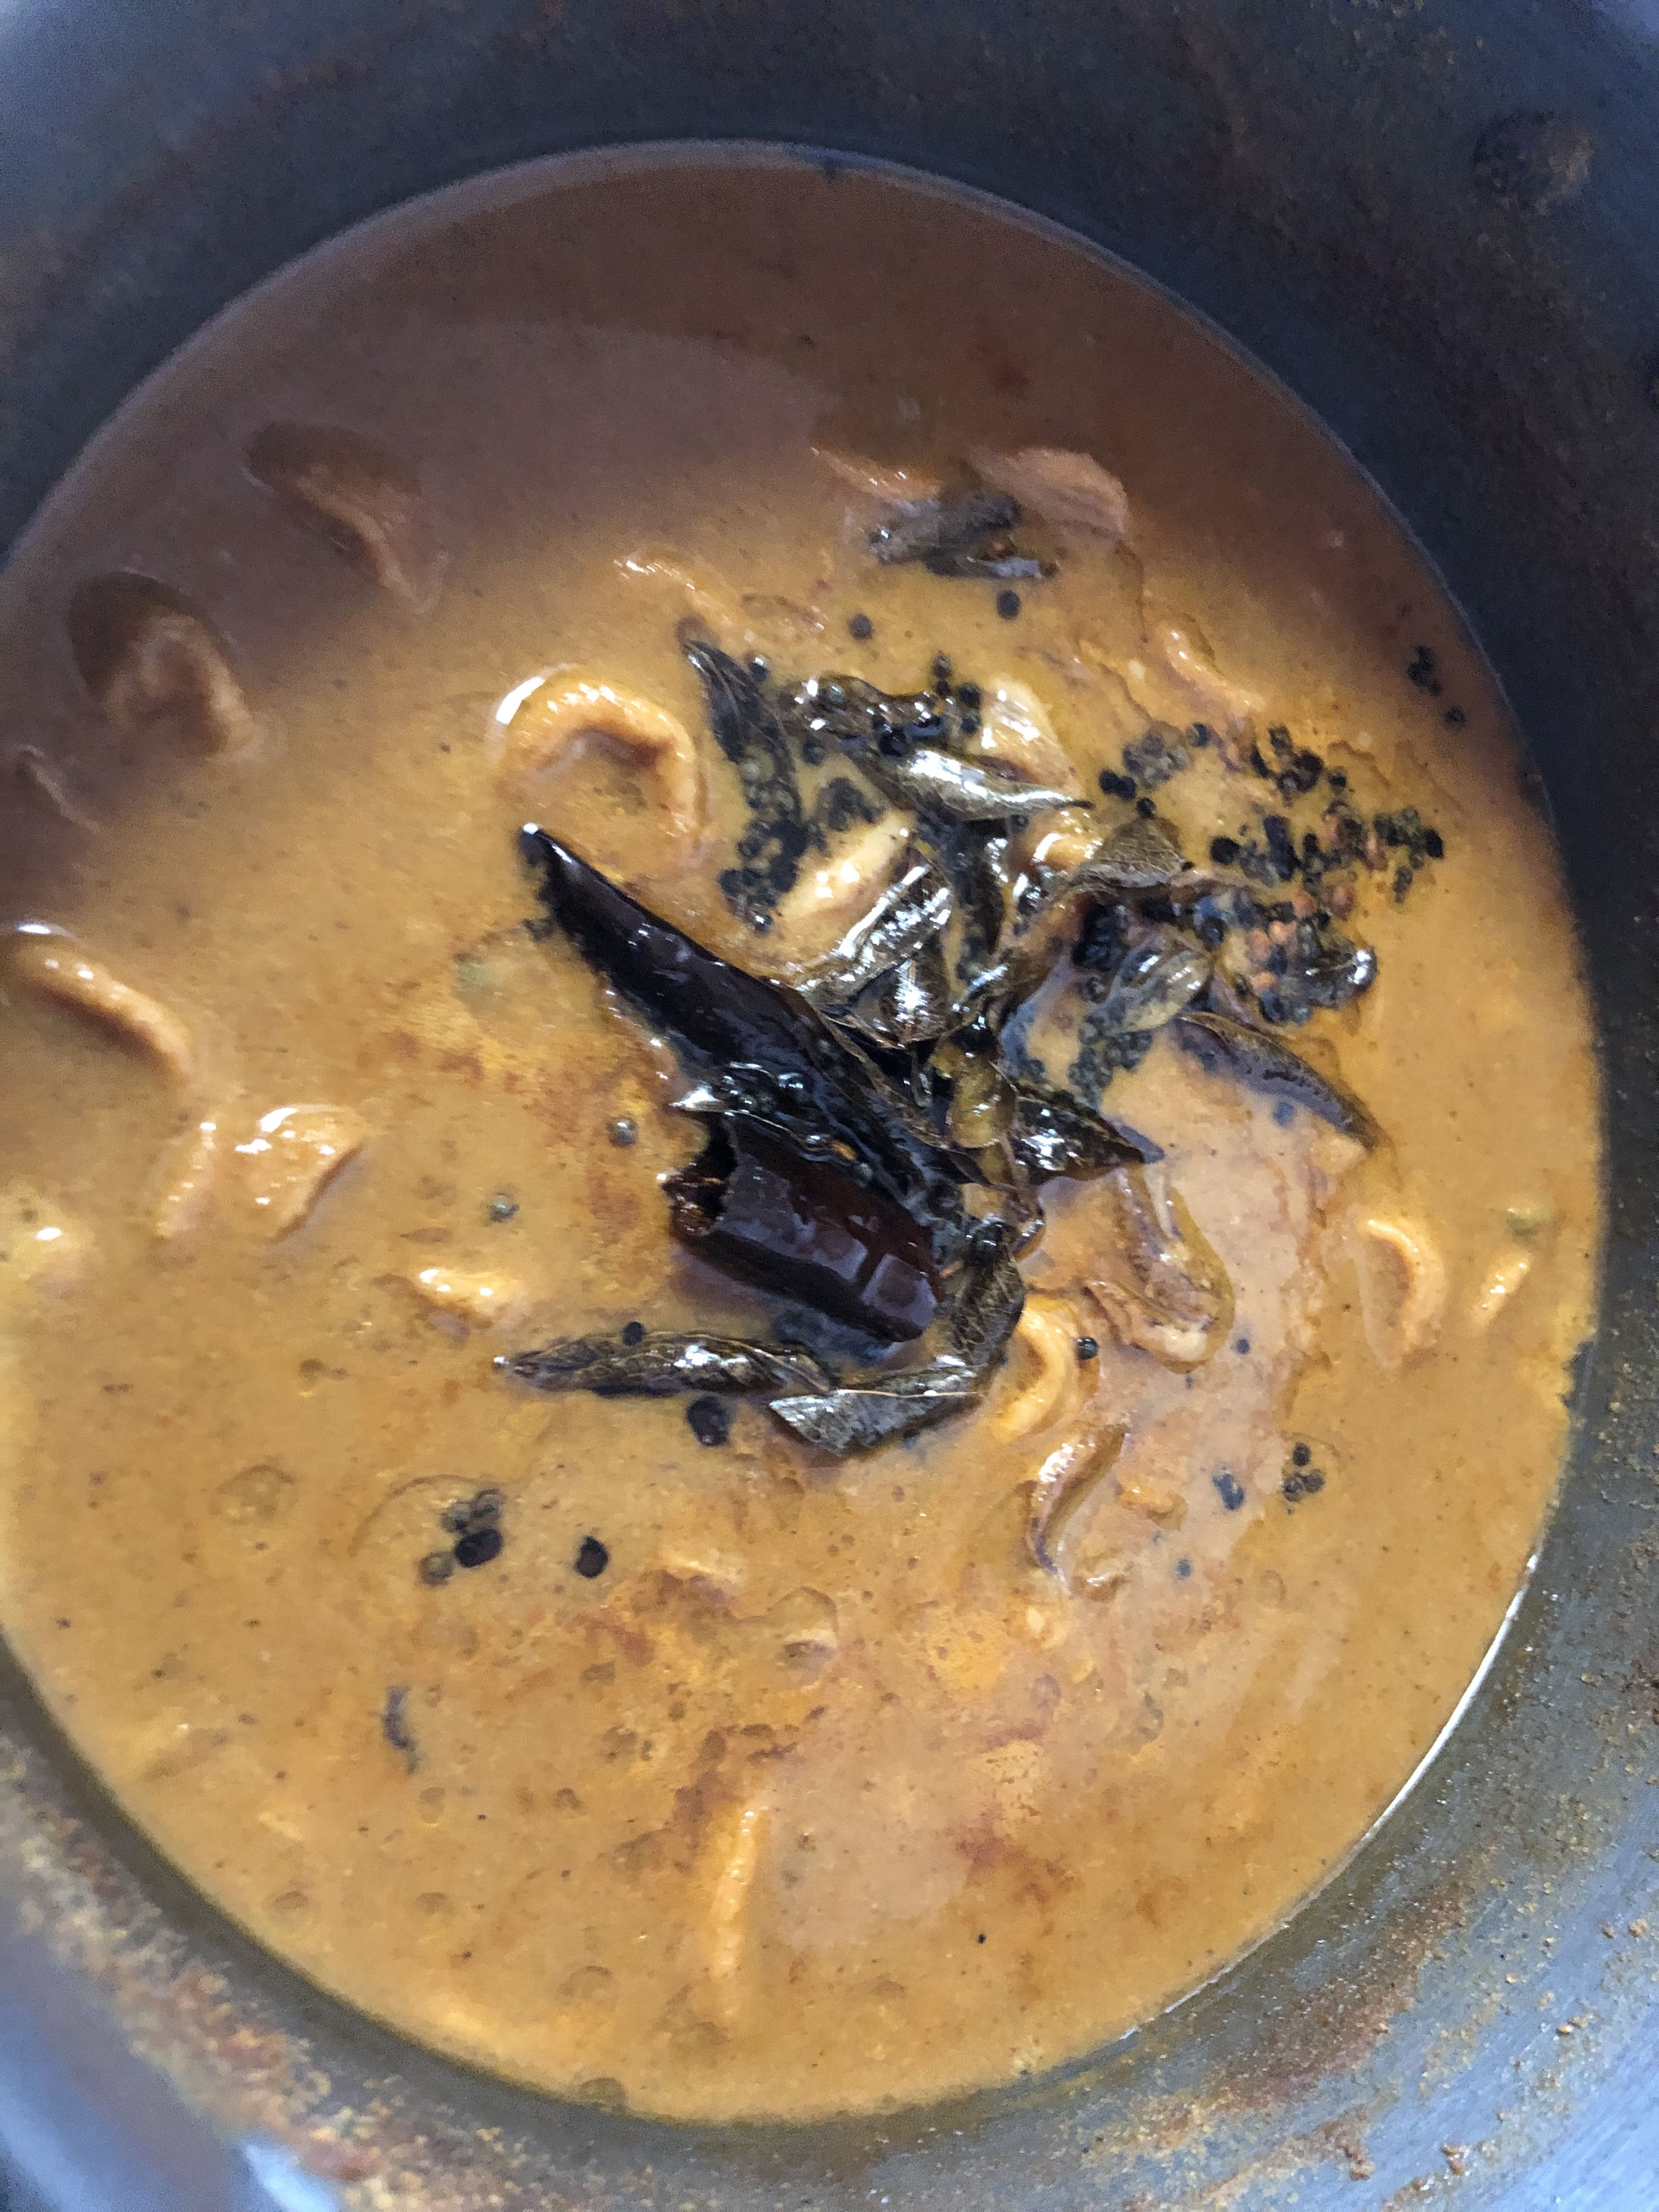
  3. Now heat 1 tbsp of oil to the same pan. Splutter cumin seeds, mustard seeds and curry leaves. Fry for a minute.
  4. Add in slit green chilli and onions and saute until the onions turn crisp and golden.
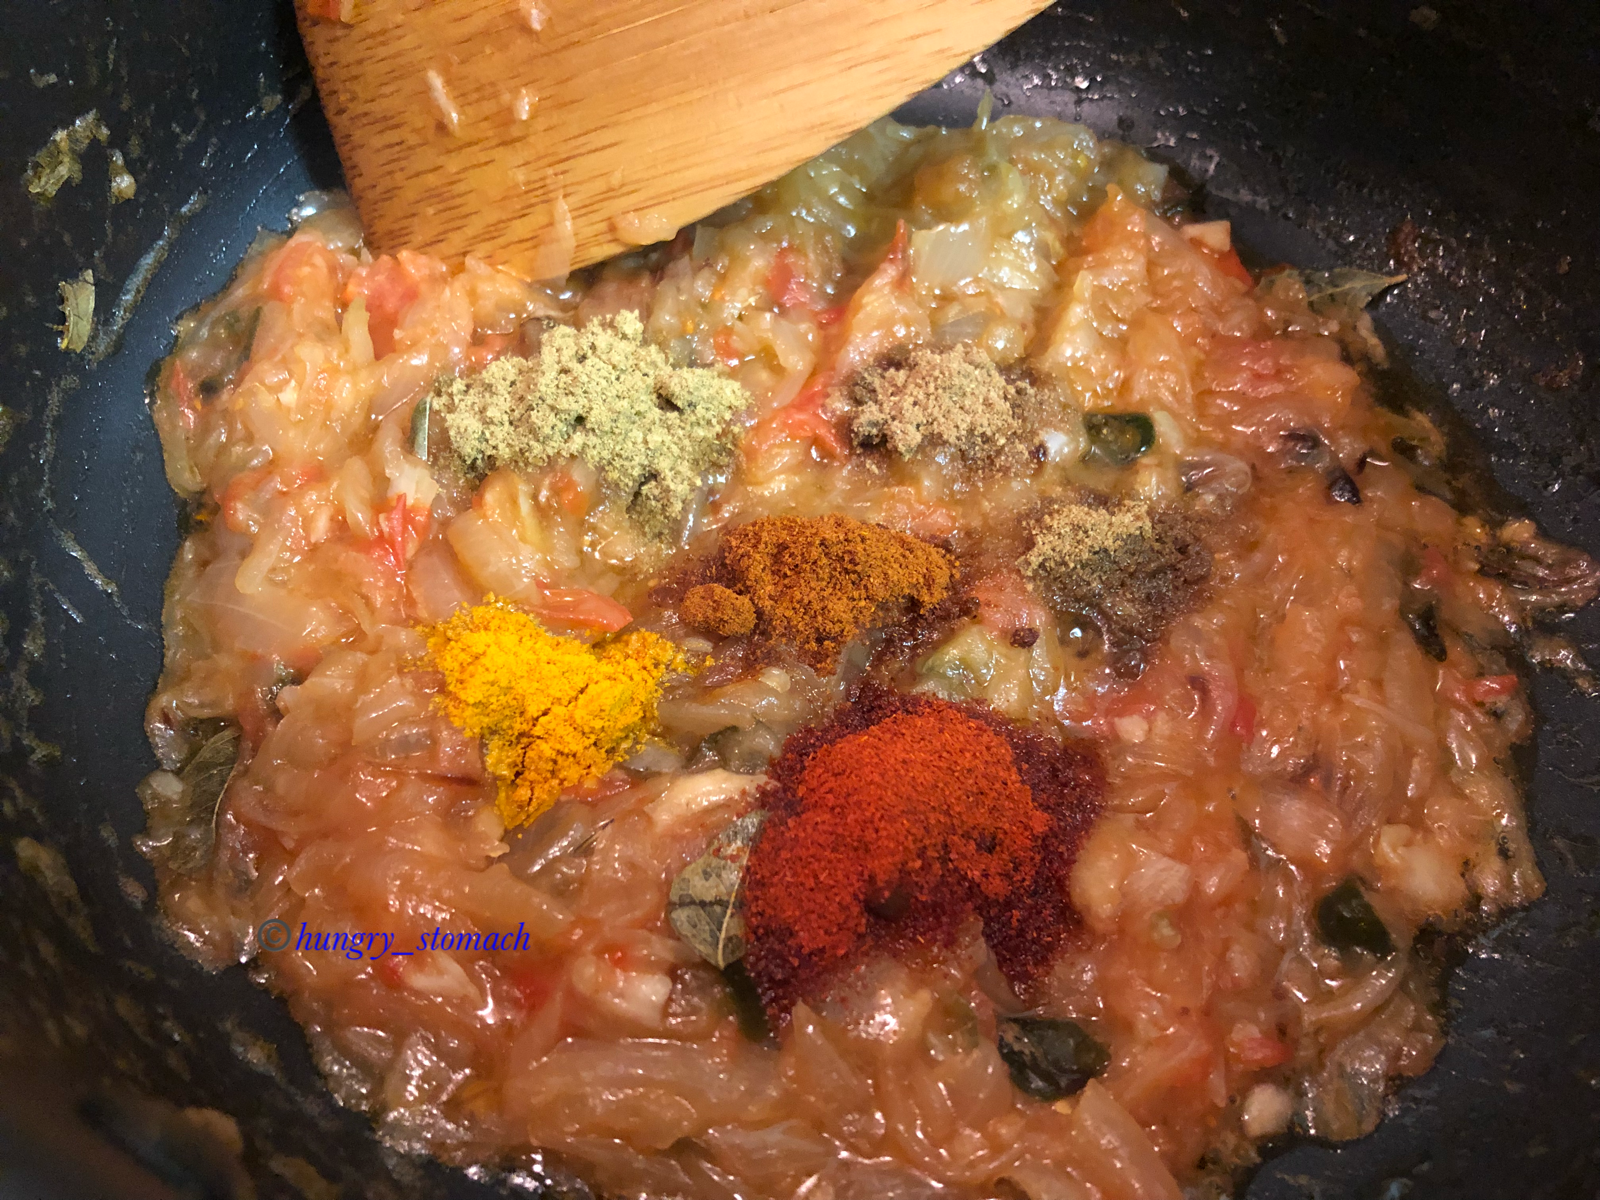
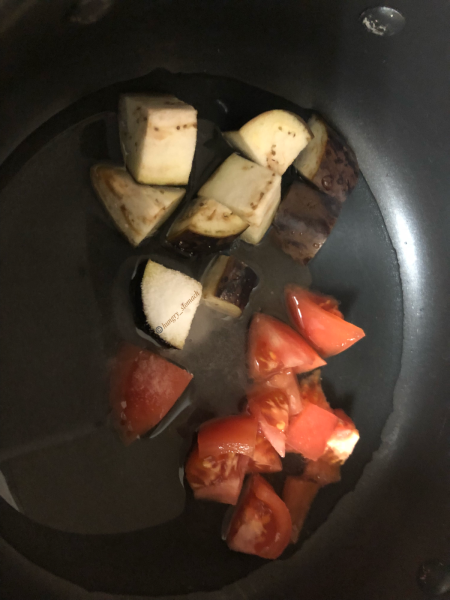
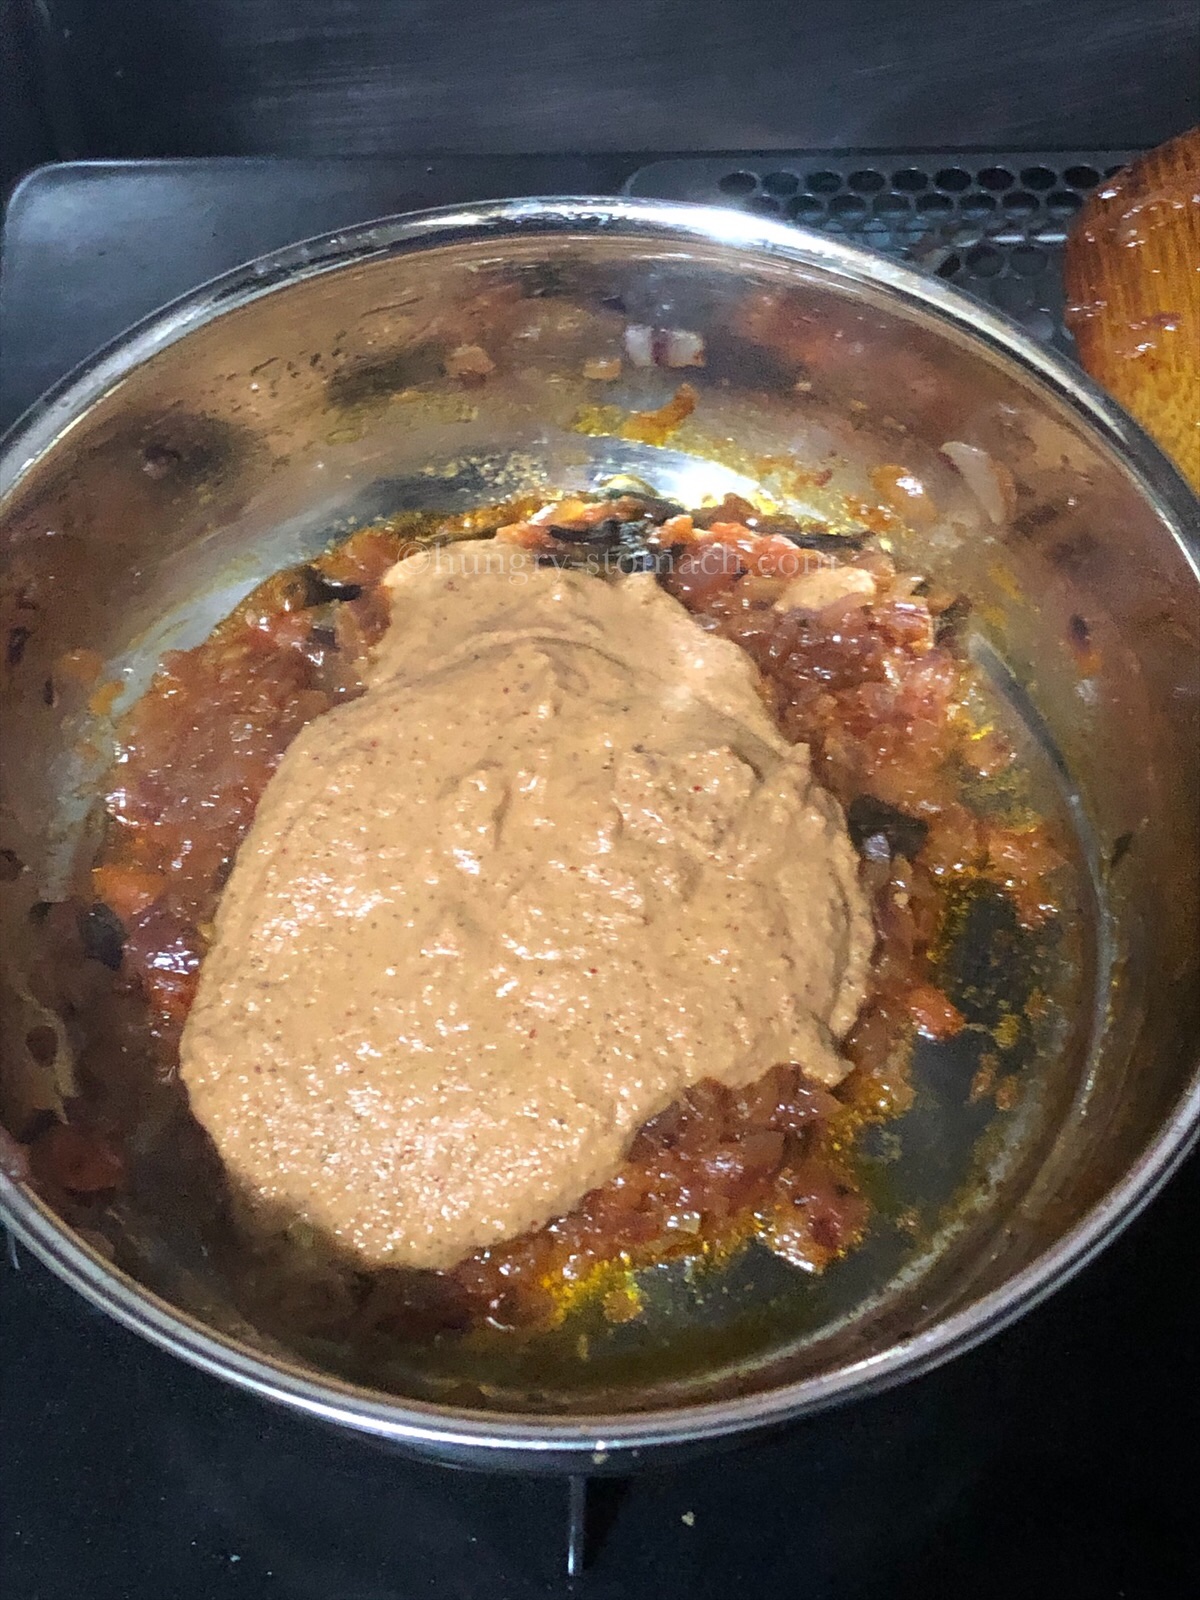
  5. Add tomatoes and cook until tomatoes turn soft and mushy.
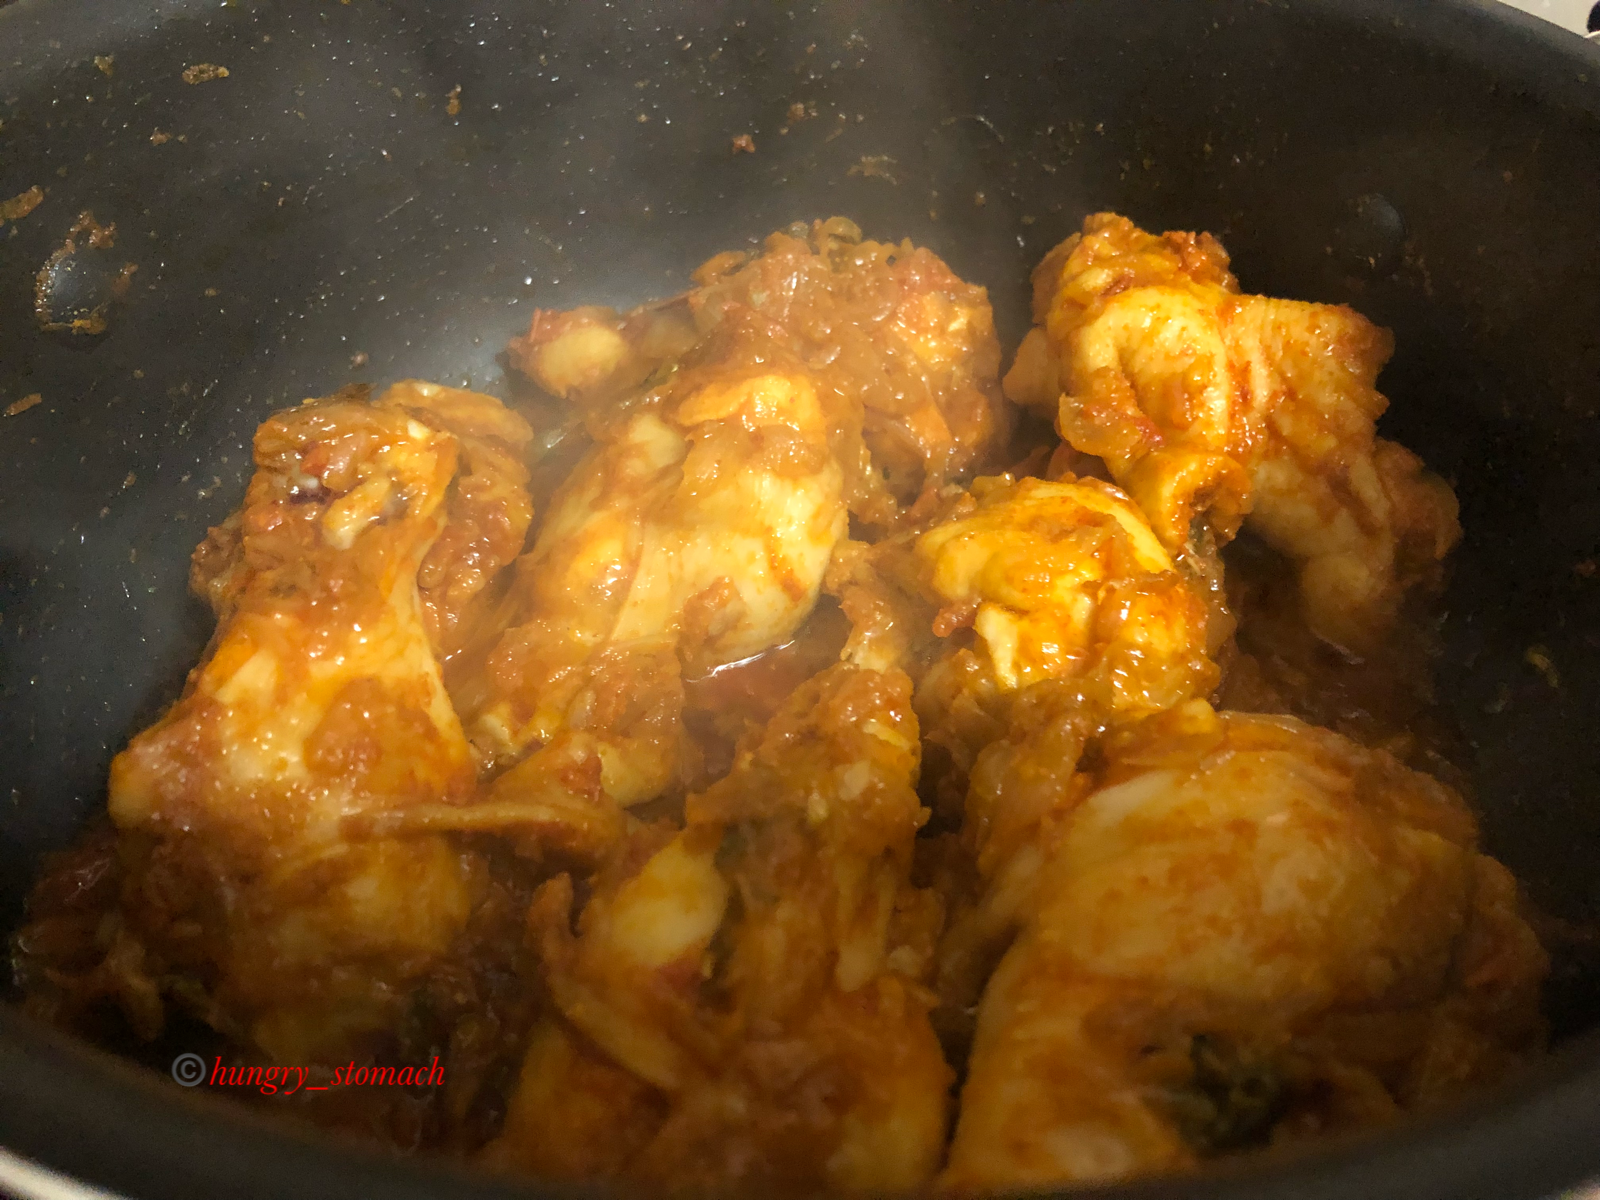
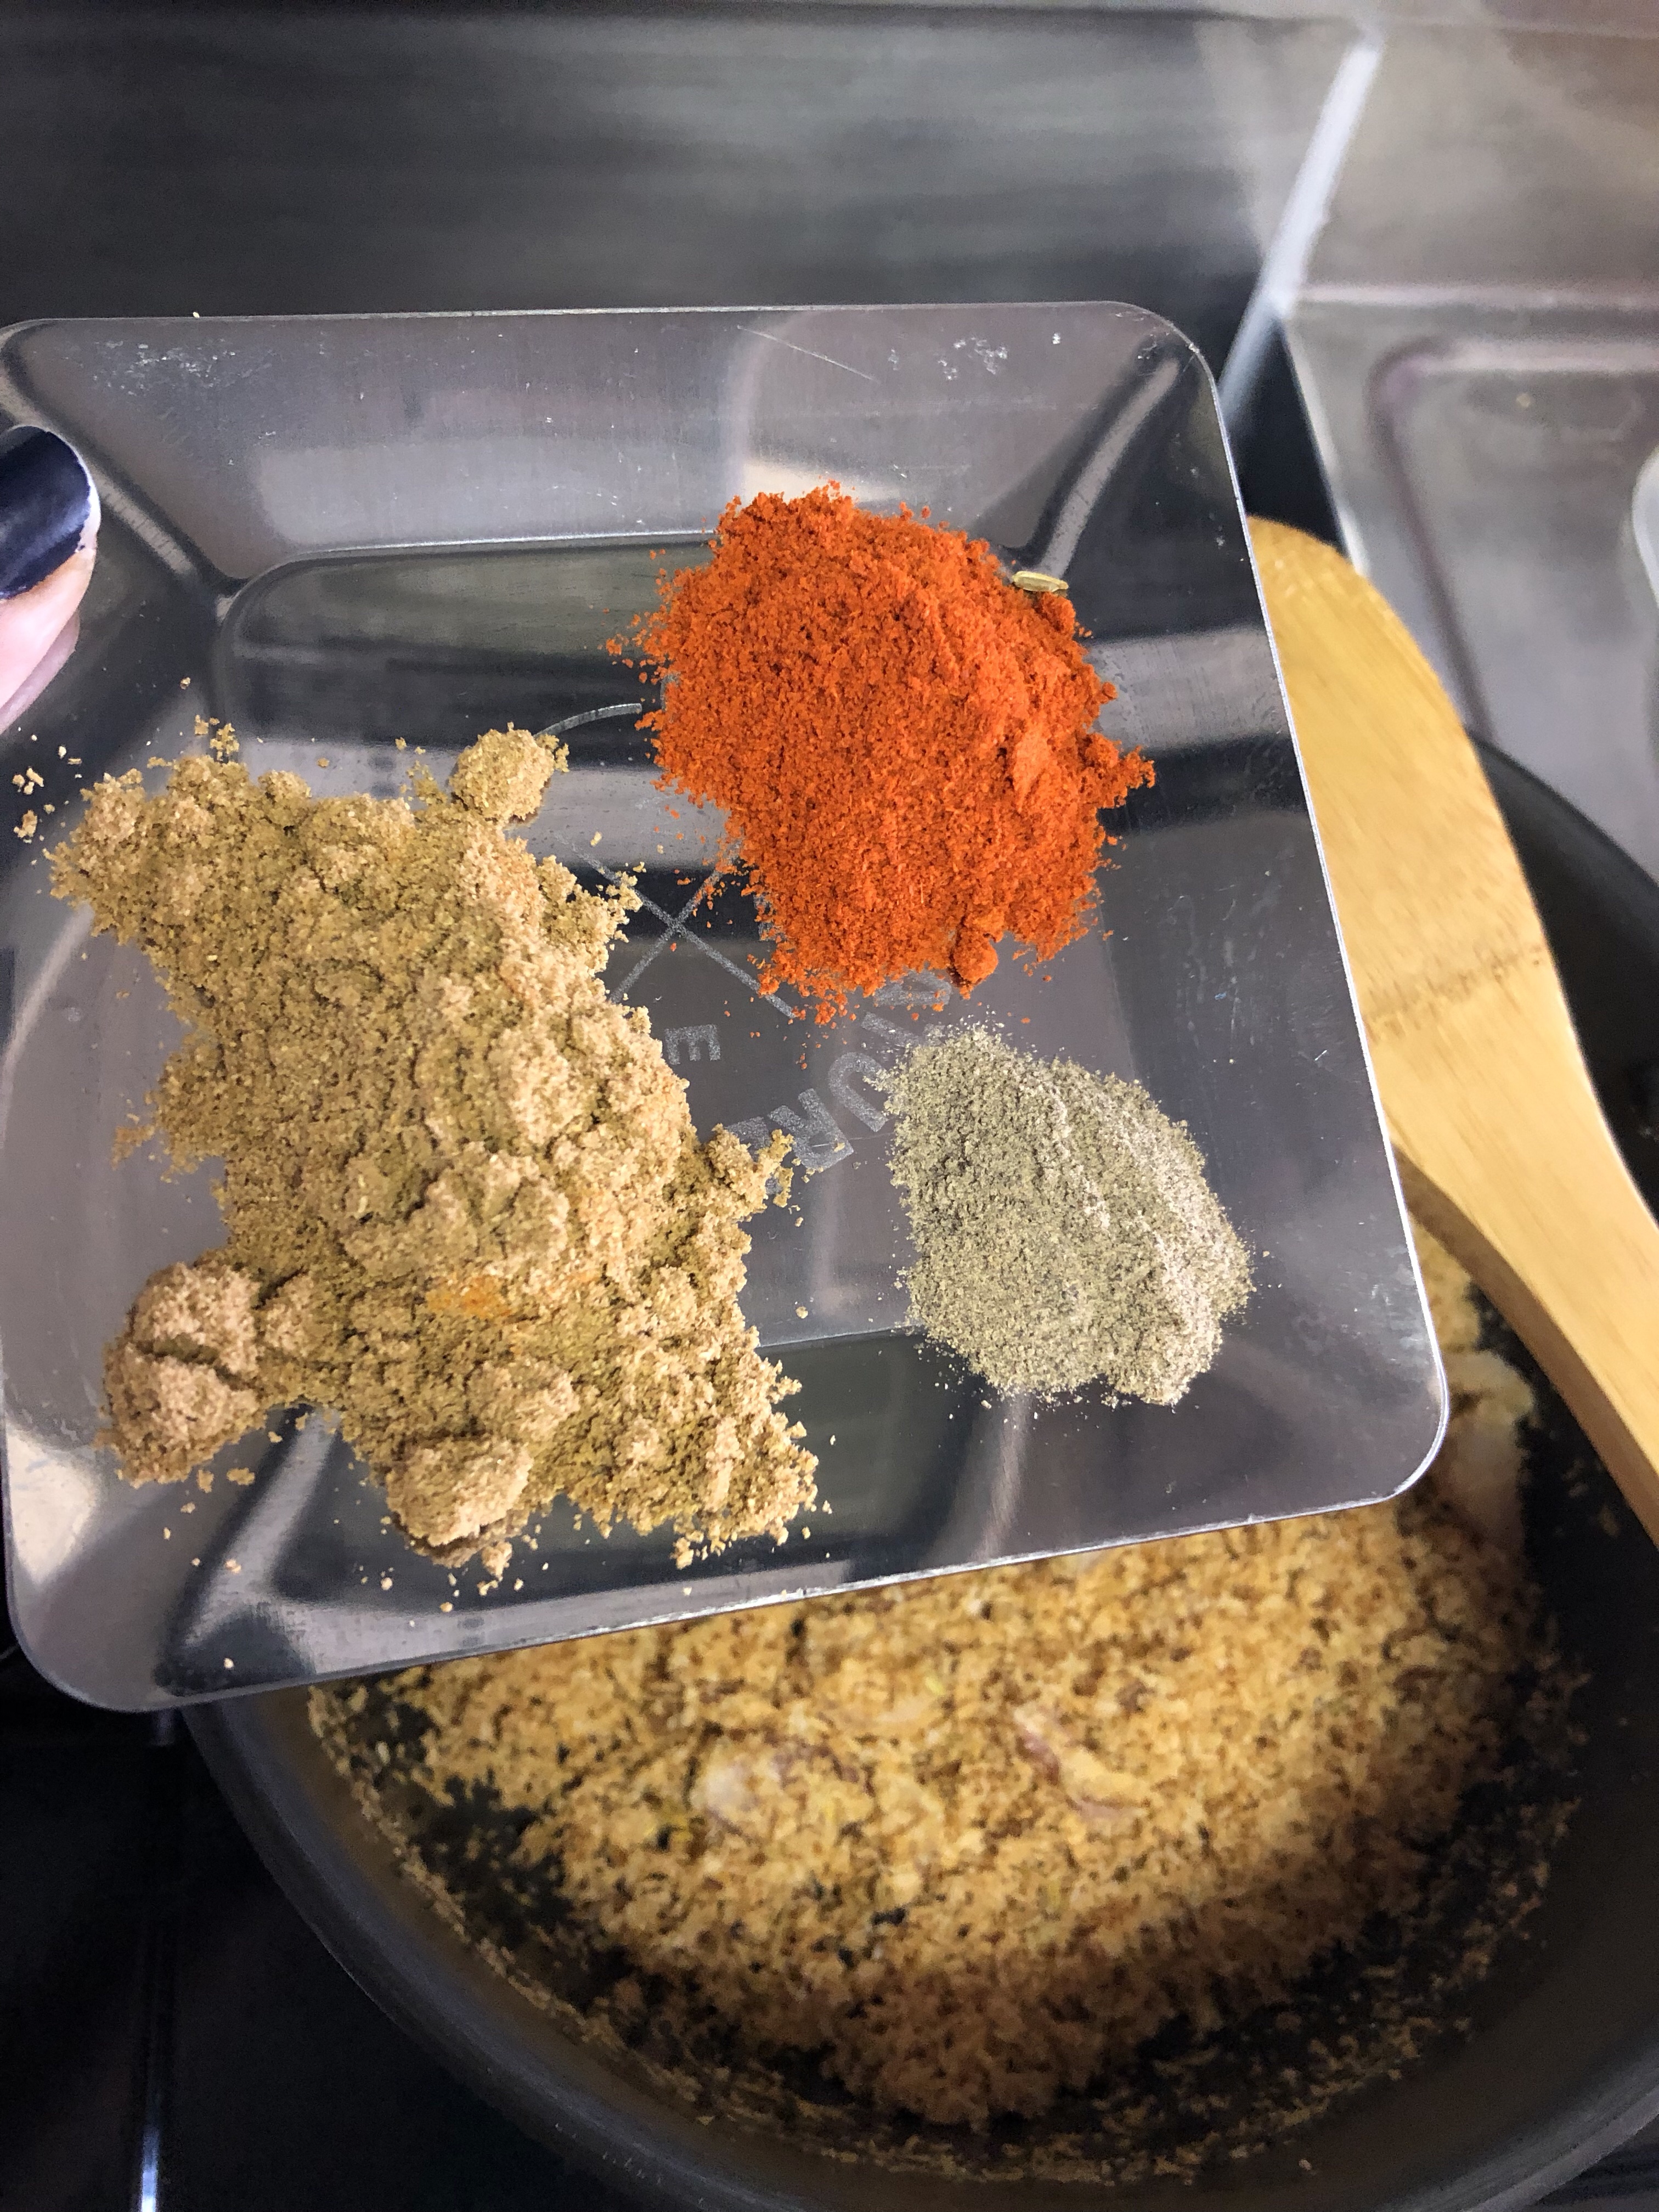
  6. Now add in the spice powders along with salt and fry until oil oozes from the sides.
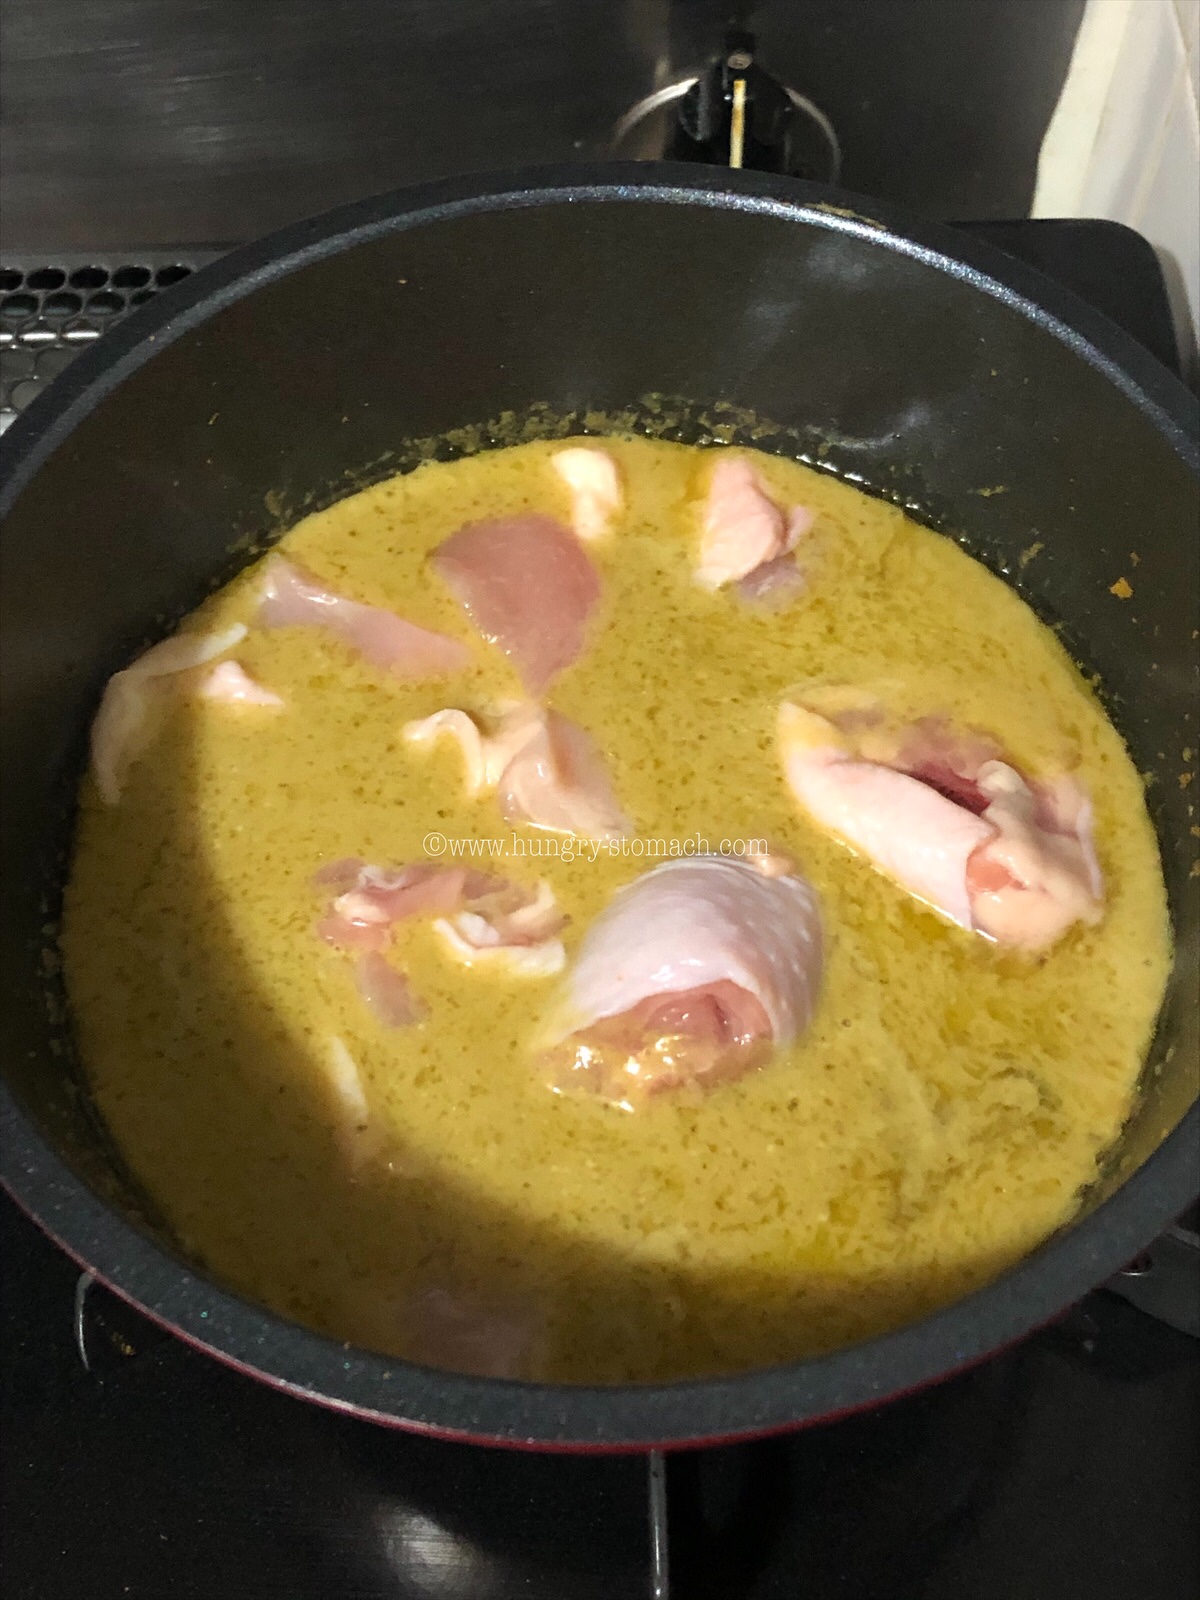
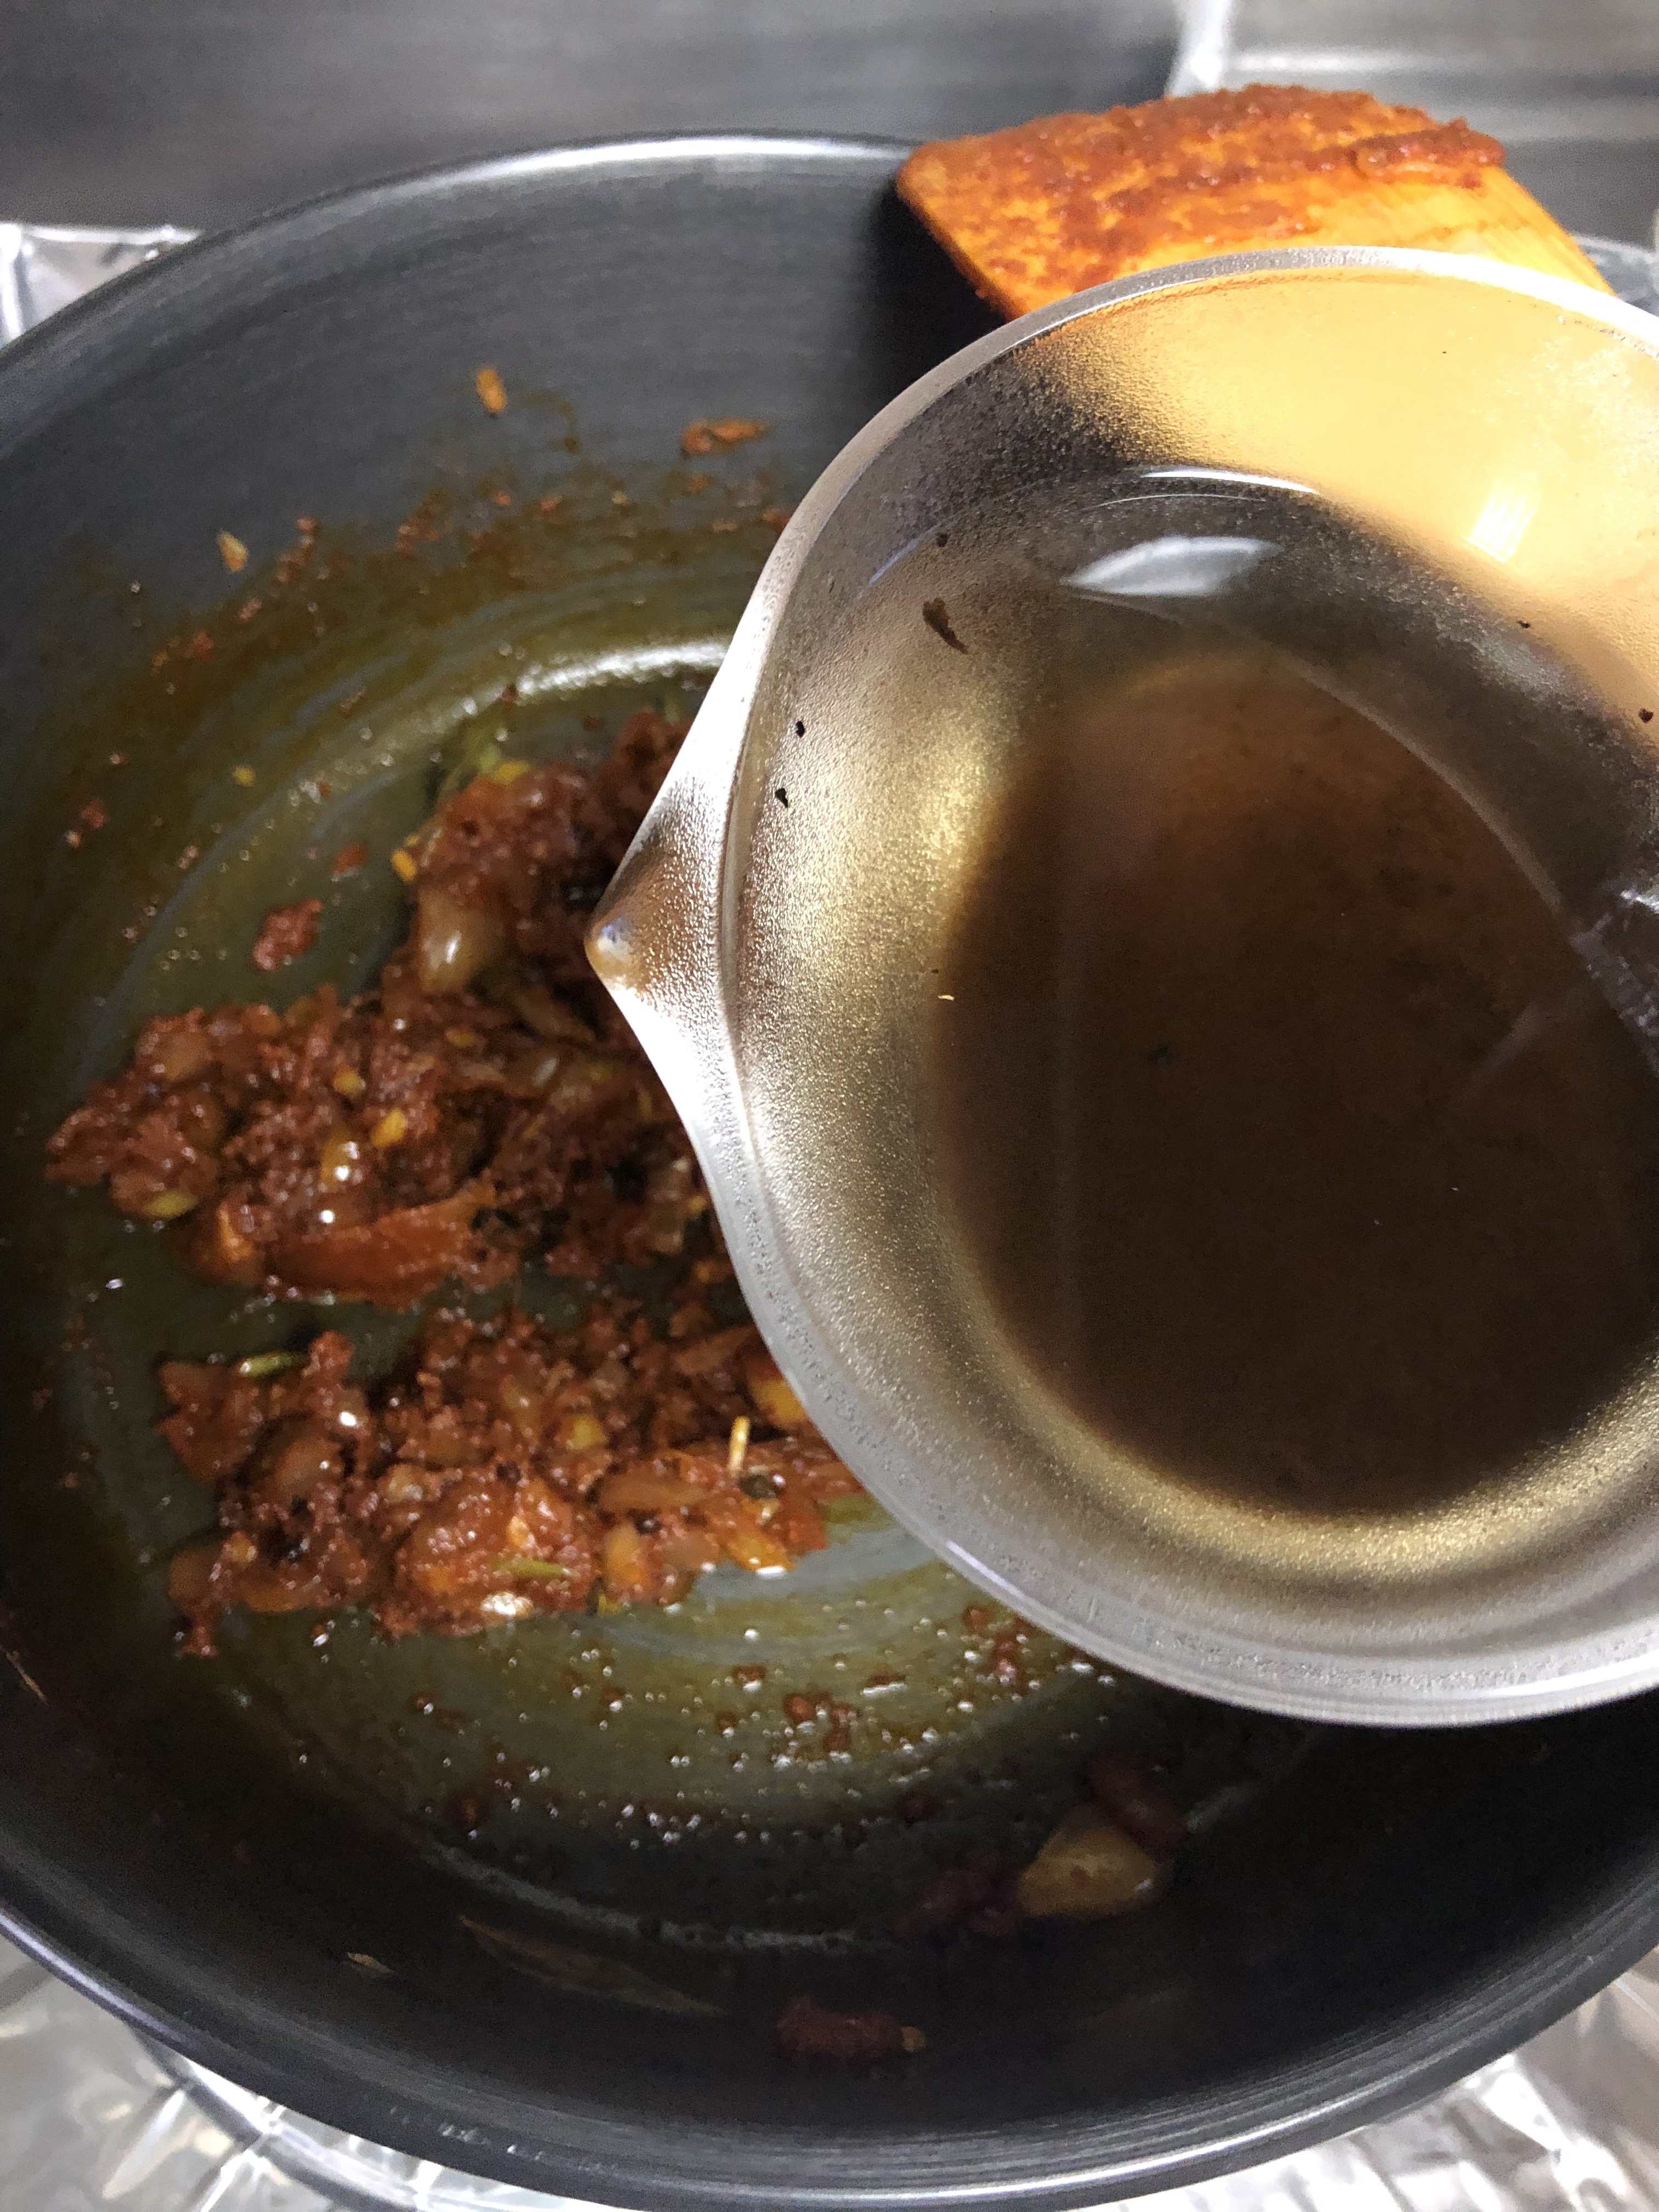
  7. Further to this, pour in the masala paste, tamarind paste and fry the masala for a couple of minute.
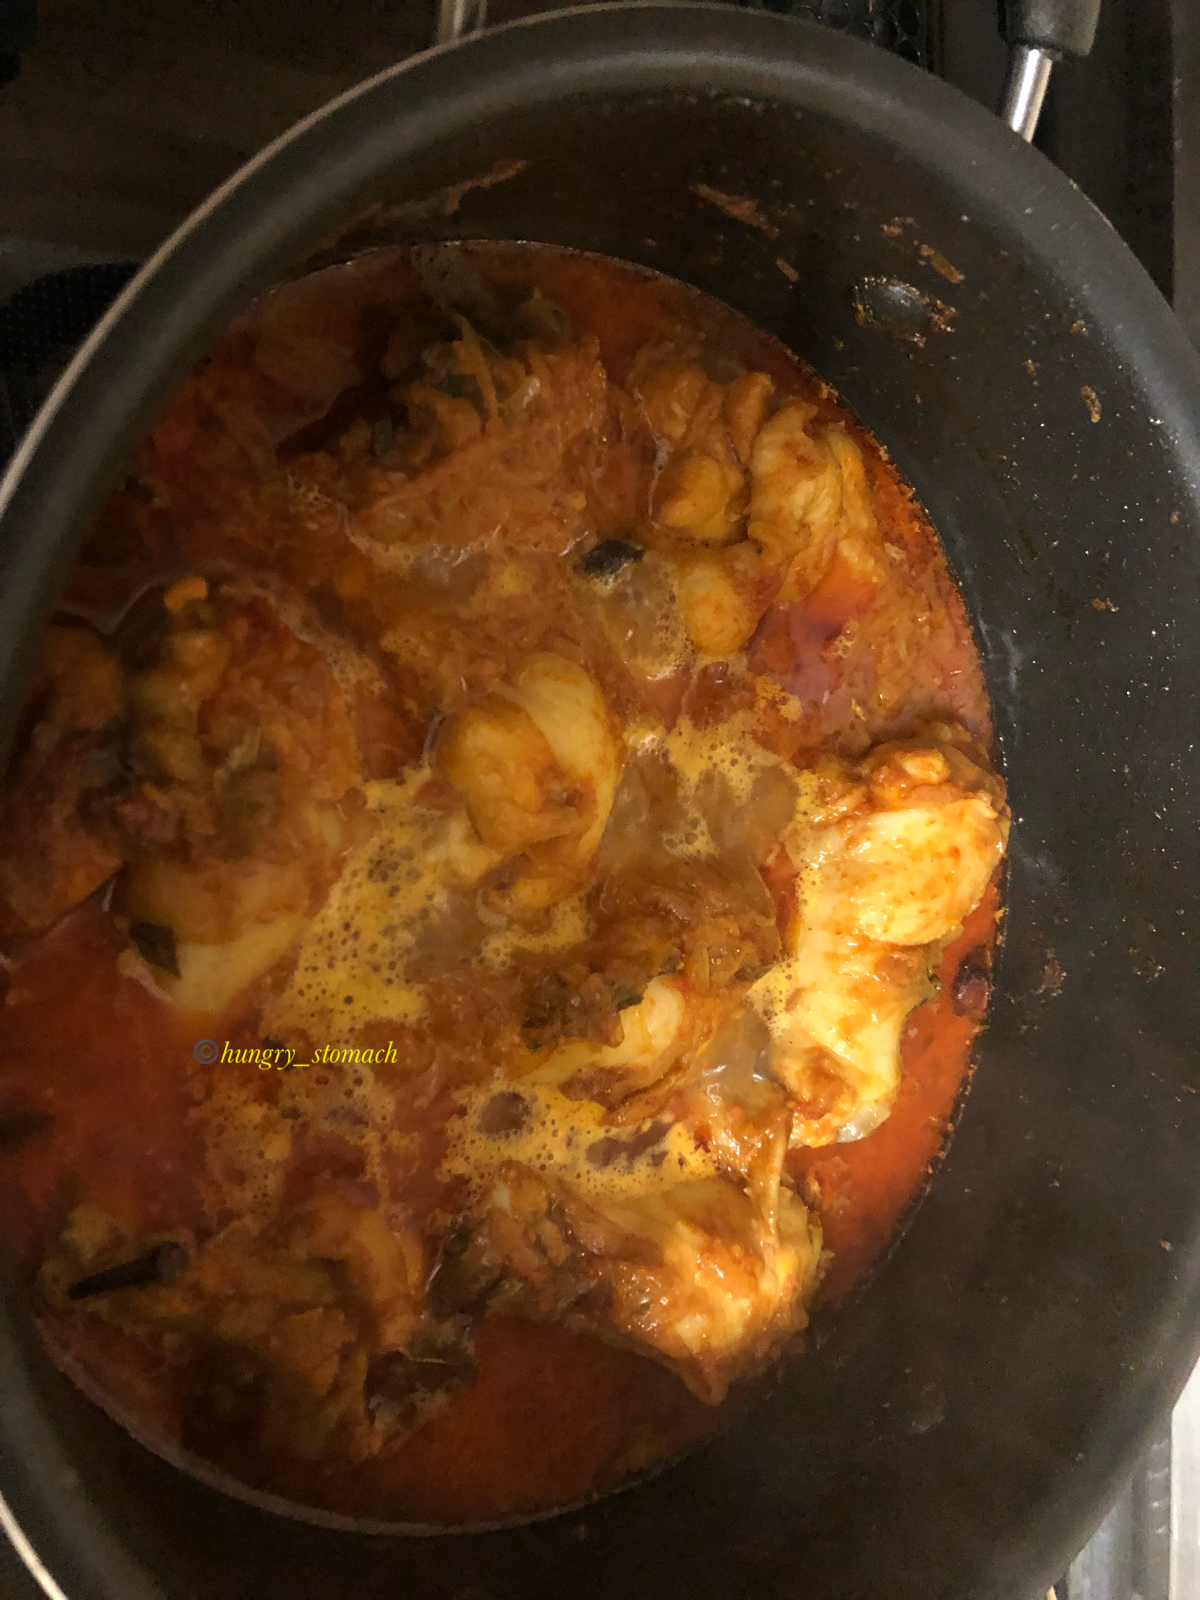
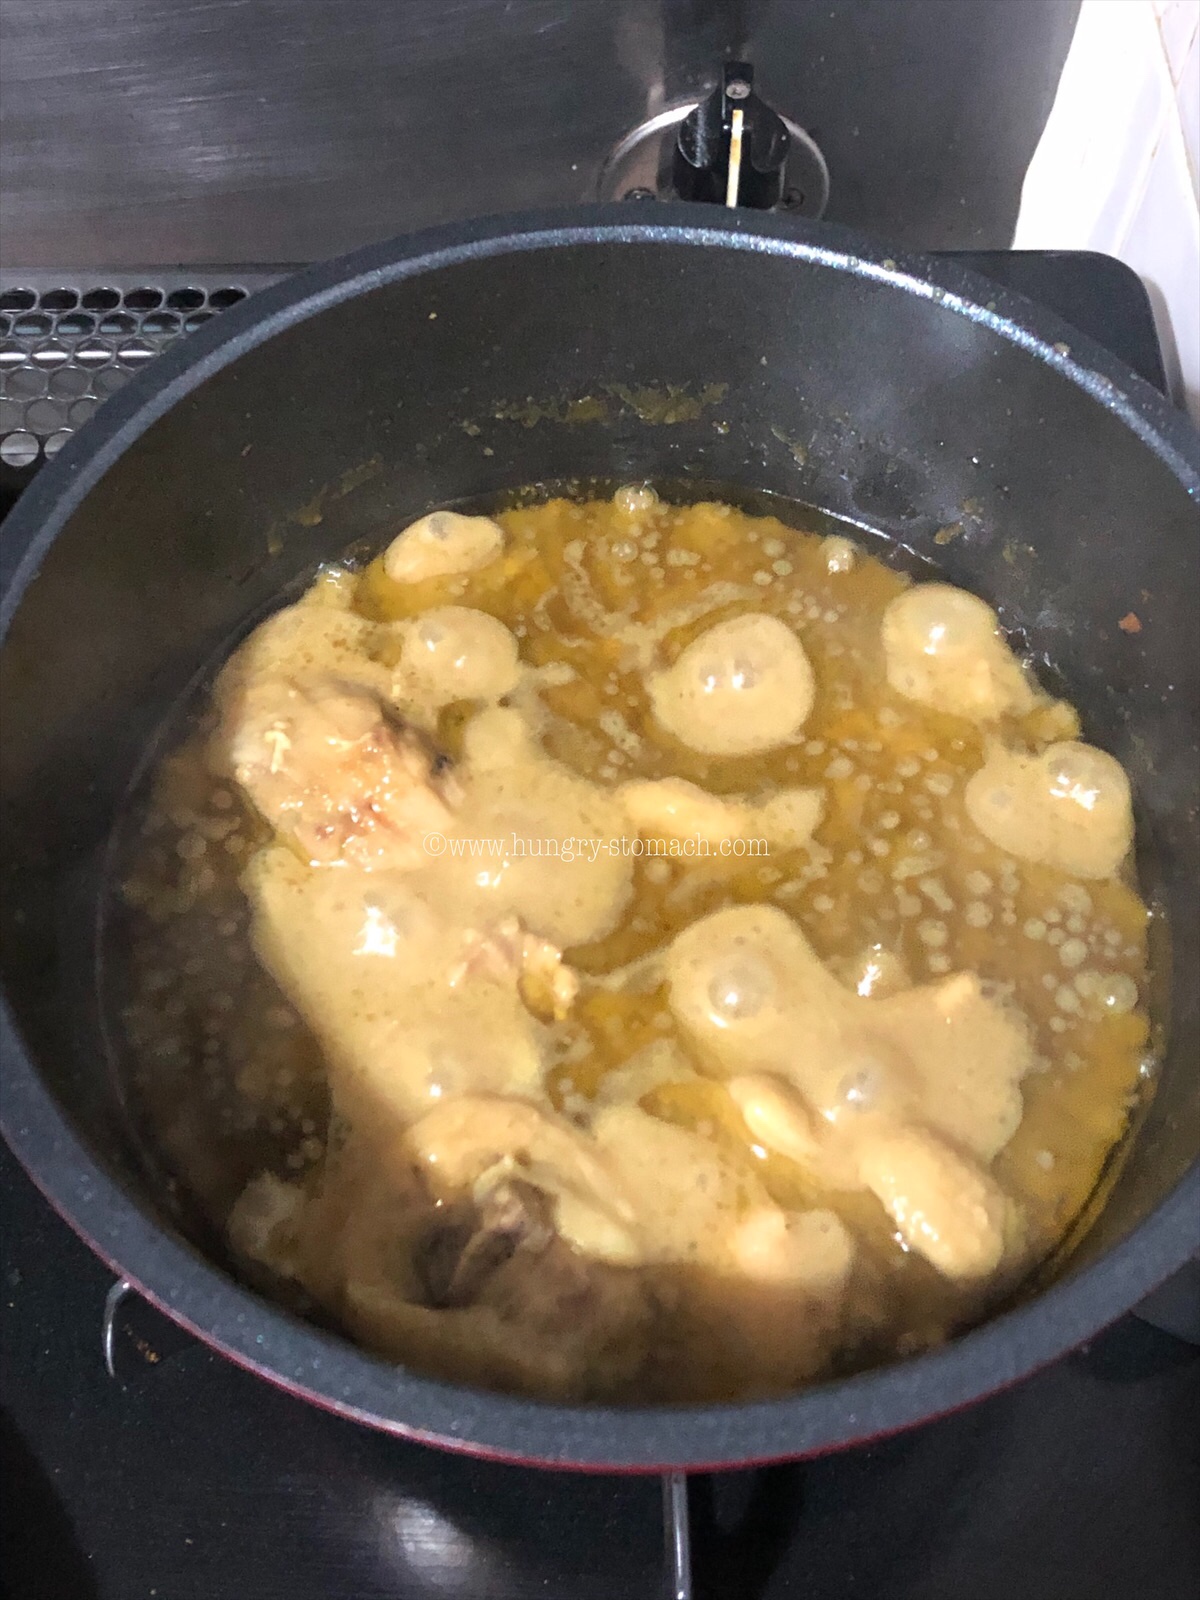
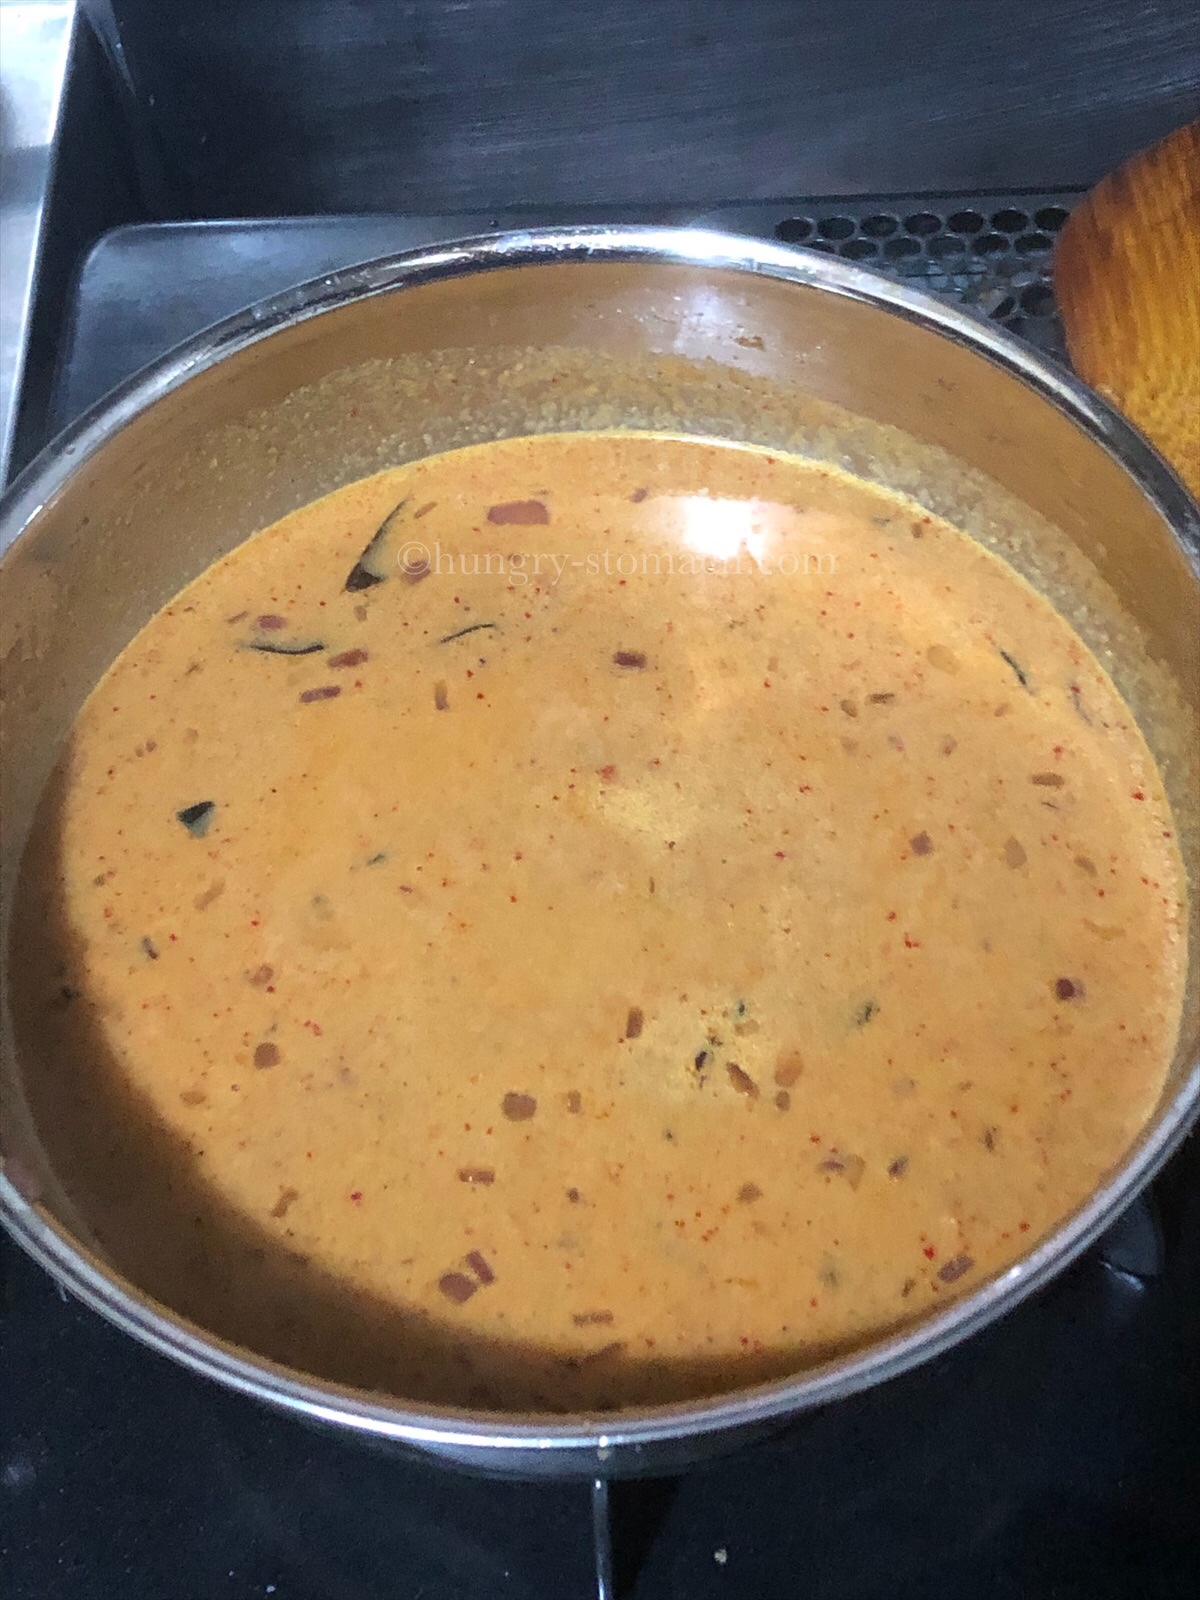
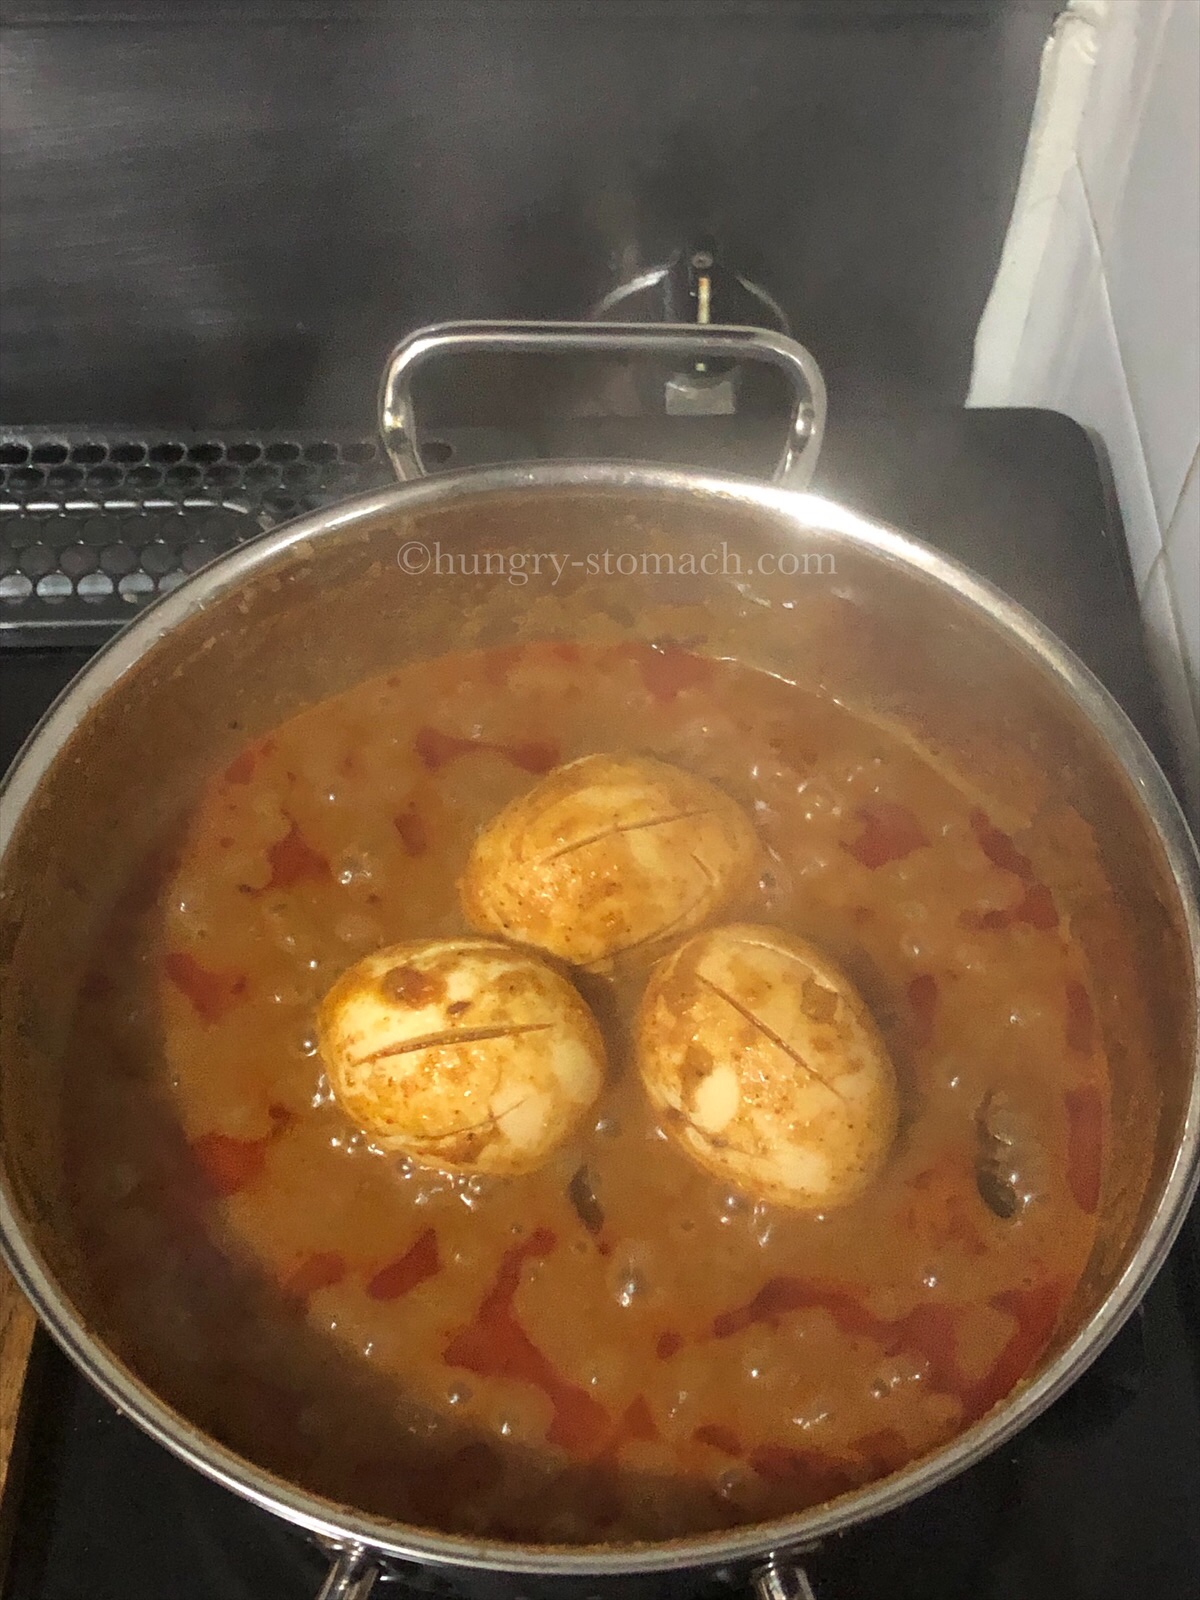
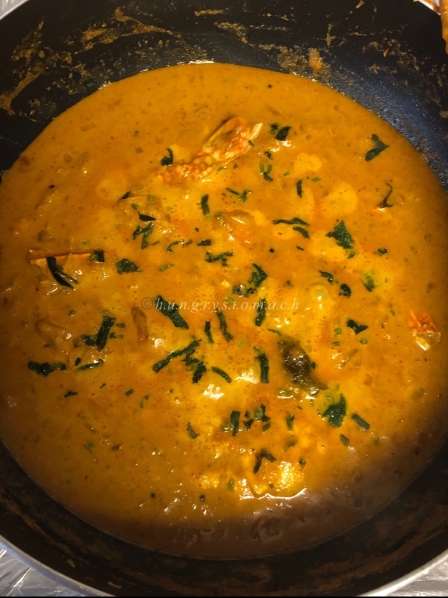
  8. Add 1.5 cups water based on the consistency you require. Mix well. Close and cook on medium heat for about 15 minutes. 
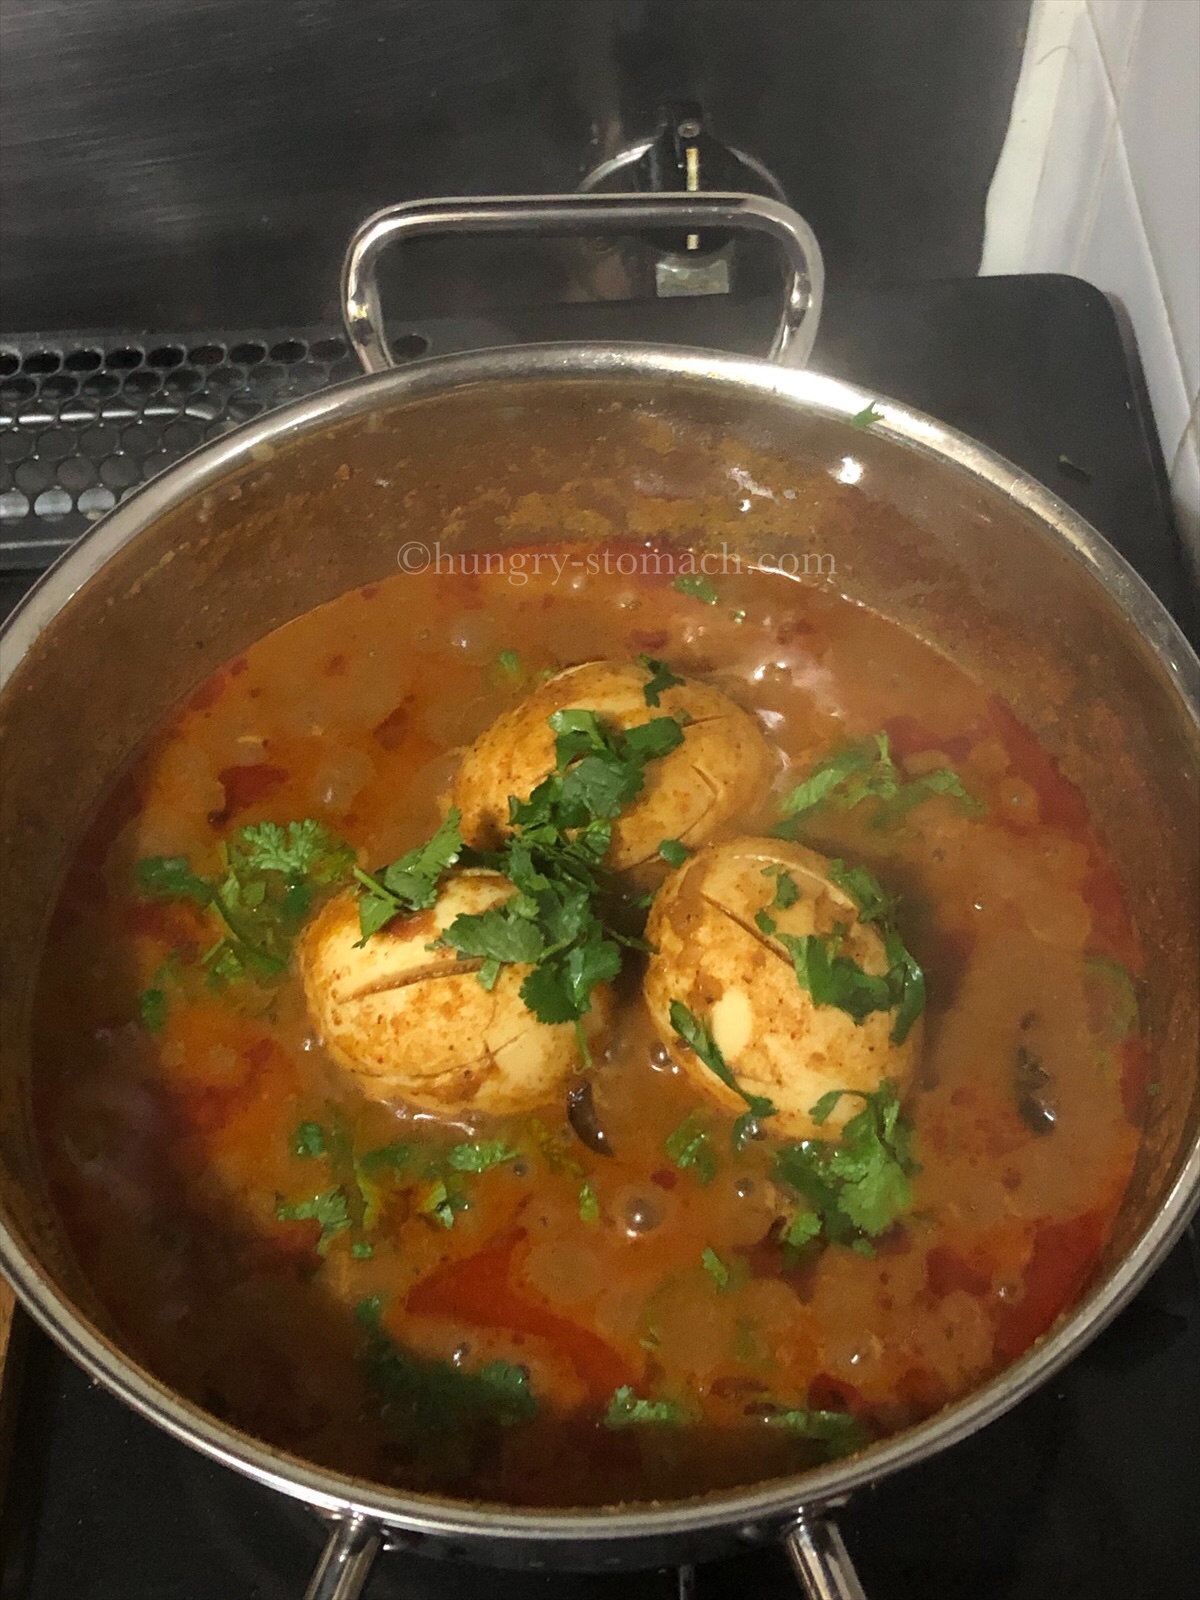
  9. Open the lid. Give a gentle mix and add the boiled eggs into the curry, simmer and cook for another 8 to 10 minutes.
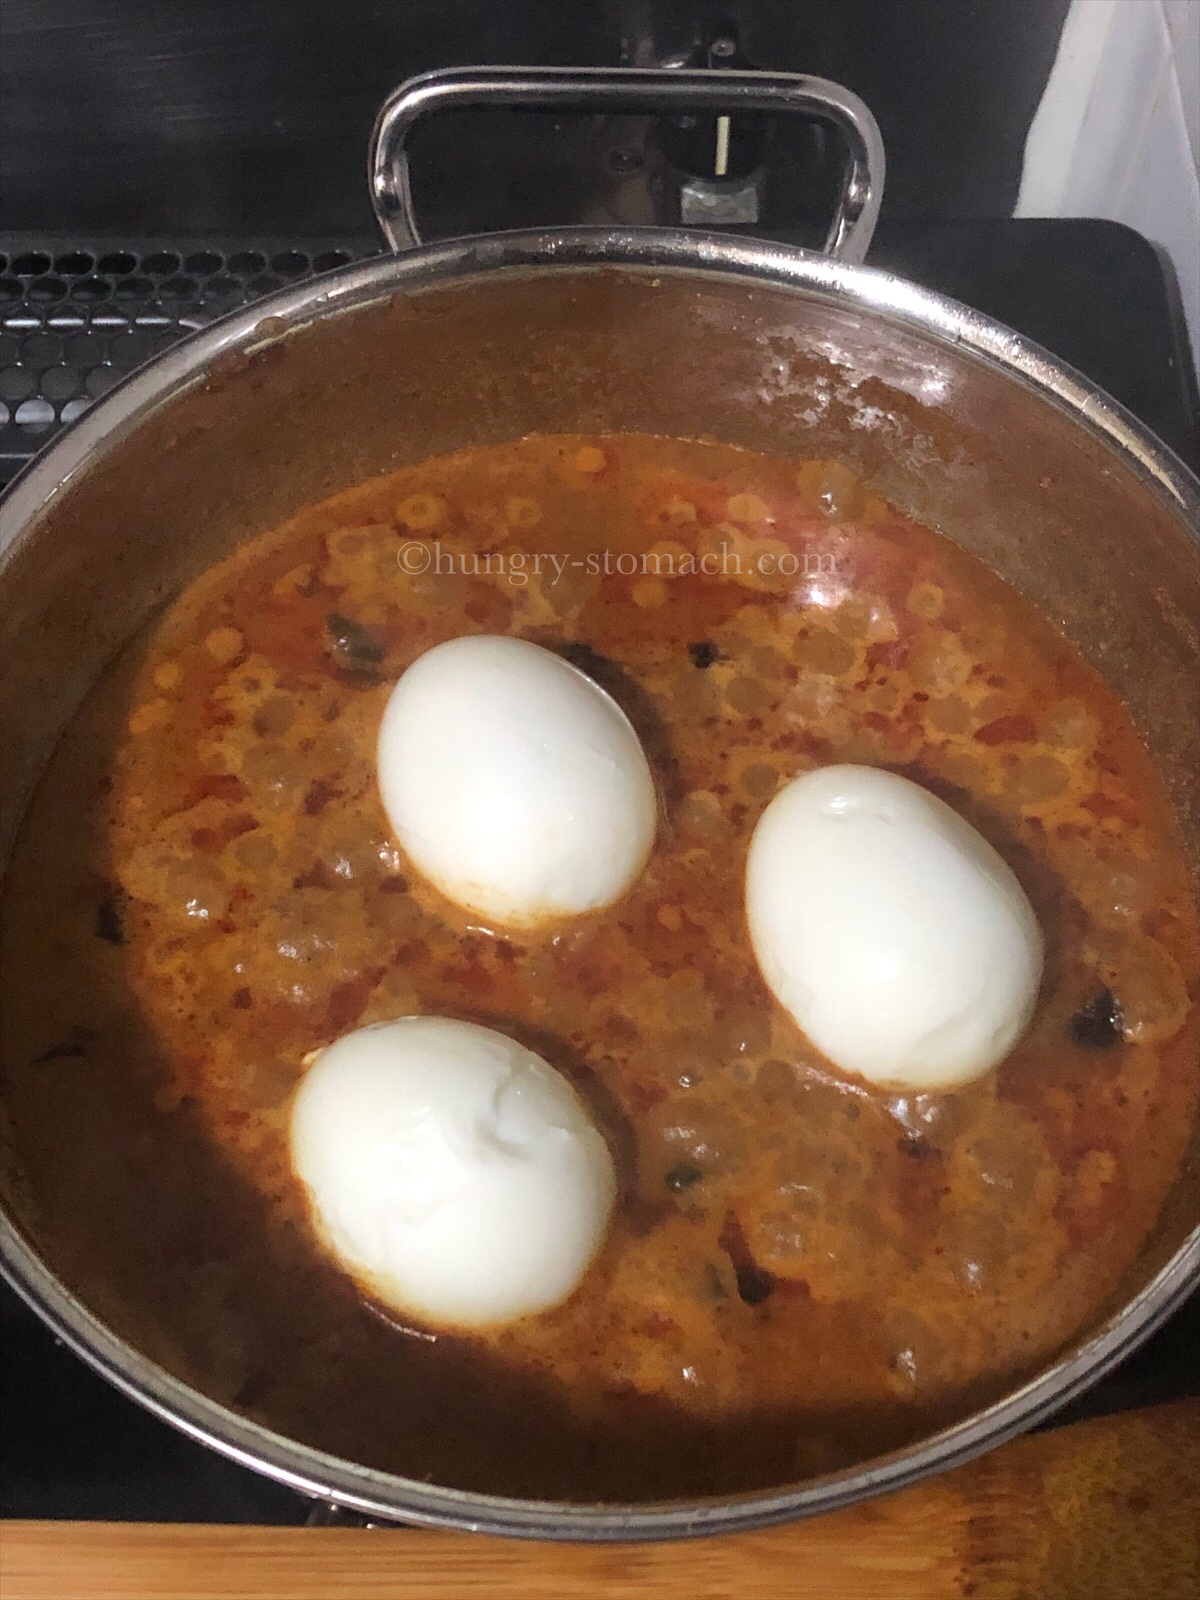
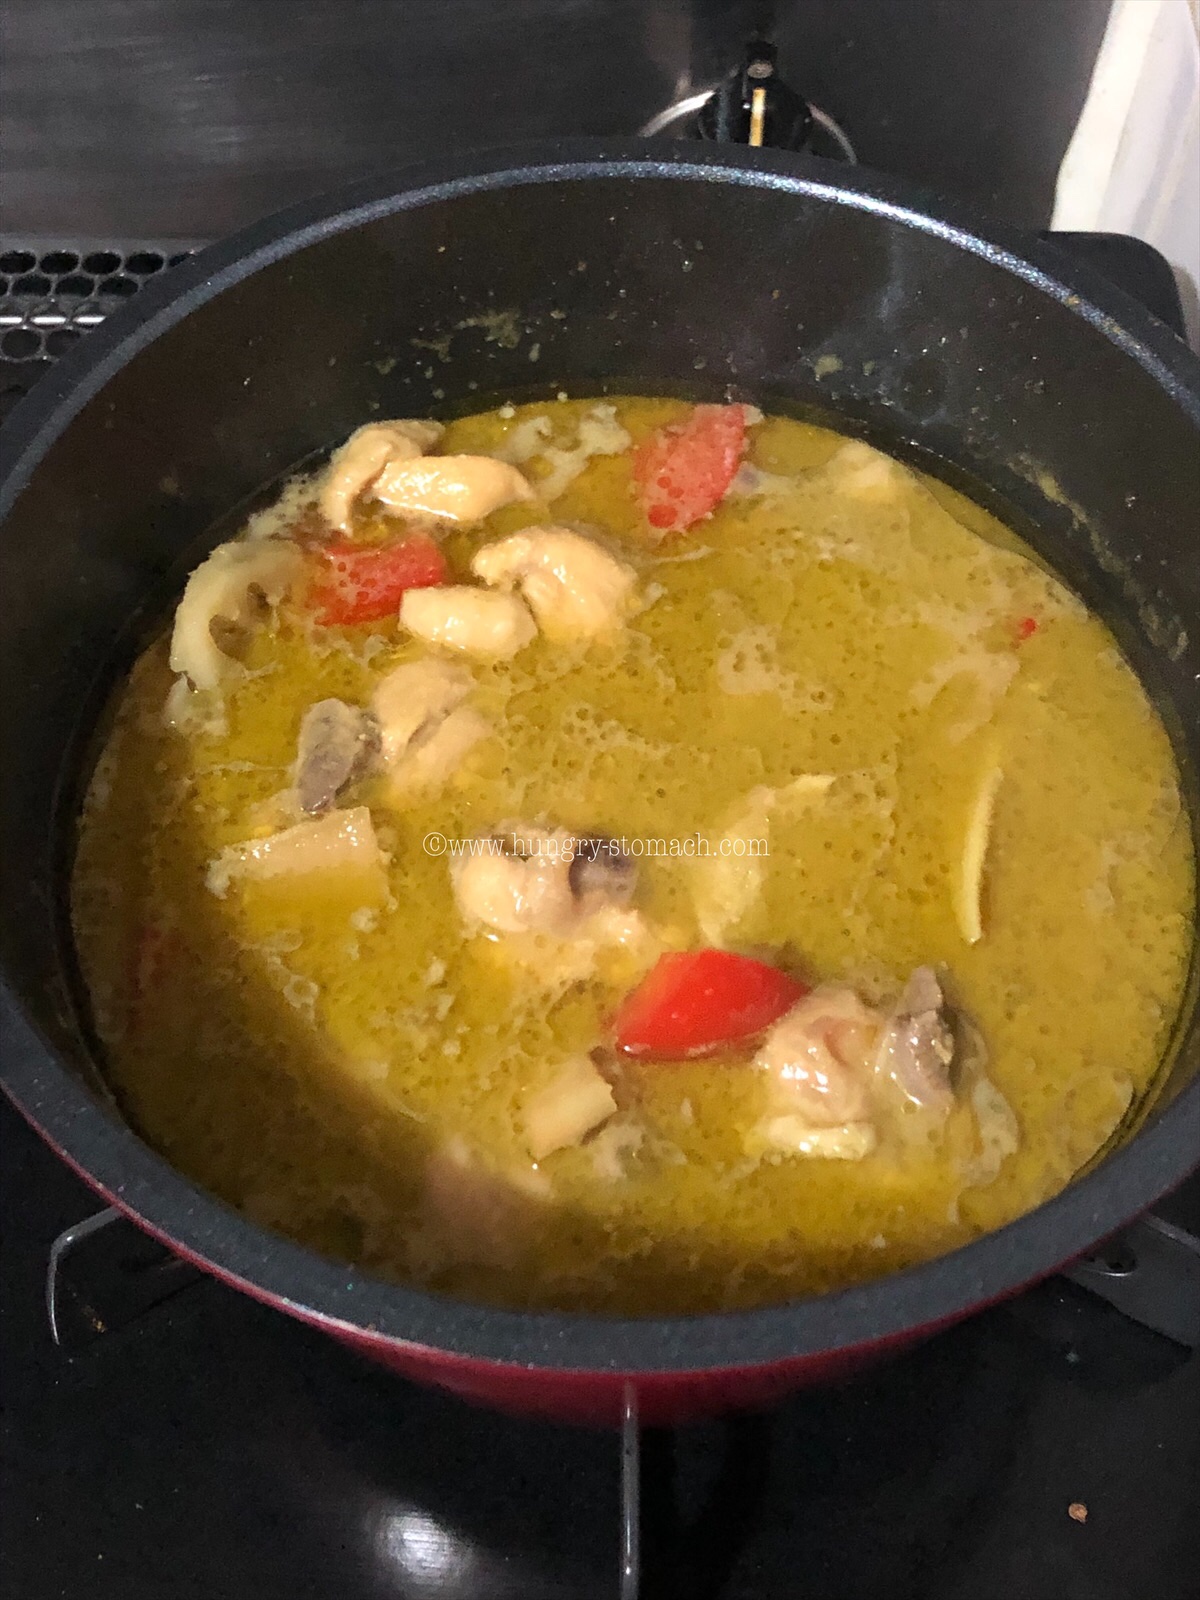
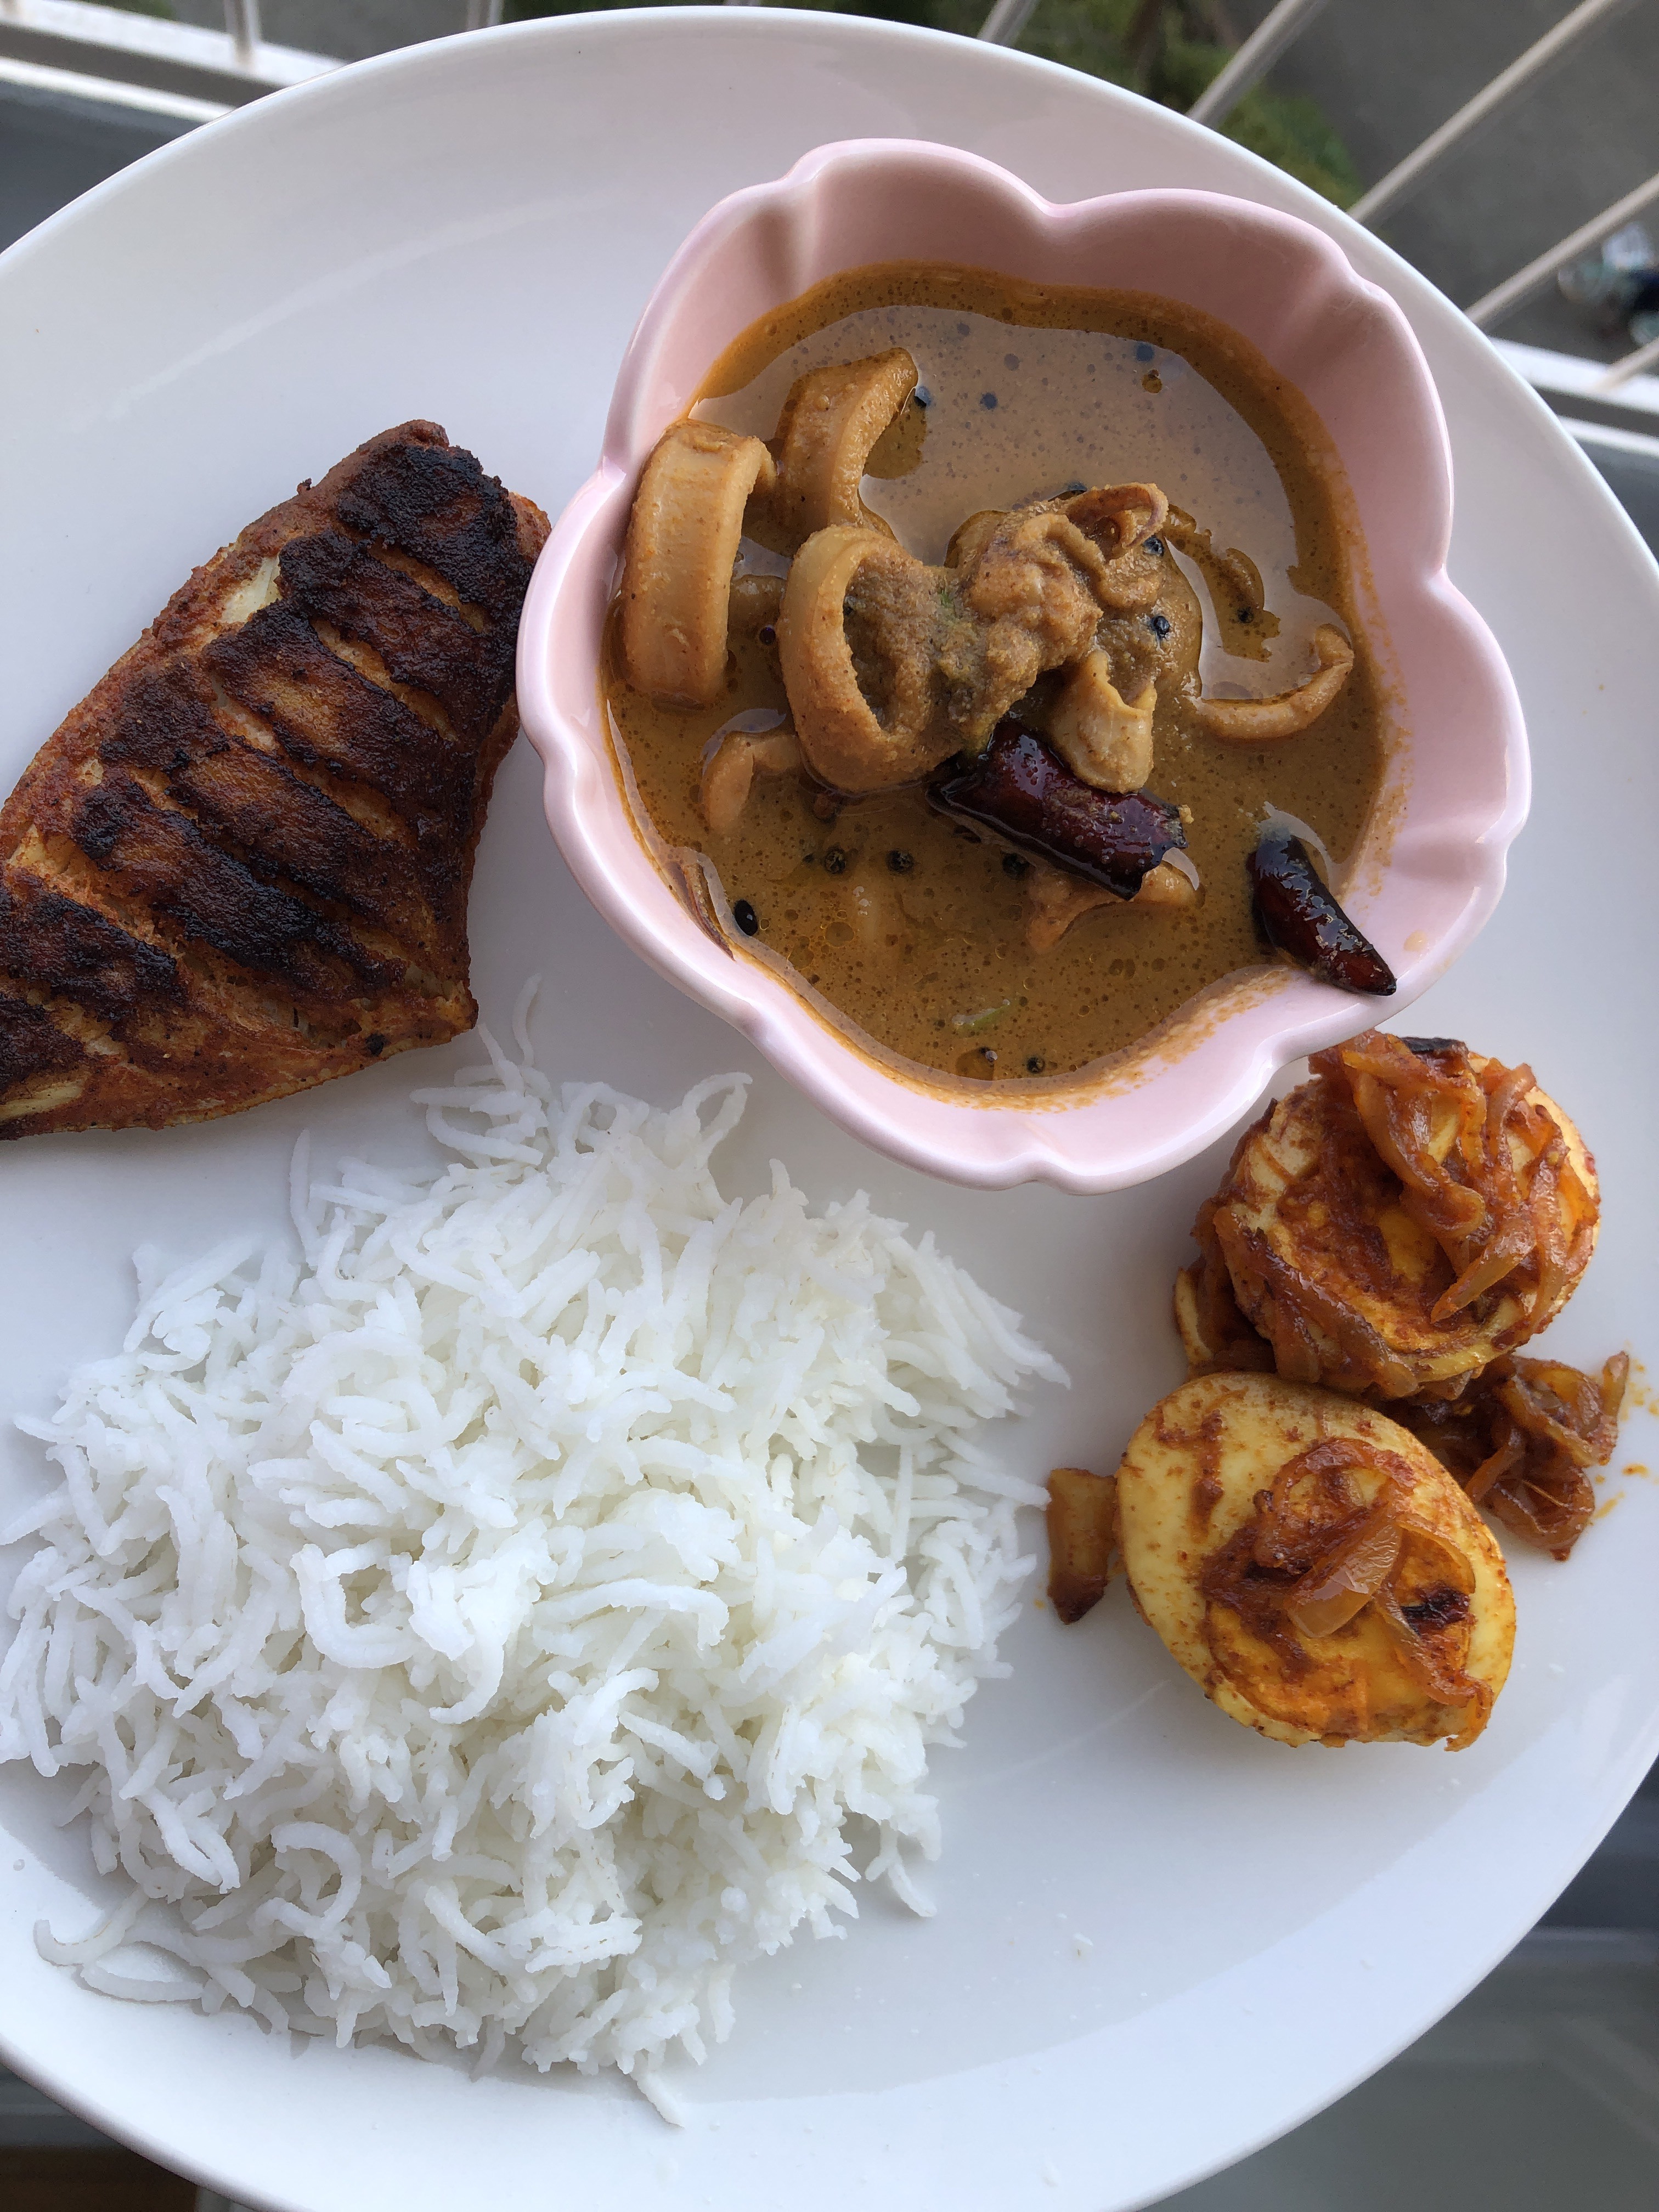
  10. Once the curry reaches the desired consistency, turn off the flame. Garnish with chopped coriander leaves.
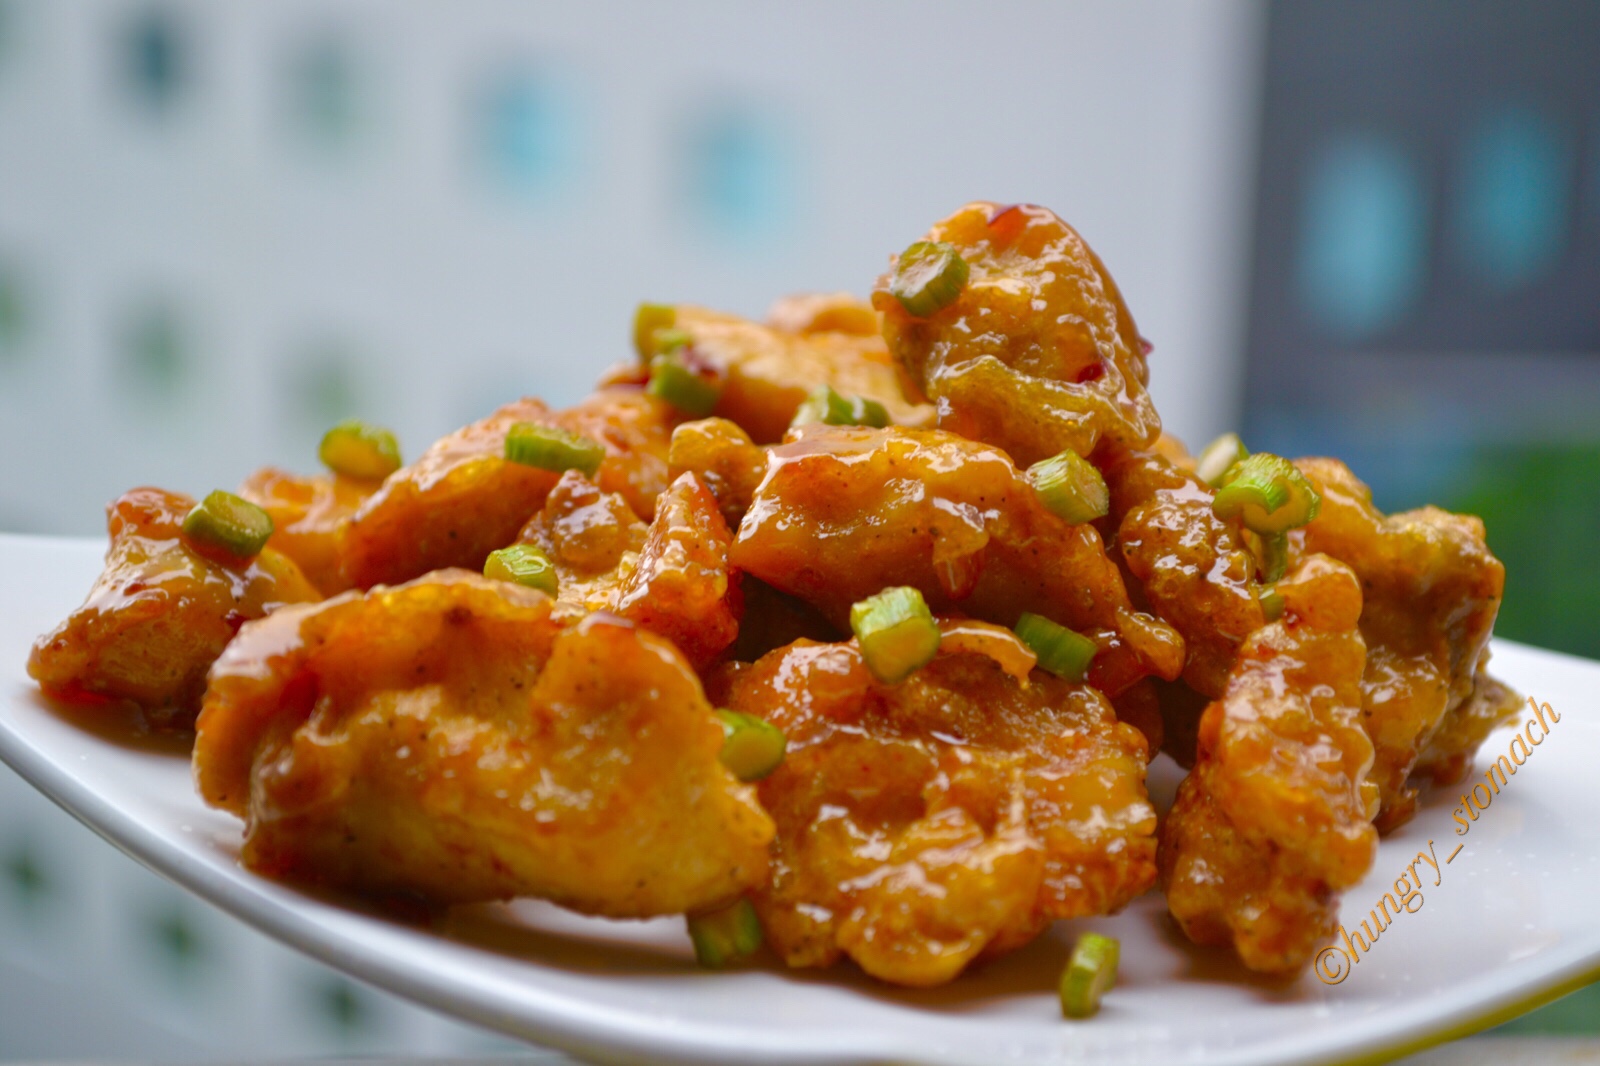
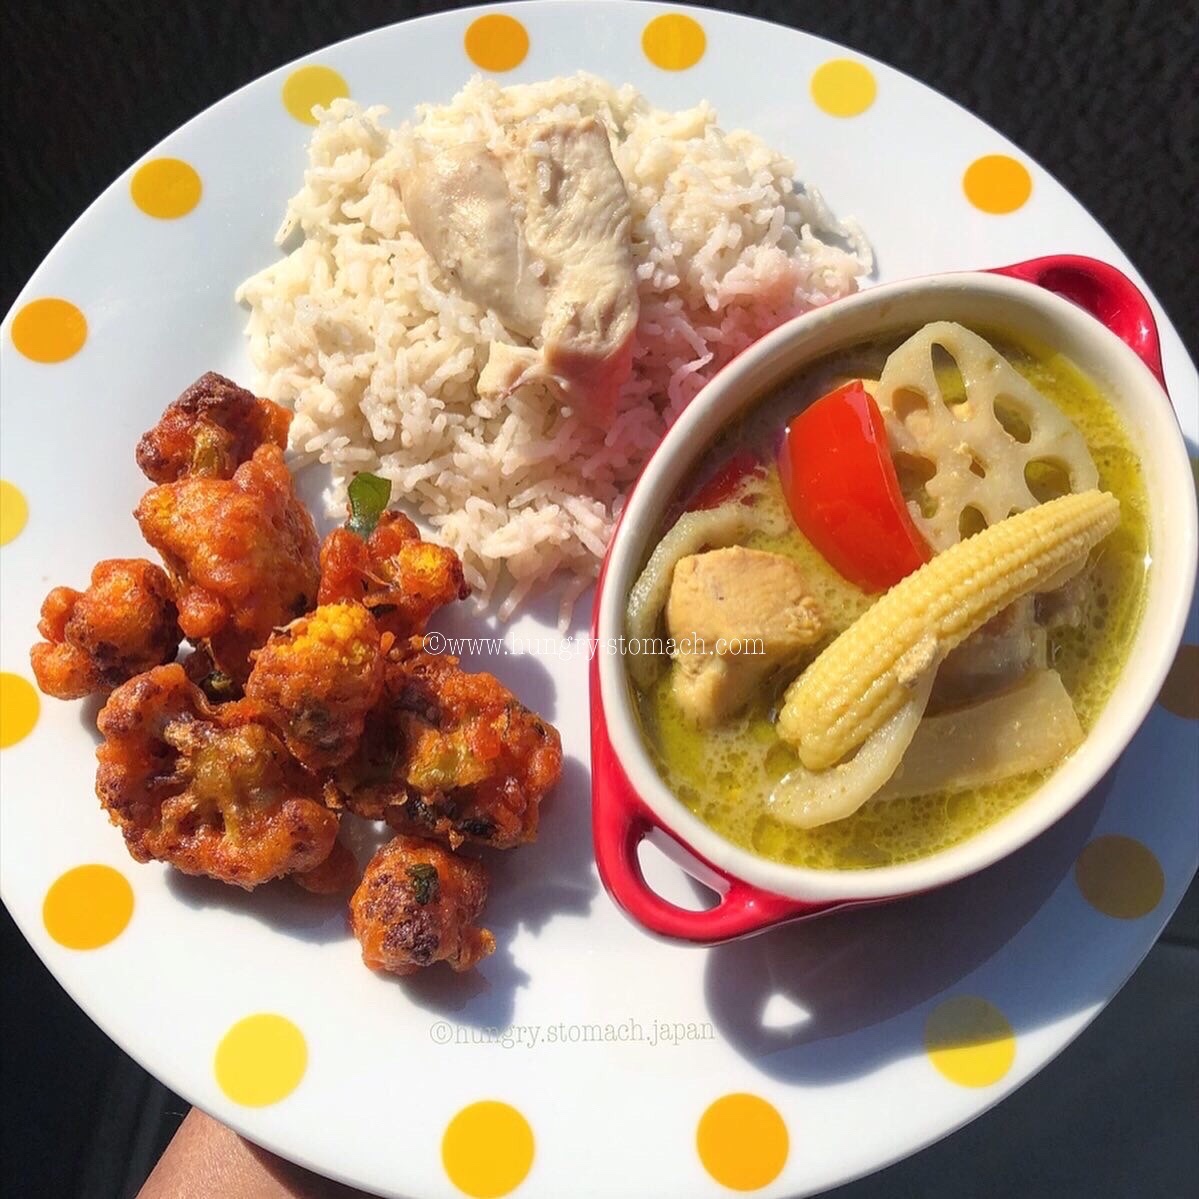
  11. Relish with Roti or rice of your choice.


Pepper Chicken| Chicken Kali Mirch |Murgh Kali Mirch |Kurumilagu Chicken Curry |

Pepper Chicken Masala or Murgh Kali Mirch is a delicious recipe that is cooked with loads of freshly ground Black Peppercorns.

With aromatic chicken pieces swimming in an incredible sauce, this Pepper Chicken Masala recipe is one of the best you will try!

The combination of right spices going into this tomato based curry is so perfect that explode the curry with flavour. You can adjust the amount of black peppercorns to suit your spice preference.

There are many many ways a pepper chicken masala can be made. This is one of the most simple, home style pepper chicken recipe for beginners.

The BEST side is hot and fresh Ghee rice and Chapathi/Rotis. For the best charred results, use a well seasoned cast iron skillet if you have one.ezy-watermark_24-05-2019_08-13-29am.png


Author: Nathiya Adiseshan

Preparation Time: 10 mins

Cooking Time: 20 mins

Serves: 3

INGREDIENTS

For the spice masala

  • 3 tsp Black peppercorns
  • 1 tsp Cumin seeds
  • 1/2 tsp Fennel seeds
  • an inch Cinnamon
  • 3 Cloves
  • 2 Cardamom pods
  • Star Anise

Other ingredients

  • 500 gms, Chicken legs
  • 3 tbsp Coconut oil
  • Bayleaf
  • 1/4 tsp Cumin seeds
  • 1/4 tsp Fennel seeds
  • a sprig of Curry leaves
  • 2 cup Onions, finely chopped
  • 1 cup Tomato, paste/ finely chopped
  • 2 Green chillies, slit
  • 1 tbsp Ginger Garlic paste
  • 1/4 tsp Turmeric powder
  • 1 tbsp Coriander powder
  • 1 tsp Redchilli powder
  • 2 tbsp Coriander leaves, finely chopped
  • Salt
  • Roasted Cashew nuts, garnishing

How do you make pepper chicken masala?

  1. Powder the ingredients mentioned above into a fine powder. Keep aside.Heat an iron kadai with coconut oil. Stir in the bayleaf, cumin seeds, fennel seeds and curry leaves until fragrant, about 1 minute.Add the onions and green chillies and cook over moderately high heat, stirring occasionally, until golden, about 8 minutes. Add the ginger garlic paste and fry until rawsmell fades away.Stir in tomato puree/ or finely chopped tomatoes with juices (crush them with your hands as you add them) and just cook through. Reduce heat and add in the spice powders and season with salt.Add chicken to the masala. Fry the chicken until white (about a minute) while scraping up any browned bits stuck on the bottom of the pan. Stir in 1/4 cup of water, then cover and cook over low heat for 20 minutes.Once the chicken is halfway cooked, add in the ground masala and simmer until sauce thickens and becomes a deep brown colour.Garnish with Cashew nuts, coriander leaves and serve with fresh, hot Ghee rice.eZy Watermark_24-05-2019_08-13-29AM

Special Notes:

  • Chicken legs can be substituted, but chicken thighs are highly recommended here.
  • Pour in water to thin out the sauce, if needed.
  • Watch carefully when you add red chilli powder, check out for spiciness.

Fisherman’s Crab Curry/ Crab cooked in Coconut Milk/ Kerala Njandu Curry

This is a beautiful, delicious coastal style Crab curry, called as “Fisherman’s Crab Curry”.

True to its seaside orientation, Kerala cuisine is almost primarily made up of seafood, particularly fish and prawn dishes. The people here in Kerala and borderline of Kanyakumari eat seafood multiple times a day pairing it with the coconut which is available in abundance.

This traditional crab curry recipe is made with coconut paste and gets a bit of kick too from the chillies added.

Why this recipe works:

The ingredients used here show a mix of both coconut paste and coconut milk. Its sweet punch is set off deliciously by the spicy crab meat.

To lighten the dish, reduce the thickness of gravy by adding coconut milk. Try serving this curry with plain boiled rice and plenty of gravy.

This crab curry is so good I’ve been making it ever since. Try and let me know how it turned out for you!!


Author: Nathiya Adiseshan

Preparation Time: 15 mins

Cooking Time: 20 mins

Serves: 3

INGREDIENTS

For the coconut-spice paste

  • 250 gms Crab, cleaned and body cut into halves or quarters
  • 1 cup Coconut, grated
  • 5 Kashmiri Chillies
  • 5 garlic cloves
  • an inch Ginger
  • 8-10 Black peppercorns
  • 1 tsp Coriander seeds
  • 1/2 tsp Cumin seeds
  • 1/4 tsp Fenugreek seeds
  • Tamarind, marble sized

Other ingredients

  • 1 cup Onions, finely chopped
  • 1 Tomato, diced
  • 2 Green chillies, slit
  • 1/4 tsp Turmeric powder
  • 1/2 tbsp Fennel powder (optional)
  • 3 tbsp Coconut oil
  • 2 tbsp Coriander leaves, finely chopped
  • Sprig of Curry leaveseZy Watermark_04-04-2019_10-24-55AM.JPG

PREPARATION

  1. Grind the ingredients (mentioned in coconut-paste listed above) into a smooth paste with little water. Keep it aside.
  2. Heat coconut oil in a deep bottomed pan, add mustard seeds and allow it to splutter. Then add fenugreek seeds and curry leaves.
  3. Add in onions and green chillies and fry it till it turns soft and translucent.
  4. Add in the tomatoes and turmeric powder and fry for a minute.
  5. Now add the wet masala paste along with a cup of water and bring it to a boil on medium high heat.
  6. Add the crab. Make sure to turn over the crabs half way so that they are well coated with the gravy.
  7. Add extra coconut milk if you prefer it more creamy, or up to ½ cup of water to dilute the gravy. Add salt to taste.
  8. Simmer for 10-15 minutes, until the crabs turn pink and are cooked through.
  9. Garnish with coriander leaves.IMG_7593_eZy Watermark_04-04-2019_10-16-28AM
  10. Spoon curry over rice and serve hot.IMG_7596_eZy Watermark_04-04-2019_10-16-31AM

Special Note:

  • Cut the crab bodies into halves or quarters with a cleaver. Crush gently the crab legs for the flavours to soak into the curry.
  • I have used blue swimmer crabs for this curry, but any sort of crab (Dungeness and snow crab) will work.
  • If you’re using dessicated coconut, add warm water while grinding to prevent curdling of fats.

If you like this recipe, Do not forget to rate us at the end of the post.

Did you make this recipe? If yes, do let me know how it turned out in the comments below. Do share a picture on instagram with hashtag #CookedFromHungrystomach and tag us @h.u.n.g.r.y.s.t.o.m.a.c.h

Mutton Stew/ Mutton Vellai Kuruma/ Mutton cooked in a coconut based gravy

Most of the Keralites include appam and stew predominantly in their breakfast menu. This South Indian recipe, Mutton Stew is full of aromatic flavours as is made with a melange of subtle spices and flavoured with coconut.

When you want to indulge in a light yet healthy mutton dish, then you must try out this lip-smacking stew recipe. When my mom buys mutton/lamb, she reserves some for this dish, as it is always on the top of her list 🙂

One good thing about this scrumptious dish is that it can be prepared in a very less time, say for occasions like potluck, kitty party and buffet.

Don’t have mutton at the moment? Don’t despair. This hearty dish can be loaded with plain vegetables too.

You can also pack this delicious stew recipe for tiffin. So, why wait? Try it now with your loved ones!  IMG_6850_eZy Watermark_22-03-2019_11-11-14AM


Author: Nathiya Adiseshan

Preparation Time: 15 mins

Cooking Time: 30 mins

Serves: 3

Ingredients

Paste 1:

  • 3 Green chillies
  • Ginger
  • 6 cloves, Garlic
  • Kosher salt

Paste 2:

  • 1/2 cup Coconut, grated
  • 6 Cashew nuts
  • 1 tsp Poppy seeds
  • 1/4 tsp Cumin seeds
  • 1/4 tsp Fennel seeds

For the gravy:

  • 500 grams mutton, excess fat trimmed, cut into 2-inch chunks
  • 2 Green chillies
  • 1/2 tbspGinger Garlic Paste
  • 2 Cardamom
  • 1 inch Cinnamom
  • 2 Cloves
  • 1 Bay Leaf
  • Pandan leaf/ Rambha ilai
  • Star Anise
  • Kalpasi
  • 1/2 tsp White Pepper powder
  • a sprig of Curry leaves
  • Coriander leaves
  • 2 tbsp Ghee
  • 1 tbsp Vegetable oil

Steps to Make It

  1. Sprinkle mutton with kosher salt, ginger garlic green chilli paste (mentioned under Paste 1) and marinate for 30 minutes.

  2. In a pressure pan, add the marinated mutton along with 1 cup of water. Cook for few whistles and keep aside.
  3. In another pan, heat ghee and oil. Splutter garam masalas listed above with cumin seeds, fennel seeds and curry leaves.
  4.  Once they fry a bit, add in the chopped onions and saute till they are lightly browned.
  5. Add in green chillies and ginger garlic paste and saute until the raw smell goes out.
  6. Throw in the tomatoes and toss a little. (No need for it to cook mushy)
  7. Then add the cooked mutton with stock, reduce heat to medium-low.
  8. Add in the coconut paste and allow to simmer for 10-12 minutes.
  9. Season with salt. Add in little water if your stew looks thick. The stew is finished when the meat is very tender (the flavor should be mild and very tasty).
  10. Drizzle 1/2 tbsp of white pepper powder on top and garnish with coriander leaves.
  11. Serve it hot with appam/ rice.ezy-watermark_22-03-2019_11-11-43am.jpg 


    Special Note:

  • If you have the best tender mutton you may cook for 4-5 whistles. But if you are doubtful,  then first cook the mutton for fewer whistles and if needed, give them few extra whistles depending on the quality.
  • The original recipe calls for white pepper powder, but I have added black one as I don’t have it in hand. Hence the darker shade of gravy.
  • For variation, coconut paste is skipped and coconut milk will be used. Can be done in both ways.
  • Same recipe can be adapted for mixed veggies which too tastes good.

  • If you like this recipe, Do not forget to rate us at the end of the post.
  • Did you make this recipe? If yes, do let me know how it turned out in the comments below. Do share a picture on instagram with hashtag #CookedFromHungrystomach and tag us @h.u.n.g.r.y.s.t.o.m.a.c.h

  • MEEN VEVICHATHU/ Kottayam Style Fish Curry/ Meen Mulakittathu

    Kottayam fish curry or Meen vevichathu can be prepared in many ways. Here you can try a traditional fish curry recipe which even the amateurs can cook at home easily.

    This dish is also called as toddy shop fish curry.

    It can be prepared with or without coconut. Usually, Kerala fish curry (meen curry) is traditionally prepared in earthenware pot for better taste.

    A great combination with boiled tapioca rather than rice!!!!

    So let’s get back to the recipe…


    Author: Nathiya Adiseshan

    Preparation Time: 10 mins

    Cooking Time: 20 mins

    Serves: 3

    Ingredients

    • 1/2 kg Fish (Seer fish, Tuna, Sardines, Mackerel)
    • 1 tbsp Ginger, crushed
    • 1 tbsp Garlic, crushed
    • 8 Shallots /chinna vengayam, sliced
    • 2 tbsp Redchilli powder
    • 1 tbsp Coriander powder
    • 1/2 tsp Turmeric powder
    • Mustard seeds
    • Fenugreek seeds
    • 3 tbsp coconut oil
    • 3 Gambooge (Cocum/Kudampuli)
    • salt as required
    • Curry leaves

    Instructions

    1. Wash and soak the Gambooge (Cocum/Kudampuli) in a glass of lukewarm water for 5 minutes.
    2. Make a paste of coriander, redchilli and turmeric powder with little oil/water and keep aside.
    3. In an earthen clay pot or a pan heat coconut oil.
    4. When oil gets hot, add mustard and fenugreek seeds, saute it slightly and wait till it turns slightly dark.
    5. Add the chopped shallots and curry leaves, saute them till it gets slightly fried.
    6. Reduce the flame and add the masala paste.
    7. Fry it well until the raw smell goes out.Add enough salt.
    8. Add water in which cocum was soaked. Taste the mixture and add soaked cocum pieces as required. Keep it in low flame.
    9. Wait until it boils in low flame. Once it starts boiling add the fish pieces. Do not stir. Just swirl the pan so that the fish coats with the masala.
    10. Cover with a lid and bring it to boil in medium flame. Usually it takes around 10-15 minutes. Swirl the pan inbetween.
    11. Cook it till the gravy is consistent.
    12. Switch off and garnish with curry leaves. Let the curry remains in the cooking pan for a few hours, allowing all the spices to steep into the fish.

    Special Note:

    • Don’t stir once fish is cooked.
    • Remember to spoon the kudampuli pieces out after few hours.
    • If it has to be kept for another day, don’t add coriander powder. It tends to spoil the dish.

    If you like this recipe, Do not forget to rate us at the end of the post.

    Did you make this recipe? If yes, do let me know how it turned out in the comments below. Do share a picture on instagram with hashtag #CookedFromHungrystomach and tag us @h.u.n.g.r.y.s.t.o.m.a.c.h

    Kanava Kuzhambu/ Squid in a Roasted Coconut Sauce/ Nadan Koonthal Curry

    Tender pieces of squid with a spicy coconut sauce makes it an enduringly popular dish. 

    This curry, as prepared with a paste of coconut gives a familiar aroma as the coconut based curry is more of a comfort dish to all Malayalis and Nagercoilians ofcourse.

    Squid is quite easily available here in Japan and I cook it quite often at my place. 

    Coming to the recipe, it’s easy, too, as the squid curry is all prepared, so the whole thing takes no longer than 30 minutes from start to finish. You can substitute few ingredients like Coconut oil with any other vegetable oil and Shallot with Onion, but the former is more of a tastier one to me.

    Pairing with steamed rice, Squid Curry is something which works perfectly on a lethargic weekend afternoons.


    Author: Nathiya Adiseshan

    Preparation Time: 10 mins

    Cooking Time: 25 mins

    Serves: 3

    Ingredients

    For the Squid

    • 250 gm, Squid
    • 2, Green Chillies, chopped
    • 1 tsp Turmeric Powder
    • 1 inch, Ginger, crushed
    • Salt

    For the Paste

    • 1 cup, Coconut, (grated)
    • 1 tsp Fenugreek seeds
    • 1 Cardamom
    • 1 inch Cinnamon
    • 2 Cloves5 Shallots/ chinna vengayam/ Pearl Onions
    • 1 tbsp Redchilli powder
    • 2 tbsp Coriander powder
    • 1/2 tbsp Pepper powder

    For Tempering

    • Coconut Oil
    • Mustard seeds
    • Fenugreek seeds
    • Redchillies
    • Curry leaves

    Instructions

    1. Pull out the little tentacles, cut the body section into ½ inch (1 cm) rings and wash them under cold running water.
    2. In a solid frying pan, add the grated coconut, shallots, fenugreek seeds, cardamom, cloves and cinnamon, shaking the pan now and then, until they darken slightly and become aromatic.
    3. Add in the chilli powder, coriander powder and pepper powder, toss and allow it to cool. And grind to a smooth paste.
    4. In a pan, add the squid along with chillies, crushed ginger, turmeric powder, salt and little water, cooking very slowly as it comes up to heat. It will only take about 2-3 minutes to cook.
    5. When it is really hot and bubbling, add the ground masala and boil until the raw smell fades out.
    6. Next, heat the oil in a pan, add mustard seeds, fenugreek, curryleaves and redchillies. Give a quick stir.
    7. Then add the seasoning to the curry, serve it straight away.
    8. This is particularly good when served with rice and fish fry.


    Special Note:

    • Coconut oil can be replaced with any other vegetable oil.
    • Adding cinnamon in excess gives a strong taste. So add accordingly.
    • Instead of dry roasting the ingredients, it can be also be roasted in a tbsp of coconut oil for a richer curry.

    If you like this recipe, Do not forget to rate us at the end of the post.

    Did you make this recipe? If yes, do let me know how it turned out in the comments below. Do share a picture on instagram with hashtag #CookedFromHungrystomach and tag us @hungry__stomach

    Fish Dum Biriyani/ Malabar Fish Biriyani

    Northern Kerala, the malabar region has many wonderful cuisines. One such authentic dish is Biriyani.

    Biriyani is always there to make us happy. Be it a lazy weekend or family get-together or any functions, it never fails to impress us. So for all the Biriyani lovers here, Come let me introduce you to the Malabar Fish Dum Biriyani.

    Ghee rice and fish masala are arranged in layers and blending is done by the dum process. The fish is marinated and shallow fried before adding to the biriyani masala.

    As you know biriyani is made with long grained Basmati rice, but here in this Malabar region, it is made with a short grain “kaima rice”. Now those of you, who do not have access to kaima rice, can very well try it with Basmati rice as I had done today 😜.

    Ghee plays a prominent part in Malabar cuisine. If you are health conscious, you can use half ghee and half refined oil or even omit ghee and drizzle a bit of ghee finally while layering the dum too. The choice is yours.

    In this Malabar recipe, I have used Seer Fish. You can use Pomfret or any fish of your choice. This is a very simple Biriyani and can be made with Chicken too. But I prefer- fish.

    Devour the classic Malabar Dum Biriyani with the detailed instructions below.. (This is a fairly big post, so pls excuse).

    How to make Malabar Dum Biriyani….


    Author: Nathiya Adiseshan

    Cooking Time: 45 mins

    Preparation Time: 20 mins

    Serves: 3 people

    Ingredients

    • 1/2 kg Seer Fish
    • 1 1/2 cup, Kaima Rice (or any rice of your choice)
    • Cardamom, Cloves, Bay leaves
    • Saffron
    • Cashewnuts, Raisins

    For marination:

    • 1 tsp Turmeric powder
    • 1 tbsp Kashmiri Chilli Powder
    • Salt
    • Lime juice (optional)

    For the gravy:

    • 2 Onions, medium sized, thinly sliced
    • 1 tbsp ginger garlic paste
    • 2 Green Chillies, thinly slit
    • 1 Tomato, chopped
    • 2 tbsp Curd
    • 1/2 tsp Turmeric Powder
    • 1/2 tbsp Coriander Powder
    • 1/2 tbsp Chilli Powder
    • 1 tsp Fennel Powder
    • Coriander leaves, chopped
    • Mint leaves, chopped
    • Salt
    • 5 tbsp Ghee
    • Oil


    Here we go….

    Instructions

    1. Wash rice and soak in water for 20 minutes, drain out in a strainer and keep aside.
    2. Marinate fish with the ingredients listed above and rest it for about 30 minutes.
    3. Heat 2 tbsp ghee in a pan and fry cashews and raisins. Keep it aside. In the same pan, add thinly sliced onions and a pinch of sugar and fry till they are caramelised and brown.
    4. Soak saffron in a 1 1/2 tbsp of warm milk.

    For Rice:

    1. In a pressure cooker, pour 3 tbsp of ghee. Add cinnamon, cloves, cardamom, star anise and bay leaves. Fry for a minute. Now add thinly sliced onions and saute until onion turns golden brown.
    2. Now add in soaked Basmati/ Kaima rice and saute for few minutes.
    3. Add 2 1/4 cups of boiling water (ratio is 1 cup rice= 1 and 1/2 cup water), salt and 1 tsp lemon juice. Combine well and pressure cook for two whistles. (If cooking in a kadai, cook in a medium low flame until water is fully absorbed).

    For Masala:

    1. Heat a pan with 1 tbsp ghee and 2 tbsp of oil, shallow fry the marinated fish pieces. Transfer it to a plate.
    2. To the same pan, saute onion until it is slightly golden.
    3. Add ginger garlic paste and green chillies, saute until the raw smell goes away.
    4. Now add tomatoes and saute till it turns slightly mushy.
    5. Add in turmeric powder, coriander powder, fennel powder, salt and curd.
    6. Cover with a lid and cook over medium heat for few minutes. When oil starts oozing out, add the fried fish and cook for 2 minutes and switch off the flame.

    For Dum process:

    1. In a heavy bottomed pan, Spread the fish layer. To the top of it, add the rice, fried onions, nuts, rasins, coriander, mint leaves, and sprinkle saffron soaked milk.
    2. Layer it with the remaining fish masala and rice with the garnishings on top.
    3. Close it with a tight lid, so that steam does not escape. (Cover it with chapathi dough or aluminium foil).
    4. Keep a dosa tawa on a low flame. And place the pan above it for 7-10 minutes for the flavours to develop. Switch off the flame and rest it for 5 minutes.
    5. Mix gently and fluff it with fork.
    6. Serve hot biriyani accompanied by Cucumber raita, papadam & pickle.

    Note:

    • Adding a pinch of garam masala between the rice layers enhances the flavour (optional).
    • If you have thick slices of fish, shallow fry it and dum it between the rice layers. If you feel so, slices are thin and may break easily, just top it above the rice and layer it with garnishings and go for dum process.
    • I’ve used Kashmiri and Chilli powders, if you use chilli powder alone, adjust spice accordingly.
    • You can either seal the lid with chapathi dough or wrap it with aluminium foil and place a shallow plate with heavy weight above it.

    Orange Chicken/ Panda Express Orange Chicken Recipe

    Do you love the ORANGE CHICKEN at Panda Express?

    The sweet, sticky sauce, the crispy breading, the incredibly average, but still so satisfying, American-Chinese dining experience. Ugh… It’s so good!!

    A flavourful reminiscent of the orange chicken in the comfort of your kitchen…

    I’m happy to say the final version of this recipe is the best orange sauce I’ve ever tasted and it’s so easy! So give it a whirl, you’ll be the dinnertime hero.

    Why do you wait for take-outs, when you can easily make it at home??


    Author: Nathiya Adiseshan

    Preparation Time: 10 minutes

    Cooking Time: 20 minutes

    Serves: 2-3

    Ingredients

    • 250 grams chicken breasts (boneless)
    • 1 egg
    • 2 tablespoons Cornstarch
    • 1 teaspoon Salt
    • ½ teaspoon Pepper powder
    • 1 cup Orange Juice (Freshly Squeezed)
    • 1 teaspoon Orange Zest
    • 1 tablespoon Ginger, grated
    • ¼ cup Chicken Stock or Water
    • ¼ cup Brown Sugar
    • 3 tablespoons Soy Sauce
    • 1-2 teaspoons Cornstarch
    • 1 teaspoon Crushed Red Pepper
    • Oil, for frying

    Instructions

    1. Cut chicken breasts into bite sized pieces. In a mixing bowl, whisk together egg, salt, pepper and cornstarch. Submerge chicken breast pieces in mixture and set aside.

    2. In a saucepan, stir together orange juice, orange zest, soy sauce, chicken stock, brown sugar, ginger, and red pepper flakes. Bring to a boil.

    3. Pour Potato starch slurry into sauce mixture and stir in until thickened. Remove from heat and set aside.

    4. Meanwhile, pour vegetable oil into a heavy bottom pot. Working in small batches, fry chicken pieces until cooked through and golden brown, about 3 to 4 minutes. Remove from oil and drain it.

    5. Toss fried chicken pieces together with sauce.

    6. Serve immediately and garnish with spring onions.

    Special Note:

    • Potato starch can be replaced with cornflour.
    • Adding orange zest in excess gives a bitter taste. So add accordingly.
    • Adding chicken broth to the sauce is optional.
    • Soy sauce has salt in it. If using low sodium soy sauce, add a pinch of salt if needed.
    • dissolve 1 tsp potato starch in 1/4 cup of water for the potato starch slurry.

    If you like this recipe, Do not forget to rate us at the end of the post.

    Did you make this recipe? If yes, do let me know how it turned out in the comments below. Do share a picture on instagram with hashtag #CookedFromHungrystomach and tag us @hungry__stomach

    Home Style Fish Curry/ South Indian Fish Curry/ Meen Kuzhambu

    Having easy access to the southern coastline, fish makes a prominent feature in my hometown. You can savour a lip-smacking range of fish preparations with the available varieties that make mealtime an extremely satisfying affair.

    An easy everyday fish curry with shallots and coconut.

    The best part is many recipes here have Coconut as the key ingredient. It adds an excellent taste and flavor to the dishes. Traditionally it’s cooked in an earthen pot, where the fish is cooked in spicy gravy of shallots, tomatoes, and spices sautéed in coconut oil.

    This flavorful Home Style Fish Curry has Indian inspired flavours and is quick enough for a satisfying meal. This delicately-flavored dish can be served with the white rice or even idli, dosas.

    I have one more fish curry recipe, Kanyakumari Style Varutharacha Fish Curryhttp://hungry-stomach.com/ in my blog which is really tasty too.


    Author: Nathiya Adiseshan
    Preparation Time : 10 mins
    Cooking Time : 40 mins
    Serves : 3-4

    For the paste

    • 1 cup shallots, chopped
    • 1/4 cup Coconut, grated

    For the curry

    • 500 grams Tuna (Kingfish or any variety)
    • 3 cloves Garlic, chopped
    • 1/2 inch Ginger, chopped
    • 5 shallots, thinly sliced
    • 1 medium Tomato (chopped or ground to a paste)
    • 3 tablespoon Chilli powder
    • 2 tablespoon Coriander powder
    • 1/4 teaspoon Turmeric powder
    • 1/2 cup Aubergine/Brinjal, chopped
    • 1 Tamarind (marble sized Ball)
    • 1 teaspoon Mustard seeds
    • 1 teaspoon Cumin seeds
    • 1 teaspoon Fenugreek seeds
    • Handful Curry Leaves
    • Salt
    • Oil

     COOKING INSTRUCTIONS

    Kerala Chicken Curry/Nadan Kozhi Curry

    An authentic kerala style chicken curry. This curry embraces the rustic style of chicken simmered in coconut milk and Indian spices. While it have variations in the level of spices and ingredients used across regions, it never fails to find its way in weekend lunch menu.

    It goes well with the Malabar Nei Choru (Ghee rice) and most of the Indian breads (Appam, Chapathi and Parotta). No wonder it turns to an absolute favourite for anyone who loves Kerala cuisine.

    This is my favorite one which suits for a weekday menu. It is an ideal recipe for bachelors and newbies too.

    temp 43
    Chicken curry well flavoured with spices


    Author: Nathiya Adiseshan
    Preparation Time : 10 mins
    Cooking Time : 40 mins
    Serves : 3-4

    Ingredients:

    • 500 grams Chicken, curry-cut with bones

    Marination:

    • 2 teaspoon Red Chilli Powder
    • 1 teaspoon Turmeric Powder
    • 1 1/2 teaspoon Salt

    Gravy:

    • 2 medium Onion, thinly sliced
    • 1 sprig Curry leaves
    • 2 Green chillies
    • 1 inch Ginger, crushed or coarse paste
    • 6 cloves Garlic, crushed or coarse paste
    • 1 medium Tomato, chopped
    • 2 tablespoon Red Chilli powder
    • 1 tablespoon Coriander powder
    • 1 teaspoon Turmeric powder
    • 1 tablespoon Fennel powder
    • 1-1 1/2 tablespoon Garam masala powder
    • 1 cup Coconut milk, thick
    • 3 tablespoon Coconut Oil
    • Salt

    Here we go….!!!!

    1. Clean, wash and pat dry the chicken.

      Chicken
      Clean, wash and pat dry the chicken.
    2. In a bowl, add the chunks of chicken, season it with the ingredients listed for marination and rest in for minimum 30-45 minutes.
    3. Heat 3 tablespoon Coconut oil in a heavy based uruli/kadai. When the oil is hot, add the thinly sliced onions and curry leaves.

      temp
      Add thinly sliced onions
    4. Add a pinch of salt while sautéing (This speeds up the process and enhances the flavor).
    5. When the onions turns to light brown paste, add crushed ginger and garlic. Stir till the raw smell fades away.

      IMG_2962
      When the onions turns to light brown paste, add crushed ginger and garlic.
    6. Add in chopped tomatoes, saute till it turns mushy.

      IMG_2963
      Add in chopped tomatoes, saute till it turns mushy.
    7. Add Red chilli powder, Coriander powder, Fennel powder, Turmeric powder, Garam masala and salt.

      temp 42
      Add in the mentioned spice powders
    8. Once the oil starts to separate from the sides, add in the marinated chicken pieces and toss gently.
    9. Cover with a lid and cook in low flame. (No need to add water, the chicken will cook in its own juices).
    10. Stir inbetween. If its dry, add two tablespoons of water and give a stir. (Be careful, not to burn)

      temp 44
      Cover and cook in low flame
    11. Pour thick coconut milk. Adjust salt and allow to boil in medium flame (Cook uncovered).

      temp 47
      Pour thick coconut milk and boil in medium flame
    12. Get into the desired consistency and switch off the flame. (Oil starts floating at the top when it is done)
    13. Garnish with chopped coriander leaves.
    14. Cover and allow to rest for best settling of flavours.
    15. Serve with Nei choru or any rice of your choice.

      temp 43
      Serve hot with Nei Choru

    Special note:

    • Coconut oil, Curry leaves and thick coconut milk are the key ingredients for the rustic flavour of the dish.
    • Allow the chicken curry to cook in a low to medium flame, if not you will end up with a looser runny curry.
    • Oil starts floating at the top, indicating that your curry is done. Switch off the flame.
    • Always use fresh homemade garam masala powder instead of the store bought ones.
    • Kashmiri chilli powder gives the bright red colour to the gravy.
    • Lukewarm water yields good quantity of coconut milk.

    If you like this recipe, Do not forget to rate us at the end of the post. 

    Did you make this recipe? If yes, do let me know how it turned out in the comments below. Do share a picture on instagram with hashtag #CookedFromHungrystomach and tag us @hungry__stomach

    INDIAN STYLE MUTTON CURRY/LAMB RECIPE

    IMG_4327
    Wherever in the World, delve into Mutton Curry

    Mutton Curry is undeniably one of the most preferred non-vegetarian recipe. The unique flavours of Indian cooking, which were embraced by many emigrants, have been developed over time to make the ‘Mutton Curry’, famous across the globe.

    Mutton features very regularly on my dining table but the variety keeps on changing almost every time from Rajasthani Laal Maas, Roganjosh, Kerala Mutton Curry, Mutton Vellai Kurma and so on.

    Mutton Curry, as the name says, it is the chunky goat meat cooked in aromatic spices, this one is a classic recipe which is an indulgent and a delight to the palate.

    This glossy cum spicy mutton curry is signature recipe of my mom which she cooks very often.  “It is like the best of all her recipes”, my betterhalf says..

    Although there’s no special occasion required to relish and dig into the flavors of this amazing Mutton recipe. A little patience while mutton gets ready and voilaaaah… you are done!!

    Firstly to make a delicious mutton curry, the choice of meat is very essential. The mutton has to be tender and fresh. To make the mutton pieces soft and tender, wash and soak it in lukewarm water, rinse properly and then marinate it with the spices and keep it aside for two hours. If you do not have so much time to rest it, use raw papaya paste. This is the key step to tenderize the meat.

    The ingredients and technique is actually pretty simple, you are sure to end up with this delicious mutton curry as your favourite bowl of comfort food.

    Serve it with plain rice/biriyani/ chapathi of your choice. I would like to pair it up with Ulundhu Vadai (Its not that wierd combo actually…)

    Now to the recipe.  Hope you like it…


    Author: Nathiya Adiseshan

    Preparation Time: 10 minutes

    Cooking Time: 40 minutes

    Serves: 2-3

    Ingredients

    Marination:

    • 500 gram Mutton, curry-cut with bones
    • 1 tablespoon Red Chilli Powder
    • 1/2 tablespoon Coriander Powder
    • 1/4 teaspoon Turmeric Powder

    Mutton Curry:

    • 1 inch Cinnamon
    • 3-4 Cloves
    • 1 Bayleaf
    • 1 petal, Star anise
    • 1 cup Onion, Thinly Sliced
    • 1 tablespoon Ginger garlic paste
    • 2-3 Green Chillies, slit lengthwise
    • 1 medium Tomato, chopped
    • 1 tablespoon Red Chilli Powder
    • 1 tablespoon Coriander Powder
    • 1 teaspoon Cumin Powder
    • 2 tablespoon homemade meat masala/garam masala
    • 1/2 cup Coconutmilk (optional)
    • Bunch of Coriander, Chopped
    • Salt
    • Oil

    My recipe for our famous Mutton Curry…

    1. Marinate mutton with the ingredients mentioned under marination for 2 hours. (This makes the mutton pieces juicy and succulent as the spices are fully absorbed.
    2. Heat oil in a pressure cooker and saute bayleaf, cinnamon, cardamom and cloves for a minute.
    3. Add thinly sliced onions. Cook this for 7-8 minutes or till the onions are translucent. (The colour of the fried onions decides the colour of the final curry. Fry until they are nicely browned on medium heat.)
    4. Add ginger garlic paste and saute till the raw smell fades away.
    5. Add in green chillies, stir for a minute.
    6. Now add chopped tomatoes, cook till the tomatoes have turned mushy.
    7. Add in red chilli powder, coriander powder, cumin powder and homemade meat masala/garam masala. Once the oil begins to separate from the masala.
    8. Add marinated mutton and saute everything together for 5 minutes to lightly sear the meat.
    9. Add water to cover and salt to taste.
    10. If using a pressure cooker, cook on high pressure for 30-40 minutes (5-6 whistles). If using a stovetop pot, cook for 45-60 minutes and let pressure release naturally.
    11. Once the pressure is released, open the lid and if the gravy reaches little thick, add coconut milk or water to adjust the gravy consistency.
    12. Check for the salt content and add salt if required and simmer for another 4-5 minutes. Switch off.
    13. Let the curry rest for 15 minutes before serving.
    14. Garnish with coriander leaves and serve warm.

    Special Note:

    • The colour of the fried onions decides the colour of the final curry. Fry until they are nicely browned on medium heat.
    • Adjust the quantity of red chili powder to suit your taste.
    • Marinate mutton for about 2 hours. If you do not have so much time to rest it, use 1 tbsp of raw papaya paste. This is the key to tenderize the meat.
    • Coconutmilk gives richness to the gravy, but is purely optional.


    Thai Green Chicken Curry | Thai Green Curry | Homemade Thai Green Curry Paste | Green Curry Recipe | Authentic Thai Green Curry

    I’ve learned so many simple yet flavourful recipes during my trip to Thailand & Indonesia last summer. This Thai Green Curry Chicken recipe features chunks of tender chicken simmered in coconutmilk along with a flavourful curry paste. Unlike most green curry recipes, this one doesn’t call for readymade curry paste – instead, everything is homemade fresh, resulting in the best possible taste.

    I cycled to Kaldi Coffee Farm here in Tokyo , Japan to gather all the ingredients needed for a simple Thai meal. Do pay a little more for sugar free coconut milk so as to avoid “crackling the milk”.

    The secret lies in making amazing Thai Green curry is to use plenty of aromatics (keffir lime, galangal, ginger and garlic), full-fat coconut milk for richness, and little bit of palm sugar, which add loads of intricate flavours.

    This deliciously fragrant curry really packs a flavour punch, and it includes lots of healthy combination of vegetables (Bell peppers, Babycorn and Bamboo shoots), so there’s no need to make an additional side dish of veggies. Best part is that the iveggies are completely upto you 😜.

    This Thai Green curry tastes so delectable, you won’t believe how fast and easy it is, will be ready in just 20 minutes. Serve it with Thai jasmine rice for a feast of a dinner any night of the week.

    I am all about making Thai curry paste from scratch, while you can look for the instant curry paste in the Asian section of the grocery store. Now let’s down to the recipe for this delicious Thai Green Curry.


    Author: Nathiya Adiseshan

    Preparation Time: 10 minutes

    Cooking Time: 20 minutes

    Serves: 2-3 

    Ingredients 

    For the Green Curry Paste:

    • 3-4 Green chillies
    • 3 to 4 garlic cloves
    • 1 piece galangal, thumb-size, grated
    • 1 stalk lemongrass
    • 1/2 tablespoon coriander seeds
    • 1/2 tablespoon cumin seeds
    • 1 tablespoon shrimp paste (optional)
    • 1 bunch coriander 
    • 1/2 tsp. peppercorns
    • keffir lime

    For the curry:

    • 1 1/2 tablespoons oil
    • 2 tablespoons green curry paste
    • 200 grams chicken breast, cut into bite-sized pieces
    • 1 1/2 cups coconut milk
    • 1/2 cup water
    • 1/8 cup Bamboo shoot
    • 5 kaffir lime leaves
    • 1/4 cup Bell peppers
    • 1/4 cup Lotus root
    • 4-5 Baby corn
    • 1tablespoon fish sauce (optional)
    • 1 tablespoon sugar or palm sugar (preferred)
    • 1 Thai Basil
  • Here we go….

  • Green Curry Paste:

    • Dry roast cumin and coriander seeds in a hot skillet for 30 seconds to bring out the aroma.
      Slice off the green bumpy peels of keffir lime.
      Pound all the green curry paste ingredients in a stone mortar and pestle.
      Add in shrimp paste, mix well and keep aside.

    For the green curry:

      1. Heat the oil in a large saucepan over a medium heat and fry the curry paste, let it sizzle for a few seconds.
      2. Pour in one cup of coconut milk. Bring it to boil, then reduce it to simmer, and wait for the oil to rise to the surface.
      3. Add in the chicken. Toss for a minute.
      4. Reduce heat as necessary to maintain a gentle simmer and cook until the chicken is tender, about 8 to 10 minutes.
      5. Chop the preffered veggies (I’ve added Bell peppers, Lotus root, Bamboo shoot, Babycorn) and set aside.
      6. Add the vegetables and simmer for 5 minutes or until everything is cooked thorough.
      7. Add in the remaining coconutmilk and half cup of water.
      8. Add 1 tablespoon of the fish sauce (optional) and a pinch of sugar. Season carefully to taste with sea salt.
      9. The final step is to toss Thai basil, and turn off the heat.
      10. Serve with steamed rice.

    Special Note:

    • Always use a mortar and pestle to make Thai green curry paste, and that would work well to extract all the flavor oils from the ingredients.
    • Do a taste-test for salt, adding 1 to 2 tablespoon of fish sauce if not salty enough. If you prefer a sweeter curry, add little sugar.
    • The veggies in this preparation have been chosen to balance colour, flavour and texture.Vegetables can be of your choice.

    Chicken 65

    Have you ever wondered why the name “Chicken 65”?

    There are so many historical claims for the dish. Chicken 65, comes with an origin story that the dish uses a 65-day old chicken meat, few others say it’s the 65th item on the menulist, some even claim 65 chillies/spices go into the recipe (sounds ill-logical right???). A more believable explanation was that chicken 65 was dish introduced in 1965 at the famous Buhari Hotel in Chennai. But, whatever the reason for the name is, chicken 65 has taken the spotlight. 

    There are many versions of the chicken 65 doing the rounds online. For now you do not have to worry about the “65″ of the Chicken 65. Try your hand at sensational flavors with this recipe.

    Yes, It’s deep-fried, with this crunchiness to it, and punchy flavours of curry leaves, ginger, garlic, chillies and all the ingredients make a classic appetizer. I must say, Chicken 65 is a classic, and a classic deserves special mention.

    The recipe is my version of Chicken 65, crispy out and moist inside with a pleasant red shade without food coloring. This tastes exactly like a restaurant one, I am sure you would love this recipe.

    temp 26
    Chicken 65- The crispy morsels of chicken with a sensational taste.


    Author: Nathiya Adiseshan
    Preparation Time : 5 mins
    Cooking Time : 10 mins
    Serves : 3 to 4

    Ingredients:

    • 500 grams boneless chicken breasts or thighs, cut into small cubes
    • 2 tablespoon ginger garlic, crushed
    • 1 ½ tablespoon Chilli powder
    • 1 tablespoon Cumin powder
    • ¼ teaspoon of Turmeric powder
    • 1 tablespoon curd (Optional)
    • 1 tablespoon cornstarch
    • Salt
    • 1 tablespoon black pepper, crushed
    • A sprig of Curry leaves
    • Oil

    So what are you waiting for? Let’s get frying…..

    1. Slice the chicken breasts into small bite sized pieces.
    2. Mix all of the ingredients listed above into a paste and stir this evenly into the chicken pieces. To this add, crushed curry leaves and peppercorns for an extra aroma.
    3. Let this marinate for about 1 hour or longer.temp 30
    4. When ready to deep fry, heat your oil in a large wok. The oil should be at least four inches deep. (The chicken can be shallow fried if you are concerned about using too much oil)
    5. The oil is ready when a small piece of battered chicken bubbles immediately when you put it in.
    6. Fry the chicken in batches until the exterior is nice and crispy and the meat is cooked through.temp 27
    7. Place the finished chicken pieces on a wire rack to rest while you finish the dish.
    8. Serve it hot with a wedge of lemon and raw onion rings. (I love garnishing with roasted cashews)

      temp 29
      Restaurant style Chicken 65


    Special Note:

    • Tender chicken thigh part works best for chicken 65.
    • Do not over-fry, it will result in hard chicken.
    • Allow the chicken to sit in the marinade for at least a couple of hours; longer will not hurt. 
    • Curd tenderizes the meat.

    Prawns Masala/ Chemmeen Mulakittathu

    This is comfort food to me, well!!!

    People, being grown up in the coastal regions are big fish eaters. Seafood, whether it is prawns or fish or squid, has always been special to me,  because it was made very often during my younger days at home.

    Chemmeen/Prawns is regular in my kitchen but for the past few days I have been cutting the corners of all my prawn recipes. Not that I I would not venture hour-long cutting and chopping, but my hero is allergic to seafoods 😦  I do a fair share of cooking nowadays. Some days are like that…

    This is what I made today, that brought the broadest smiles, not just on me, but on him. “Prawns Masala/ Chemmeen Mulakittathu” with the authentic kerala flavours oozing through. Although the list of ingredients and process may seem a bit overwhelming, when you actually go into making it, you will realize that it actually is the simplest one ever! This recipe can be made with equal success in fish too.temp 23


    Author: Nathiya Adiseshan
    Preparation Time : 10 mins
    Cooking Time : 25 mins
    Serves : 3 to 4

    Masala Paste:

    • 1 cup Coconut, dessicated/grated
    • 1 medium Onion, roughly chopped
    • 1 sprig Curry leaves
    • 4 Red chillies
    • 3 tablespoon Coriander seeds/ dhaniya
    • 1/2 teaspoon Turmeric Powder
    • 1 tablespoon Oil

    Gravy:

    • 500 grams Prawns, deveined
    • 1 medium Tomato, chopped
    • 1 Brinjal, chopped
    • Tamarind, Goose-berry sized or to taste
    • 3 tablespoon Coconut Oil
    • Salt

    Here we go….!!!!

    1. Clean and devein the prawns. Soak the tamarind in 1/4 cup warm water for 15 minutes and extract its juice.

    2. Heat oil in a pan at medium heat. Fry dried red chillies, coriander seeds, curry leaves and onion. Add in grated coconut and fry till light brown. Switch off the flame.
    3. Let it cool. Add in a pinch of turmeric powder. Transfer into a blender and pulse, adding water bit by bit, to get a very fine paste.

      temp 19
      Add in a pinch of turmeric powder.  Transfer to a blender and grind to a fine paste.
    4. Cook the tomatoes and brinjal in a claypot/meenchatti adding salt and little water. Cover and cook until tomato gets mashed up.

      temp 13
      Cook the tomatoes and brinjal with little salt and water.
    5. Add the ground roasted coconut masala and tamarind extract. Mix well.
    6. Simmer till the gravy thickens on a low flame. Season with salt.

      temp 14
      Simmer till the gravy thickens
    7. Add in the prawns. Do not stir any more, rotate the pan to mix the prawns and the masala well. Simmer for 3-5 minutes. (Check in between, the prawns gets done quickly)

      temp 17
      Add in prawns gently.
    8. Switch off.
    9. Set aside for 15 minutes. Serve with rice or tapioca.temp 22

    Special Note:

    • The prawns gets done quickly (within 3 minutes), so check in-between, else you will end up in rubbery prawns.
    • I have used Jumbo/King Prawns, you can use regular prawns too.
    • Pour a tbsp of coconut oil over the curry before serving.